Wednesday, February 29, 2012

Watch the clock!

Hello and happy Wednesday to you all!  I have a card to share with you today that I made with the Time's a Ticking set.  I love the different clocks in this set and I have a list of projects in my head that I want to make with it.  This is just the first :)


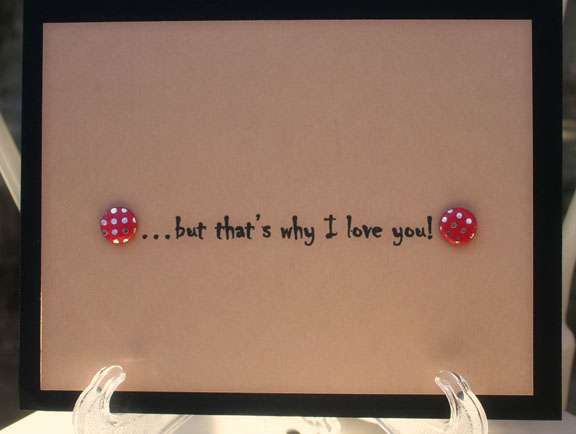
I stamped two different clocks onto my background papers with red ink.  This card came together so quickly and it'll be perfect to send to a friend that I've been wanting to see.

I hope that you've been liking all the amazing projects that out DT has been making for you!  Don't forget to like us on Facebook, we'll be giving away a prize to a random fan once we reach 500 fans on our page!

Supplies Used:
Paper: Basic Grey, Crate Paper, Sassafrass Lass
Flowers: The Paper Studio
Flower Centers: Prima
Adhesive: Xyron

Tuesday, February 28, 2012

This is love...

Image

Sharing the love today with these adorable images from both Snips & Snails and Sugar & Spice. How sweet they are and just in time for those spring and summer weddings.
Image

Although the stamps are a rectangle shape, I liked the idea of creating something similar to game pieces. Added the top portion of a glassine bag to the front of the card, backed each stamped circle with foam tape and mounted the boy and girl images inside the bag. Used the circle stamps from Coffee Break and a heart punch to add a little detail to the outside of the bag.

Gel-A-Tin Supplies:
Coffee Break
Snips & Snails
Sugar & Spice

Additional Supplies:
October Afternoon - paper
My Mind's Eye - paper
Frost It Pink - ribbon
Remember Me Emily - button
Pink Paislee - postage stamps
Papertrey Ink - cardstock, sentiments
Epiphany Crafts - heart punch
Graphic 45 - paper
doily
glassine bag
stick pins
twine

Andrea

Monday, February 27, 2012

Happy Monday!

For my friend's baby shower, I created a baby girl album for her using 3-D alpha stamp set for the title, by stamping the alphabet one at the time using purple die ink, and clear embossing powder on top of the lilac color dye ink. The entire project was full on acrylic paint and naked chipboards that has been altered using pearl paint and mist.


I added glitters throughout the entire project and on the painted crown chipboard. Fabric ticket was used on top of the project and distressed with ink. I hope you enjoy this week project and can't wait to show you more!

Other materials:
Momenta pattered paper
Crate Paper patterned paper
Maya Road chipboard
ranger ink
Stickles from Ranger
Basic Grey Ricrac
Sassafras Lass cardstock sticker
Recollections mulberry flowers

Friday, February 24, 2012

Stamped party favors!

Hello and Happy Friday, gelly fans!  It's Jessica again today and I have a little stamped party favor to share with you.
It can be hard to come up with a cute little favor to give away at your parties or to send with the kids to school, because you want things that are cute and affordable and things that people will actually use and like.  I think this one covers all of those :)


I got a bunch of these tins at the craft store on the wedding aisle, but you can also find them at party supply stores.  The stamps from the Put a Cap on it set fit perfectly on this one.  I chose bright colors for my inks.  They coordinate with the papers I used and they're very fun for a kid's party.  I attached a die-cut star to the back and tied some twine around the body (after filling it with come candy, of course) and it was done!
These are very affordable and you can choose any kind of candy or mint to give away, even stuff that matches your party theme if you're throwing a wedding or baby shower.
I hope you like this!  Just think about all the different styles you could do!  Animals in the background with our Pet Shop or Elephant Garden stamps, hearts and our A Hundred Hearts stamp set...there are so many possibilities!

Supplies Used:
Stamps: Put a Cap on it by gel-a-tins
Adhesive: Xyron 250
Paper: MME
Twine: The Twinery
Ink: Stampin Up

Thursday, February 23, 2012

You are such a hoot!

I had such a fun time with this card. I blew the dust off the ole Cricut and used the Create a Critter cartridge.

I am using all Authentique Papers from the 2 lines called:

Gathering & Celebrate

I am using the Gel a tins stamps called:

Love Knots

Image

First, I embossed the stamp onto a piece of paper in black.

I adhered it to my card front as shown below.

Image

Next I embossed the Love Knots stamp onto the tree branch and phrase in white.

Image

Then comes the fun part...putting the card together.

Image

A close up of the darling owl! Isn't it adorable??

Image

To keep the card closed, I used a homemade repositionable glue dot under the bottom of the owl.

Image

It lies nice and flat and opens nice an easily:)

I hope you like this as much as I do...

I have been so into giveaways lately...I am doing one for this card on my blog...

Be sure to head on over to my blog to get in on this giveaway!

http://wp.me/pU8Ya-1bQ

This has been Jeannie from The Polka Cabana http://polkacabana.wordpress.comwith today's post.

Wednesday, February 22, 2012

Pawsitively Cute card by Donna


Happy Wednesday!! Today's card uses the Gel-a-tins Cosmo Pups stamp set. I stamped the dog and the sentiment and the tiny paw on a die cut. I inked the edges of the die cut with a black marker. Then I layered the die cut with coordinating papers. Behind the die cut I added some tape. On the tape I added two black pearls. This is a cute and easy to make card that would be perfect for any dog lover. Here is a close up of the stamping on the die cut.

Materials
1. Stamp set - Cosmo Pups - Gel-a-tins
2. Ink - Tuxedo Black -- Memento
3. Die cut - Sweet Threads - Basic Grey
4. Decorative paper - Out of Print - Basic Grey
5. Card stock - Ladybug - American Crafts, Black - Recollections
6. Marker - Black - Stampin' Up
7. Tape - Washi
8. Pearl - Black - Prima Marketing

Thanks for stopping by and check out my blog at http://thecraftycorgi.blogspot.com if you get a chance!!

Donna

Tuesday, February 21, 2012

Blast off!

Image

We're going to outer space today using Gel-A-Tins Snips and Snails. Looking through my paper the other day to, keeping my Gel-A-Tins stamps near, trying to find something inspiration and came across this collection of paper by BoBunny. It is a perfect combination with the rocket stamp.

Image

Added a little rocket power with Gel-A-Tins Coffee Break and you have a card perfect for that little space explorer.

Supplies:
Gel-A-Tins Coffee Break
Gel-A-Tins Snips & Snails
Bo Bunny - paper
Papertrey Ink - button, die cut
Spellbinders - die cut
Really Reasonable Ribbon - ribbon
MLS - alpha stickers

Monday, February 20, 2012

Pinwheel pup!

Happy Monday everyone!
The card that I am sharing with you today use Cosmo Pups stamp set on images and title.

I stamped the sentiment on the cardstock sticker and adhere it on top of twine. I wrap it around the card repeatedly and created a bow to finish. This squared body puppy is my one of favorite images on the stamp set! They all are too cute... To add some :happiness" to the card, I added pin wheel on top of the card with XOXO sticker from Crate Paper.
This card is pretty simple to create and with the generic title such as "happy tail to you!", it is great for any occasion...

Other Materials:
American Crafts cardstock
Crate Paper patterned paper
Crate Paper cardstock sticker
Papertreyink twine
Queen & Co pearl
Ranger ink

Friday, February 17, 2012

Butterfly background...

Hello and happy Friday!  I hope you've all had a great week and ready for a little inspiration for the weekend.  I decided to share a card that I made using our Butterflies are Free set.  I love that look of color on color stamping.  Whether it's something like a red on red or a brown on kraft like I did here, I think it's such a pretty style for stamped papers.


I also really like this size card.  Great for a longer note or for cash for the birthday boy or girl.  I stamped the butterflies onto the card using brown distress ink and added my embellishments over the top.  Quick and simple, but with some great color and details!

Supplies Used:
Stamps: Butterflies are Free by gel-a-tins
Adhesive: Xyron
Flowers: Prima
Paper: Crate Paper
Banner: Martha Stewart
Ribbon: Making Memories

Thursday, February 16, 2012

Animal Fun!

This card is just a fun, innocent card!

I just couldn't help wanting to make this ANIMAL card, when I started working with this sweet little set.

The set is called:

Pet Shop

Image

What I did was cut all my papers to size first. I took the sheet of stamps and randomly out the whole set(minus the hearts) on one acrylic block.

Image

I then stamped and embossed my background paper and added the hearts back in, in 2 different embossed colors.

Image

Then a made my phrase in PSE and printed it out and put the card altogether.

Image

Here is the inside of the card.

Image

I just love how whimsical this came out.
Image

Have you tried using multiple stamps from a set to create your own unique background paper?

Image

I will be looking carefully at all my sets to see which ones I can use this same technique with.

I hope you have enjoyed my post today!

Head on over to Gel a tins Stamps blog and see what some of the other designers are up to! While you are there let them know Jeannie sent you!

Have a great rest of your week, this has been Jeannie with The Polka Cabanahttp://polkacabana.wordpress.com with today's post.

Wednesday, February 15, 2012

Doggie Treat Bag by Donna


Happy Wednesday!! Today I'm making a Treat Bag (this is a doggie treat bag, but you can put any kind of treats you like in yours) using the Gel-a-tins Cosmo Pups stamp set. Why do I need doggie treat bags you may ask? I have a Pembroke Welsh Corgi named Dusty who will be turning 12 years old this month. She was born on February 29, 2000 so she's a Leap Day baby and she's looking forward to finally having her 3rd birthday!! Since she only has a real birthday every 4 years, we always have a party and invite all her doggie friends. This year, all the doggies that come will leave with their own treat bag - the one I'm am showing you today. It's super fun and easy to make and turns out really cute. Here's how to do it.

I used a 4x6 cello bag and cut a 4.5 x 4 panel and scored it at 2 inches for the top panel of the bag.


Then I made a white panel that was 4 x 3.5 inches.


I stamped on the white panel using the 2 dog bones and the small paw print from the Cosmo Pups stamp set.


To finish off the topper, I stamped the sentiment "Happy Tails To You" on a small white panel and framed it with a slightly larger coral panel. Then I framed the larger white panel with a slightly larger coral panel and adhered these to the topper of the treat bag.

 I used a strip of double-sided tape to adhere the bag to the topper and one on the other side.

And, before I go, I have to post a picture of Dusty. Here's one of my favorites from her 1st birthday party.

Materials
1. Card stock - Whisper White, Island Indigo, Calypso Coral - Stampin Up
2. Stamps - Cosmo Pups - Gel-a-tins
3. Ink - Island Indigo, Calypso Coral - Stampin' Up
4. Cello Bag - Stampin' Up

Thanks for checking out this post and stop by my blog and say hi if you get a chance http://thecraftycorgi.blogspot.com

Donna

Tuesday, February 14, 2012

Dancin' in the rain...

Image

You're invited today to dance in the rain. Why not? I remember this moment a few years back while my mother was visiting. It was raining, obviously, and we decided to let the kids run around outside and just get wet. The giggles, smiles and splashing were captured in a few minutes of video and photos and loved every minute of it. An unusual concept for the little ones realizing you can get wet, put down the umbrellas and just go for it.

Image

Used Gel-A-Tins Love Knots and Coffee Break for this layout. Found the sentiments in the coffee break set to be fitting.

Supplies:
Gel-A-Tins Love Knots
Gel-A-Tins Coffee Break
Heidi Swapp - paper
Epiphany Crafts - circle punch
Vintage Street Market - film strip, tape
Simple Stories - sentiment and alpha stickers
Papertrey Ink - twine
Frost It Pink - glitter star
Glitz - sentiment stamp
My Minds Eye - die cut
Studio Calico - butterfly

Monday, February 13, 2012

In love

I love Valentine's Day and instead of creating pink color card, I decided to create one with just using everyday colors, but still within love theme, of course!


I used Cosmo Pups stamp set to create these two cute puppies and the banner came from Crate Paper cardstock sticker using double natural twine with small attachers from Tim Holtz on each side. For the title "in love" I added the paw on top of the letter "i". These letters are from naked chipboard that have been distressed using white dye ink.
I hope you enjoy today's project and happy stamping!

Other materials:
American Crafts cardstock
Crate paper patterned paper
Tim Holtz attacher
Ranger ink
Papertreyink twine
Foam tape

Saturday, February 11, 2012

Sweet girl card by Kim

Hello everyone, today I have another CAS card for you and to go with the baby card for a boy from last week, here is one for a sweet baby girl.

Image

Instructions:
Making use of the PEACE ON EARTH stamp set I started by stamping a set a baby feet onto the cardbase.

Image

A handcut sentiment was added on top of the feet with some pop dots for dimension and a few pearls added.
As just the stamp and sentiment looked so lost on the card, I added a layered butterfly die to create a balance.


Supplies used:
Cardstock - Papermill
Sentiment - Bella Blvd
Ink - Donna Salazar Mixed Media Inx for Clearsnap
Butterfly Die - Donna Salazar for Spellbinders
Pearls - unknown

Friday, February 10, 2012

My favorite stamp right now!

You've seen me use this and you've seen it in other posts, but I am going to say again that I just love this Love Knots stamp!  I love the wood grain texture that you can add to a project with it and although the hearts are great for Valentine's Day you can certainly use this one all year long!
For today's project a made a set of a few small thank you notes with it.  The colors are very Valentine's Day, but that is fine with me because I can use them any time.  I always need thank you notes!


The "Thanks" stamp is from the Many Thanks set and I embossed it using the Chocolate Bliss gelly powder.  That embossing powder smells just like a fresh baked brownie!

My trims on these cards are by May Arts and Maya Road, Twine by The Twinery and pins are from Joann's.  Inks by Stamping Up and Staz-On.

I hope you all have a great weekend!  Don't forget to stop by the Facebook page and like us there!

Thursday, February 9, 2012

Sweet Ballerina Card

I have come up with such a sweet card to show you today. What I did first was to make a tiny little slippers. They will look cute when the card is all assembled, trust me!

Image

For the background of the card, I had a rub-on that said TWIRL, so I adhered that first. Then, I stitched tulle over the background paper put some flower and gems in between the tulle and paper layers.

Image

I embossed the ballerina things in pink and assembled the card. The stamp is from the set called SUGAR and SPICE.
Image

Here is a close up of the card.

Image

I thought it turned out pretty cute! Lots and lots of PINK! What little girl would not be excited about that?
Image

I am having so much fun coming up with things with these stamps! I adore them and making things with them is never a chore. Thanks for letting me share this project with you today. This has been Jeannie from The Polka Cabana http://polkacabana.wordpress.com with today's post.

Wednesday, February 8, 2012

Friends Furever card by Donna


This card features 3 of the dogs in the Gel-a-tins stamp set called Cosmo Pups. I thought it would be fun to have a "wall" of doggie friends "portraits" and use the sentiment "Friends Furever." To make this card I stamped each of the dogs and used the 1 inch square punch around their heads so it would look like a photograph. Then I punched out scalloped squares that look like frames around the dog "photos." I colored in the dogs with Copic markers and went around the edges of the square with an orange marker. This was a really fun card that showcases the cute dog stamps in a different way.

Here's a close up of one of the doggie "portraits."


Materials
1. Stamp set - Cosmo Pups - Gel-a-tins
2. Ink - Tuxedo Black - Memento
3. Markers - Copic
4. Card stock - Whisper White - Stampin' Up
5. Decorative Paper - Lime Twise - My Minds Eye; Central Park - Studio Calico

Thanks for stopping by and I still have a HUGE blog candy offering in honor of my Blogoversary on my blog. Hop on over and leave a comment http://thecraftycorgi.blogspot.com You have until Sunday, February 12 at noon to enter.

Tuesday, February 7, 2012

In Bloom

Image

Spring is coming and ready to see some color in the garden...well, crafting garden that is.
Image

I love creating felt flowers and finding creative ways to package them to give to friends. Used a combination of Gel-A-Tins Love Knots and Sugar & Spice to create a colorful mix of embellishments. Stamped a white envelope with Love Knots, added the felt flowers and stitched the envelope closed. Added a tag using a mini clothes pin and you have one colorful gift set.

Supplies:
Gel-A-Tins Love Knots
Gel-A-Tins Sugar & Spice
Remember Me Emily - buttons
Martha Stewart - tape
Pink Paislee - paper
Prairie Bird Boutique - ribbon
Quikutz - label die
Sizzix - label die
Papertrey Ink - paper
Epiphany Crafts - round 25 punch
mini clothes pin
envelopes
felt flowers

Monday, February 6, 2012

Happy tails to you!

To create a variety of dimension on your project, try to adhere some of your main images using foam tape to create 3D effect. Chipboard embellishments are also perfect to create the 3D look on your project. For this card, I stamped the dog image using dye ink, fussy cut, and adhered next to the stamped dog image that I already created on the cardstock.


The sentiment "happy tails to you!" was stamped on sticker tag on the bottom of the card and here is the detail photograph...


Other materials:
Crate paper chipboard sticker
Create paper sticker tag
Jenni bowlin butterfly
American Crafts ribbon
The twinery twine
My Mind's Eye patterned paper
Tsukineko ink