Friday, December 30, 2011

A sunny card for a holiday weekend!

Hey again!  It's Jessica :)  Today I have a card that I made using the Sweet to the Core stamp set and the Milk and Honey scented embossing powder.  Check it out!


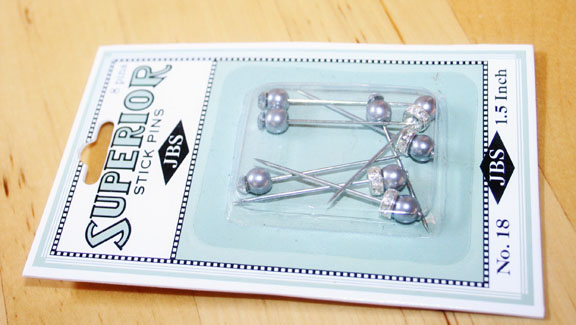
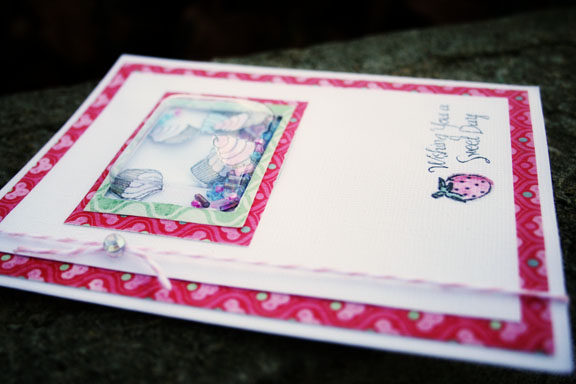
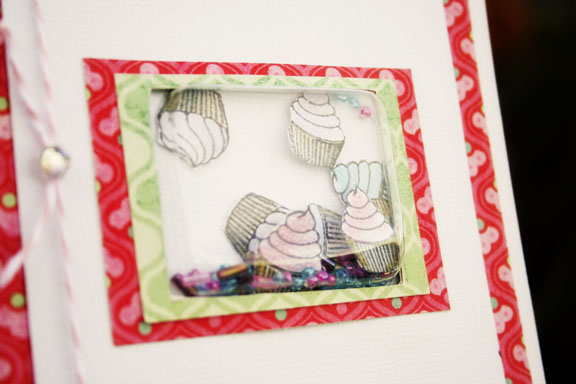
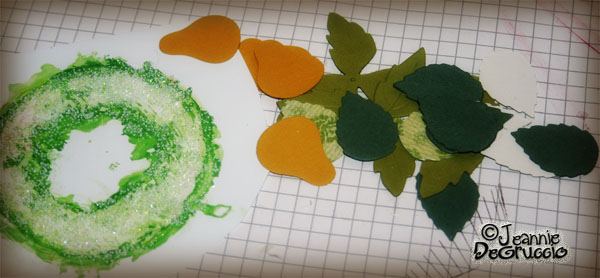
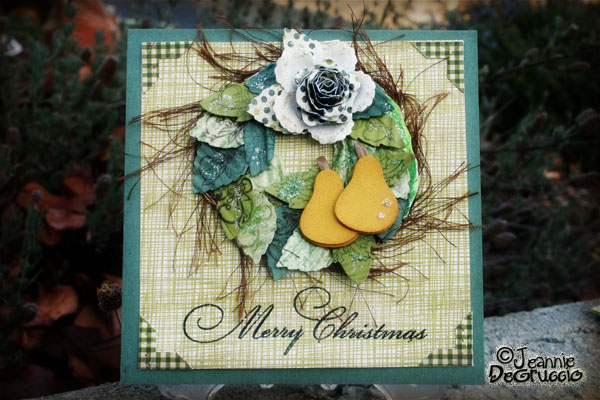
I started with a circular card base and added to that.  The heart was made by tracing one of my Xyron/Spellbinder's dies (I wanted a slightly different size than I could get with the set, but tracing and cutting worked perfectly)!  I stamped the "Sweet to the Core" sentiment on blue paper and punched it out and the pear was punched with Versamark ink, embossed with the Milk and Honey scented embossing powder and then cut out with scissors.  I layered it all together with My Mind's Eye papers, Maya Road and Joann's pins and May Arts ribbon.  Hope you like it!

Have a wonderful new year!

Thursday, December 29, 2011

Stamps aren't just for paper!

Hello again, gelly fans!  It's Jessica here.  I have been busy putting up the posts by our amazing DT members, but today I'm going to share one of my projects with you!


I was at my LSS one day and found these awesome wood embellishments from Kaiser Craft.  I thought that they'd look beautiful with a design stamped on them so I had to pick them up.


The only thing I wish I had done differently was the misting.  I waited until after I stamped to do the misting, and it seemed to make the ink bleed a little.  Next time, I'll mist first, let it dry, then stamp.  I used the Many Thanks set for this.  The sentiment across the strip and the samped pattern on the wood are both from that set.  I just added in some buttons and flowers and I think it turned out great!

Hope you like it too!

Wednesday, December 28, 2011

Making A "Krafty" Thank You Card with Donna


Christmas is over, the gifts have been opened and now it's time to send the thank you cards. So this week I've made quick and easy "Krafty" thank you card using the Gel-a-tins Stamp Set 3-D Alphas. Just find some patterned paper that you like and you can make a set of these in no time.

To start, I stamped the letters for THANKS on a "Krafty" paper and cut them out. I really like this striped paper so I decided to use it over the whole card. I find papers with large patterns look best if you let the paper show so I don't like to cover them up with lots of embellishments. So I cut the striped paper to fit the card 5.5 x 4.25 inches and adhered it to a "Krafty" card base. Then I cut a 1.25 x 5.5 panel of the plain Kraft paper and adhered the letters to the panel. Then I cut a 1.75 x 5.5 panel of the polka dot paper - which is the back side of the striped paper and put it in the middle of the card and placed the panel with the letters on top of it.

I hope you like this "Krafty" thank you card. Stop by my blog http://thecraftycorgi.blogspot.com to see more cards made with Gel-a-tin stamps. And, Happy New Year to you! See you next Wednesday.

Materials
1. Card stock - Crumb Cake - Stampin' Up
2. Ink - Bravo Burgundy - Stampin' Up
3. Stamps - 3-D Alphas - Gel-a-tins
4. Patterned paper - KRAFT Happy Days "Icing" - My Minds Eye
5. Paper snips - Martha Stewart

Tuesday, December 27, 2011

Make it quick...

Image
Time is limited these days, especially during the holidays. Between the morning rush and a packed afternoon, this little note card set can be put together in as little as 15 minutes. No stitching, die cutting and little paper cutting. If you are looking to make your own after holiday thank you notes this may be the design for you?

Image

Supplies:
Gel-A-Tins Love Knots
Gel-A-Tins Coffee Break
Papertrey Ink - cardstock
Studio Calico - paper
Simple Stories - paper
Epiphany Crafts - punches
pom-pom trim
thread
staple

Began with a folded piece of cardstock, which was stamped using Love Knots. Found a little note pad and took out three pieces of paper and added it to the front of the card. Stamped Coffee Break sentiment circle onto the paper. Punched out paper circle and added to the paper. Stamped and cut out coffee cup from Coffee Break. Add paper flag to top of card, stapling on heart to secure in place. Finished it off with a little thread and pom-pom trim. Quick and easy!

Andrea

Monday, December 26, 2011

Another sweet card by Linda!

Hi all...
For this week, I created a card using Sweet Cake Stamp Set with simple embossing and distressing technique. The two cupcakes were stamped on a plain white cardstock, emboss and heat set with light blue glitter on top to finish. They both are positioned next to each other with title stamped on a pink ticket.

This is a hybrid project and the background patterned paper was measured to fit the card size and printed from digital file. I love using vintage buttons and for this project I added two of them for accent on the top right corner. The light blue pearls were glued one by one around the circle diecut.

I hope you enjoy my project and see you next Monday!

Other materials:
Pearls: Queen & Co
Cardstock: Momenta
Lace: My Mind's Eye
Ink: ranger
Decorative scissor: Fiskars

Saturday, December 24, 2011

X-Mas '72 layout by Kim!

I don't know about you, but I am terribly behind with the scrapping of my older Christmas pictures. The other day I came cross one, which showed me and my baby brother on his first Christmas - way bank in 1972.
Yup, I think I desperately need to catch up somehow!

What better way, to make use of the stamp set "Christmas Wreath" to incorporate in the overall design of the page.
Image

Instructions:
Using a Versmark inkpad, I stamped the sentiment "Happy Holidays" and the wee "Floral" on the side of my layout. Then I sprinkled some white embossing powder over the area and tapped the excess power back into the pot. Using my heat gun, the sentiment and image quickly set.
I actually like the effect when the embossed are is not perfectly covered with the powder - it gives a more vintage-distressed look, don't you think?

Image

Image

Supplies used:
Papers - My Minds Eye, Simple Stories
Inks - Clearsnap
Other - Embossing Powder, Dimensional Paints
Stickers - Jenni Bowlin

Friday, December 23, 2011

A last minute ornament idea from Jodi!

Christmas is only a few days away, and to help you get into the Christmas Spirit, I thought I would share with a neat project that you can make with your stamps!


Instructions:
1. Stamp your tree stamp from the Twas the Night Before Christmas Stamp Set on white cardstock and color it in with your copic markers
2. Add Glitter to the garland, and add mini red pom-poms to the tree.
3. Cut around the tree, and adhere with a strong glue to your clear ornament. I used Modge podge to smooth it over nicely.
4. Cut think strips of paper using Christmas Colours and roll them around a pencil. Insert these rolled pieced into the clear ornament until it is filled.
5. Attach a ribbon and place on your tree.

Supplies Used:
Gel-a-tins Stamp: Twas the Night Before Christmas
Clear Plastic Ornament
Copic Markers
Modge Podge
Mini Pom poms
Glitter

Hope you have a wonderful Christmas!

Thursday, December 22, 2011

A Yummy Gel a Tins Shaker Card

Today I am using the set called Sweet Cakes.

I remembered a card a sweet friend and FABULOUS card maker named Candace made and knew that I wanted to try her idea out. Click here to see her card.

The other day I was using some of my Jenni Bowlin Pins. They came in this great package.

Image

Well I took the pins out and thought to save the plastic tray, because I knew I'd reuse it.

For this card, the tray is the window of my shaker.

Image

I did not take pictures in the making process of this card. It was quite a round of trial and error.
Image

I tried to take multiple pictures to show you how the tray works as the pop out window.
Image

I used the tiny cupcakes for the inside of the shaker and small glass beads that I thought looked like cupcake sprinkles.
Image

We have a fried who refers to the sprinkles as SPINKIES..is that the cutest thing?

Image

This card was fun to make but I did have quite a time getting the hole in the paper fit the plastic tray just right.

Image

But no fear, I am mathematically challenged, so this is probably only an issue to me!
Image

My little ones enjoy shaking the card...shaking...shaking...shaking..."Ok..put the card down now!"

I love the way it turned out...what else have you seen put in these shakers? We'd love to hear from you. Leave a link in your comment if you'd like!

I'd love to hear your ideas!

This has been Jeannie with The Polka Cabanahttp://polkacabana.wordpress.com with today's post!

Have a "Gel" a riffic day!!

Wednesday, December 21, 2011

Making a "PEACE"ful CAS Holiday Card & Envelope with Donna


Since we are in the middle of the holiday season, I decided to make a colorful CAS card that you can share with anyone no matter what holiday they are celebrating. To make this card I used the Gel-a-tins Stamp sets 3-D Alpha and Oh Christmas Tree. These letters are so cool and I really love the shapes of the trees. I decided to use non-traditional holiday colors to go with these fun letters and funky trees.

I just stamped the trees in different colors and cut them out. I stamped the letters in Perfect Plum and cut them out and added some purple twine above and below the letters to add a little interest. To get the twine to lay flat I dabbed a tiny drop of Glossy Accents every couple of inches so it would stay on the paper and not pop up.

Then I decided I would enter this card in to this weeks CAS-ual Fridays Challenge which requires a matching envelope. This card is 5x7 so I opened the envelope and measured. I cut a 6 x 3 inch piece of white card stock, stamped some trees and the Oh Christmas Tree sentiment on my white paper panel and scored a line at 1.65 inches so the panel would fit in the envelope and be able to fold evenly when the envelope is closed. It's a special touch to decorate your envelope. It makes for a fun surprise for the person opening up the card.

Here is a close up of the envelope.

Here they are together.


These are the stamp sets I used for this card.


This is a fun and easy card that you can make quickly if you need a last minute card this week. Thanks for stopping by and be sure to stop by my blog http://thecraftycorgi.blogspot.com to see more Gel-a-tin cards. Happy Holidays!!!!

Materials
1. Card stock - Whisper White - Stampin' Up
2. Ink - Perfect Plum, Tempting Turquoise, Tangerine Tango, Wild Wasabi, Melon Mango
3. Twine - Purple - Doodlebug Designs
4. Paper Snips - Martha Stewart

Tuesday, December 20, 2011

Twas the night before...

Image

Just a few days remaining and all of the 2011 seasonal crafting, shopping and decorating will come to a end. This is the time when we can sit back and enjoy all that makes this holiday season so special year after year. Before the post office closes, the stores are quiet and you have run out of steam...take a break in your craft room and whip up something just for you.

Image

Created this card using Twas the Night Before Christmas. Strung a few stockings...these ones not by the fireplace, but with bits and pieces of vintage goodness. Each tiny tag is stamped with the holly and lightly colored using Copic markers. Finished off with the traditional sentiment, which is must this time of year.

Supplies:
Gel-A-Tins Twas the Night Before Christmas
Melissa Frances - paper
Frost It Pink - bell, seam binding, tags, ticket, lace
Papertrey Ink - die, notebook paper, cardstock
Quickutz - label die
mini clothes pins
twine


Monday, December 19, 2011

Hybrid card by Linda!

Hi all...
Today I would like to share with you one of my hybrid Christmas cards that I created with 3-D alpha stamp set that I embossed and glittered. I attached the letter XMAS on 1.5" X 1.5" square patterned paper and arranged them as shown on the picture. I straight stitch for accent and added 3 vintage buttons on the top. To finish, I glittered the heart shaped chipboard and added silver ribbon.


Other materials:
Embossing powder: Ranger
Pearls: Queen & Co
Patterned paper: digital collection
Ribbon: American Crafts
Chipboard: Maya Roads.

Happy Stamping!

Saturday, December 17, 2011

Happy Holidays - Card by Kim

So, are you all organised for the holidays or could you do with a little more inspiration for quick last minute card? Good, because I have one more for you making use of the new stamp set HAPPY HOLIDAYS
Image

Instructions:
First I inked the edges of some paper scraps and layered them on top of each other. Stamping the "Wreath" onto some white cardstock, I coloured the image with various shades of green and added a little clear glitter glue to some areas, for a frosted look.

Image

The sentiment "Happy Holidays" was stamped onto a strip of masking tape and added to the top of the card.
For the final touch, I used a border punch to avoid too much white space at the top and added a few drops of clear dimensional paint.

Supplies used:
Cardstock - Mad About Cards
Papers - Authentique
Inks - Stampin' Up, Clearsnap
Other - Glitter Glue, Dimensional Pints
Tools - Martha Stewart border punch

Friday, December 16, 2011

Merry Christmas Card by Jodi

Hi everyone! Is everyone almost ready for Christmas? It's Jodi Wilton here again with you today! I have a cute and simple card to share with you, using the Twas the Night Before Christmas Stamp Set! This stamp set is so versatile, I could make so many different cards! The card I am sharing with you today, is using the ornament stamp!

I wanted to card to look like hanging ornaments everyone! I love the simple background with the fun bright ornaments!

Instructions:
1. Cut your base of your card in black cardstock.
2. Stamp your sentiment on the right hand corner of a white piece of cardstock. (Do not adhere this piece yet!)
3. Stamp in black ink, 5 ornaments on white cardstock. Use your copics to color them in, in a variety of colors. Fussy cut around them.
4. Use a small hole punch, and punch the tip of the ornament to make a tiny hole to thread some string through it.
5. Use Foam tape to adhere the ornaments in random order on your white cardstock. Tape the other end of the ornament on the backside of your white cardstock
6. Adhere your white cardstock onto the base of your card. Doodle around the edge of the card with a white pen.

Materials Used:
Twas the Night Before Christmas- Gel-a-tins Stamp
Copic markers
Black Twine
Best Creation Foam Tape
Stampin' up cardstock
White Signo Pen

Thursday, December 15, 2011

3-D wreath card by Jeannie!

Today I am using the set called Christmas Wreath.

To start out what I did was to very faintly stamp the wreath onto white paper.

I only wanted the shape and did not care about the image showing up too much.

Image

Next, I pretty much made a mess with paint, again I only wanted the shape and was not too concerned with how it looked at this point.

Image

I added some sparkle to the paint in case any or the painted wreath showed through in my final product.

I also die cut a couple of different sized leaves in different papers and die cut little pears also.

Image

Then I took the 2 smaller stamps from the stamp set and stamped each leaf.

After I stamped them I ran them through a paper crimper a couple of times to distress them.

After that was done, I adhered them to the wreath background, creating a 3-d wreath.

Image

I added some fibers and embellishments and embossed the saying in black on the card front.

Image

Ahhh, I could just stare at this for hours I think the colors are so gorgeous and relaxing!

Image

All of the decorative papers are from Authentique Paper's Free Bird - COMFORT series.

The decorative corners are from Authentique Paper's - Wonder Headlines.

Image

 I hope you have enjoyed seeing how I came up with this design.

I am just loving playing with these stamps and know you will love them too!

This has been Jeannie from The Polka Cabana with today's post. 

Wednesday, December 14, 2011

Making a CAS Christmas Ornament with Donna

This week I made a fun CAS Christmas ornament using the Gel-a-tins 3-D Stamp Set. You could easily make these for a quick, inexpensive gift. Here's the finished product.

I found this acrylic ornament at Hobby Lobby. Here's what it looks like.


The first thing you do is take out the cardboard insert that comes in the ornament and trace it on the patterned paper. It's not a standard circle so you can't use a punch or die - you just have to cut it out with scissors. Notice I traced it on the very edge of the paper, because I want to use as little of my paper as possible so I have more to use for other things later.


I decided to use two colors for my ornament. One side uses and aqua blue polka dot paper and the other side uses a red polka dot paper.


After I cut out both the ornament shapes from the two papers I glued the patterned papers onto the insert that came in the ornament. Don't worry if you have a few imperfections cutting out the circle - we can work on that. After gluing the two pieces of paper to the insert, I painted the edges with my Snow Cap Dabber acrylic paint dabber. This helps cover any imperfections you may have had when cutting out the shape.


Then I stamped the letters J O Y twice - once in the aqua blue color and once in red. After cutting out the letters I adhered them to both sides of the ornament insert using foam tape. Next, I put the insert back in to the ornament and closed it and put the top back on.


I had a great time making this ornament and I was surprised at how nice the finished product look. If you decide to make an ornament, please let me know. I would love to see it. My blog address is http://thecraftycorgi.blogspot.com

Materials:
1. Ornament Ball - Hobby Lobby
2. Decorative Paper - Bright & Jolly - Recollections
3. Ink - Real Red, Pool Party - Stampin' Up
4. Stamps - 3-D Alpha - Gel-a-tins
5. Acrylic Paint Dabber - Snow Cap - Adirondack Lights
6. Foam Tape - Stampin Dimensionals - Stampin' Up
7. Paper Snips - Martha Stewart

Tuesday, December 13, 2011

For the love of fabric...

Image

The combination of fabric and stamps is a great way to give your project a shabby chic/vintage feel you may be looking for. After working with fabric and stamps separately for many years the two together seemed to be a perfect match. Whether you are creating your own embellishments or background, this look can be accomplished in just a few simple steps.

Supplies:

Gel-A-Tins Love Knots
Imaginisce i-top
Prairie Bird Boutique - wrinkle ribbon
Maya Road - stick pins
Remember Me Emily - button
Ink
Fabric
Felt
lace

1. Cut out a square of fabric. In this example I used a 2.5" square.
2. Ink stamp and press onto fabric. For more detail, stamp your sentiment onto your fabric before moving to the next step.
3. Either stitch/adhere onto paper surface as is or create a badge using Imaginisce.

Image

4. Assemble card with layers of paper, fabric and felt. Add badges to felt piece.
5. Add ribbon, button, and stick pins.

Andrea

Monday, December 12, 2011

Pretty cupcakes with Linda!

For this week, I would like to show you a quick project to create cupcake wrap using circle cutter. This is a very quick and fun project to do and definitely will make your homemade cupcake pretty!

First, cut patterned paper with 10 inch diameter, cut the circle into three pieces and add lace throughout the length of the circle.


If you think the wrap is too short, feel free to increase the height by layering another piece of paper with different pattern as shown on the picture.
Stamp strawberry image on a piece of white cardstock multiple times, color them with permanent markers. I use copic for this project.


Stamp: Sweet Cakes Stamp Set
Patterned paper: Crate Paper
Lace: stash
Marker: Copic

I hope you enjoy looking at this simple project and try creating it next you make your yummy homemade cupcakes. Happy Stamping!

Saturday, December 10, 2011

Merry Christmas card by Kim!

Today I would like to showcase another Christmas card with you, which was created within the matter of about 10 minutes. I can sometimes spent hours on getting just one card finished but the gorgeous new stamp set Christmas Wreath makes creating cards a doddle!
Image

Instructions:
I started stamping the tag with the "Merry Christmas" sentiment first and then added the little "Swirl" to the corners of the tag. Previously I stamped the "Holly" twice to a sheet of white bleed proof paper, coloured it in and hand cut the image, adhering it to the tag with the aid of some foam dots.

Image

To add a little more interest to the "Swirl", I adhered a red flat backed pearl to the lower part to compliment the berries from the "Holly" image.

Image

Finally I added the tag to my card base with a double helping of adhesive foam pads, to raise it off the red background and allow me to tuck some punchinella behind the tag.

Supplies used:
Cardstock - Mad About Cards
Papers - Donna Salazar Designs
Tag- WH Smith
Inks - Stampin' Up
Other - Bakers Twine, Punchinella, Button