Thursday, February 28, 2013

Another day...

 That's right...another day closer to Spring!  
And with that...spring showers.  


Wouldn't you rather have showers or snow?
I would!

I paper pieced the umbrellas to create patterns.
A rainy day gets better when you have a brightly colored umbrella!


I hope that spring is just around the corner from where you live!
Thanks for stopping by today,
Dawn Mercedes, of Sunnyside Up!

Wednesday, February 27, 2013

Happiness

Hello! My layout this week was made using the Happiness background and border stamp set. I like the different backgrounds in this set. I used the swirl background stamp and the single dotted line stamp on my page.


The swirl background stamp was stamped with Tim Holtz distressed ink in faded jeans. The single dot line stamp was stamped with white pigment ink from JoAnn's.

Thanks for stopping by & checking out my page. For more info about my layout, visit my blog: http://www.marklandandmain.blogspot.com

Monday, February 25, 2013

All-Silver Congrats

Hey everyone! How are you all today on this fine day?

I'm popping in to show you a card I created for Gel-à-Tins. None of our stamps on this today but I am using our *awesome* Gelly Gem roll-ups! These are a sheet of bling all woven together - such a great idea! You can cut off and use individual gems, or you can use a strip, like I've done today:

Image

Colour me sparkled!! I think this all-silver card would be perfect for a Silver Anniversary!

Image

I started with a silver card base and stamped the sentiment from using Versamark ink. I then heat embossed with silver embossing powder.

Image

All that I needed to do then was to adhere my strip of gems! I did this with a little glue gel on the backs of some of the rows. No need to glue the whole thing down, just the edges will do!


Supplies Used:

Gel-à-Tins:
Silver Gelly Gem Roll-Ups

Other:
Think big Favourites #5 stamp set (Papertrey Ink)
Versamark ink (Tsukineko)
Sterling Silver cardstock (Clear and Simple Stamps)
Sterling Silver Super Fine embossing powder (WOW!)
Pinflair Glue Gel


Thanks so much for stopping by - I hope you have a wonderful day!!

Saturday, February 23, 2013

Game Day Treats!

Hello!  Today I want to share a quick and easy project that you can make with the gel-a-tins Hoops stamp set. 

I have twins that play basketball, and I like to make up a little treat for the end of the season.  One year I did sugar cookies decorated like basketballs, and this is just the sort of packaging I needed and didn't have at the time :)


The great thing about this packaging is that you could really put any kind of cookie or brownie in there and the bag had that basketball theme.  That would save a whole lot of time!

These bags have a bit of a waxy coating so they're perfect for food, and all I did was fold over the top (you would wait to do this after your cookies were inside), add a strip of paper (this one went through my Xyron 150 and it sticks to the paper perfectly), then twine, a punch and a couple of stamped images.  How cute is that? 

We also have a hockey set that is very cute for those of you whose kids are into hockey.  Stamps can help you put together cute and easy gifts for your favorite team of kiddos!

Have a great weekend!

Friday, February 22, 2013

Raindrops and Flowers

Hello!

This general greeting card could be used for a special occasion or just to say Hello!

Image

Products Used

gel-a-tins 'Raindrops are Falling' clear stamp set
Xyron Mega Runner
Xyron 2.5" Sticker Maker
Xyron Creatopia Shapez Frame 7 Dies
Xyron 150 X
DCWV Trade Winds Stack
Websters Pages Fabric Ribbons
Tim Holtx 'Frayed Burlap' Distress Ink
docrafts Vintage Lace Trim
Twine

Place the base layer onto the card using the Xyron Mega Runner, Run the lace and twine through the Xyron 150 X and the Fabric Ribbon through the Xyron 2.5" sticker maker and then layer on the card.

Image

On contrasting paper, stamp the gel-a-tins clear stamp poem and cut out using the dies, also cut a larger background. Use the Xyron mega runner to stick together. Apply to the card using the foam pads

Image

Finish my adding the button threaded with twine.

Image

Thursday, February 21, 2013

A Banner Birthday

"It's Your Day" is such a wonderful collection of stamps for any occassion. A couple of weeks ago I shared
with you the layout I created using the banner stamps in this collection, today I am sharing with you how
I used the heart banner stamp on a birthday card.

Image

I used Quick Quotes PowderPuff Chalking Inks to create a chalk board effect with the heart banner stamps
and the "It's Your Day" sentiment on the black cardstock. Pretty smashing effect!

Image

Gel-å-Tins Supplies(http://gelatinstamps.com):
It's Your Day Collection

Other Supplies:
Bazzill Cardstock
Quick Quotes Powder Puff Chalking Inks
Helmar Premium Craft Glue & Zapdots

~Katie
http://www.scissorsspatulassneakers.com

Wednesday, February 20, 2013

A Card for a Rainy Day

Hello, everyone! It's Jessi here from Kissin' Krafts! I don't know about you, but I love the rain! And here in Texas, the spring tends to be the only time we really get any rain!

Here is the card I created using gel-a-tins, Raindrops are Falling Stamp set:

Image

I absolutely love paper-piecing with stamps! As soon as I saw the stamp with the woman and the umbrella, I knew that was what I was going to do!

Image

I created the 'window' by using a circle diecut and cutting the circle out of the patterned paper. The sentiment is stamped onto a different diecut and added using foam dots. Colorful twine is wrapped around the card to add another pop of red to the card.

Image

Thank you for stopping by! If it happens to be raining where you are, hope you stay dry and find some time to create!

Need some gel-a-tins inspiration? Like us on Facebook!

Supplies:
gel-a-tins - Raindrops are Falling
Lily Bee Picket Fence Collection
Spellbinders Circle and Tag diecuts
Trendy Twine - Peppermint Stick Twine
Stazon Jet Black ink
Foam dots

Tuesday, February 19, 2013

Swak Booklet

Image

Here's a cute SWAK booklet to rev your honey's engines! Inside are blank...

Image

Just think of the sweet nothings you can scribble down.

Leave this in a laptop case, on a pillow, or next to the sink...

I bet your honey writes a note back to you too!

Image

Supplies:
Gel-a-tins Stamps: SWAK
Papers: The Robin's Nest
Gelly Gems from Gel-a-tins
Glue Dots ©
eyelet
stapler
ribbon

Monday, February 18, 2013

Crackle and Bricks

Hello everybody!

I made a card using the crackle paint background. I thought it would be perfect to use on a congratulations/engagement card for my cousin. Some of her engagement photos have a brick background & this stamp compliments it very well.

I sometimes find it hard to get a good impression with a background stamp. What I've found helpful is to press the paper to the stamp instead of pressing the stamp to the paper. Does that make any sense? After my stamp is inked I flip it up & then press the paper down onto it. I find that I get a better image that way.

Thanks for stopping by today :)

For more info about my project, visit my blog: www.marklandandmain.blogspot.com

Friday, February 15, 2013

Lips Lips Lips

Hi everyone! How are you all doing?!

I'm back to today to share a sweet gift card holder I made using the Gel-à-Tins SWAK (Sealed With A Kiss) set.

In my head I envisaged a cute card that could be given to a girlfriend, maybe with a spa or beauty voucher/gift card tucked inside:

Image

Pretty huh? And so easy to do!

Image

I started by stamping one of the lip images using a mix of pink, purple and red inks.

Image

I then added some glossy accents to one of the lips and sprinkled with glitter for a pouty lip gloss look!

Image

All that was left was to add a suitable sentiment in black ink. I chose to add this on a strip of cardstock with scored edges to add a fun accent.

Image

Cute and ready to gift in no time!


Supplies Used:

Gel-à-Tins:
SWAK

Other:
Flipping Out set (Papertrey Ink)
Grapefruit, Cherry, Heather, Grape, Watermelon inks (A:Muse), Versafine Onyx Black ink (Tsukineko)
Stamper's Select White cardstock (Papertrey Ink)
Glossy Accents (Ranger)
Crystal Fine glitter (Martha Stewart)


I'll be back soon to share another project, thanks so much for stopping by!!!

Wednesday, February 13, 2013

Sun Showers and Rainbows

After the spring showers come the rainbows,

Image

Products Used

gel-a-tins 'Raindrops are Falling' clear stamp set
Xyron Mega Runner
Xyron Glue Stick
Websters Pages Petite Papers 'Sunday Picnic'
Websters Pages Fabric Tickets
Tim Holtz 'Frayed Burlap' Distress Ink
Tim Holtz 'Broken China' Distress Ink
docrafts Red Pigment Ink
docrafts paper flowers
Doodlebug Purple Sugar Coating
Flowersoft
Foam Pads
Promarkers

Stamp the 'Girl with Umbrella' stamp directly onto the backing paper, the bicycle image is part of the backing paper and by using red ink they match well together. Color using the promarkers and then add the glitter.

Image

Add the raindrops and color around the edges using a red felt tip pen. Cut out the rainbow and place over the base sheet using foam pads. Stamp the clouds onto the rainbow and backing sheet.

Image

Add the flowers using the Xyron glue stick.

Image

Finish with the topper in the top right corner.

Image

Tuesday, February 12, 2013

Showering You in Kisses

Valentine's Day is just two short days away. Today I am showering you with my latest Valentine's card created using the "Raindrops are Falling" Collection and "Sealed With A Kiss" Collection.

Image

I started with a visual in my head of how I wanted this card to look. The "showering you in kisses" sentiment was printed on my computer, then I built the card scene around the sentiment.

Image

The umbrellas from the "Raindrops Are Falling" Collection were stamped with black Archival Ink onto printed paper. I fussy cut them out and laid them on the bottom of my card (without adhering them). Then I stamped the umbrella handle directly onto the card. (A little hint here...to get just the handle image of the umbrella on my card base, I covered the rest of the umbrella with washi tape while I was inking and then pulled the tape off before I stamped the handle so the rest of the umbrella wouldn't accidently be stamped onto my card base.)

Image
Showering You With Kisses_Card_Gel-a-tins_4 by ktbomb15, on Flickr

I arranged the the lip stamps from "Sealed With A Kiss" randomly around my sentiment and above the umbrellas. They are inked in pink and red Momento Ink.

Image

My finishing touch was adding the umbrellas with Helmar Zapdots to give them a bit of height.

Gel-å-Tins Stamps Supplies (http://gelatinstamps.com):
"Raindrops Are Falling" Collection
"Sealed With A Kiss" Collection

Other Supplies:
PaperTrey Ink Cardstock
Crate Paper
Ranger Archival Ink
Momento Ink
Queen & Co Pearls
Helmar Zapdots

I hope you have a loving Valentine's Day and are showered in kisses!

~Katie
http://www.scissorsspatulassneakers.com

Monday, February 11, 2013

Love Birds

Happy Monday, gel-a-tins fans! It's Jessi here from Kissin' Krafts! Can you feel the LOVE in the air? Valentine's Day is just around the corner! Are you ready for it?


Today I have a cute paper-piecing card to share with you:

Image

Using the gel-a-tins, Love is in the air, and a variety of papers from Echo Park's This & That collection, I stamped the images on the patterned papers and hand-cut the images out. To include the birds' legs, I stamped the images on the cardstock and placed the paper pieces over the images. After the cut-outs were glued to the cardstock, I added the white cardstock onto a back layer of patterned paper. The final touch was the sentiment stamped onto a hand cutout cloud.

Image

Thank you for stopping by today! Hope you have a wonderful day!

Like our Facebook page to find more gel-a-tins inspiration!

Supplies:
gel-a-tins - Love is in the air
Echo Park - This & That
Stazon Jet Black ink
Foam Dots

Saturday, February 9, 2013

Congrats Ribbon

Image

Let the inside of your card show through! After making a card base, trim 1.5 inches off the top layer. Be sure to line the inside of your card with fun patterned papers.

I think there will be tons of possibilities with this new ribbon stamp by Gel-a-tins! Here, I curled up the tail to make it look a bit more realistic. Use colored ink to coordinate your faux ribbon with your color combination.


Supplies:
Gel-a-tins Stamps: Rock a bye Baby
pearl bling, punch

Friday, February 8, 2013

It's Your Day

I used the It's Your Day stamp set for this layout. The banner stamp is perfect for this layout about when I won tickets to see my favorite country music singer ever, Gary Allan.


This is such a great set because there are several stamps for all of your celebration needs. The heart stamp I used once before and in addition to this banner, there is also a balloon banner. I haven't even used the sentiments with this set yet!

For more details about my layout, visit my blog: www.marklandandmain.blogspot.com

Wednesday, February 6, 2013

You Drive Me Wild

Hi everyone! It's great to be with you today! I can't believe it's February already!

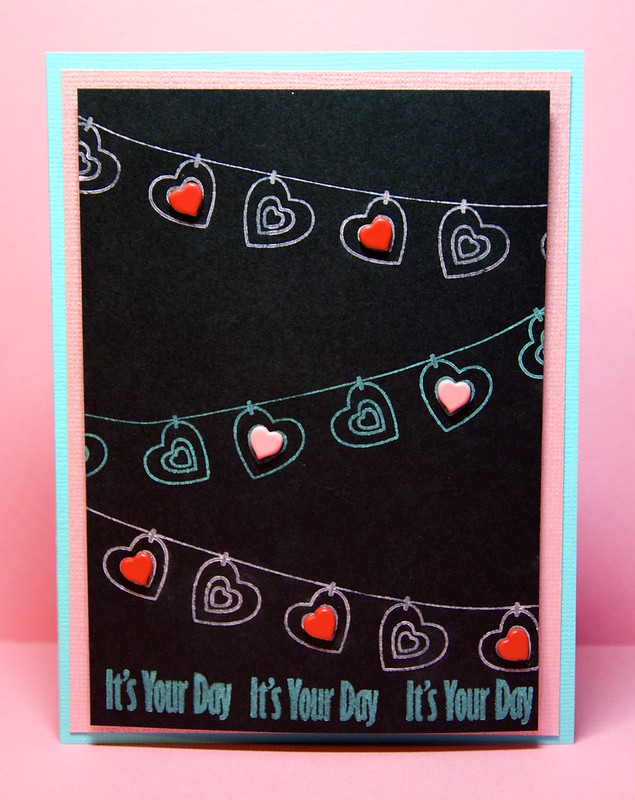
Today I'm sharing a fun card I made using the Gel-à-Tins SWAK (Sealed With A Kiss) set!

I'm always looking for unusual ways to use stamps, and this idea came to me straight away:

Image

Pretty out-of-the-box huh?! Let me tell you what I did!

Image

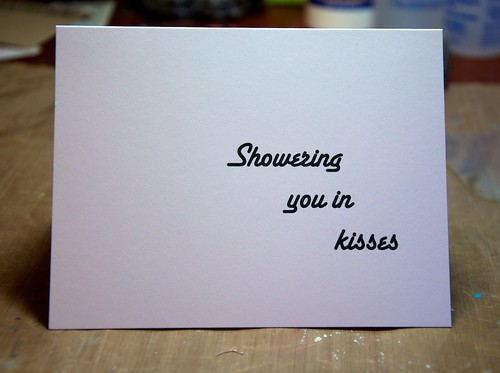
I started with a yellow card base and stamped the mini lip trio using black ink.

Image

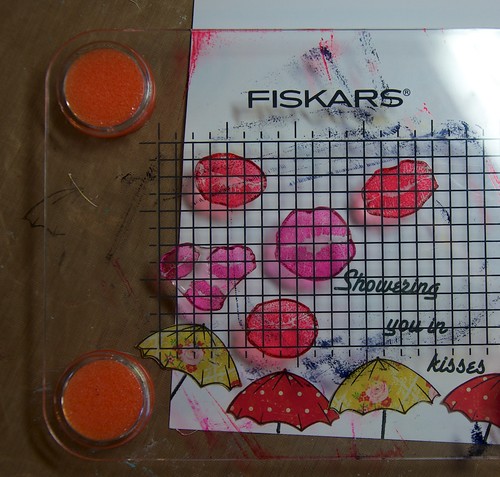
I then used various ink colours and a stiff brush to stipple on the colour to give the look of leopard print!

Image

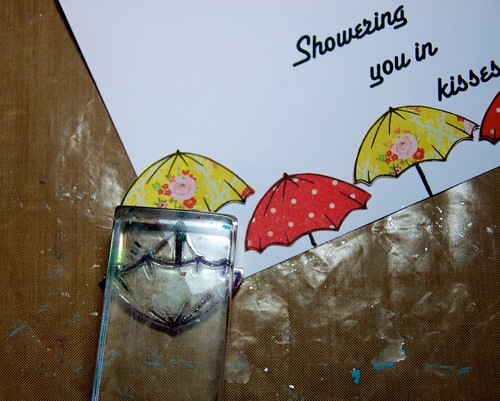
I didn't want to cover up too much of that background, so I die-cut a tag, background stamped it with some distress-effect stamps and then built up a custom sentiment from lots of different stamp sets!

Image

A tip for twine that defies gravity - paint on some Matte Mod Podge and shape the twine as you wish, then hang upside down to dry!


Supplies Used:

Gel-à-Tins:
SWAK

Other:
Typewriter Alphabet stamp set (MFT)
Lots of Love stamp set (Avery Elle)
Midnight Letters stamp set (Mama Elephant)
Background Basics: Postmarks, Farm set (Papertrey Ink)
Lido, Squash, Pumpkin, French Roast inks (A:Muse), Kraft ink (Papertrey Ink), Versafine Onyx Black ink (Tsukineko)
Harvest Gold, Kraft cardstock (Papertrey Ink)
Fillable Frames #9 Die (Papertrey Ink)
Twine (Divine Twine)


I'll be back soon to share another project, have a fabulous day and thanks for stopping by!!!

Tuesday, February 5, 2013

Hearts For Your Love

Happy Tuesday!  Have you been looking at gifts for your Valentine this year?  I like to give a little something to my husband and all the kids to show that I care, and I am a little behind with the shopping.  Maybe I've been spending too much time scrapping and that's why my shopping isn't getting done :)
 
Today I wanted to share some of that crafty-ness I've been working on.  I used two different heart stamps from the A Hundred Hearts set to embellish this Valentine's card.


I did a lot of layering on this card with some papers and lace and stamps and pins and I really like how it turned out.  Sometimes you need a special embellishment in just the right size and color, and stamps are the perfect thing to grab.  That small heart, combined with that pink that matches the color exactly, really finished up that top corner.  The other heart looks great too, because those outline stamps are exactly what you need when you're using patterned paper for your stamping.  Keep your stamps where you can reach them and you'll always have the embellishment you need for your project!

Monday, February 4, 2013

Raindrops and Spring Flowers

Spring is here, flowers are starting to bloom and yes, spring showers have arrived too. Here is a card to brighten up those days!.

Image

Products Used

gel-a-tins 'Raindrops are Falling' clear stamp set
Xyron Mega Runner
Xyron Glue Stick
DCWV 'The Edumacation Stack'
Staz On Black Ink
Quick Quotes Powder Puff in Green
docrafts Capsule Collection Petals
Flowersoft Spring, Summer and Festive
Mini Fimo flowers
Letraset Pro Markers

I started by stamping the Girl with Umbrella using the green ink and colored it using the promarkers before i cut it out.

Image

I cut the base layer and fixed in place on a black card using the Xyron Mega Runner. Then I added the layered flowers using the Xyron Glue Stick. In the centre of the flowers I added the Flowersoft.

Image

I then added the fimo flowers randomly to the project.

Image

To finish I stamped the poem using the StazOn Black ink to the left corner.

Image