Saturday, August 31, 2013

Bunch of Thank Yous


Hello, gel-a-tins friends and family! As you have seen, this is a week of farewells and Thank Yous! Today is my last post for gel-a-tins. It has been a pleasure to be part of such a talented design team for over the past year! I am thankful for the opportunity and the chance to meet some wonderful ladies!


To make this CAS card, I used a variety of 'THANKS' from the Merci stamp set.  The main sentiment is stamped in pink. The rest are randomly stamped in black.

Interested in getting the latest updates from gel-a-tins? 
Join them on FACEBOOK! Or check out their blog, HERE!

Friday, August 30, 2013

Buzzzin' by with Birthday Greetings!

I'm a glad person that enjoys my birthday... every six months!
I'm trying to enjoy others' birthdays too. 
Sending cards is a fun way to celebrate others!
This bee card is a sweet card to buzzz on over to a friend on her 
special day.


Did you know that there are two sizes of silhouette sets that focus on grasses and insects?
See the bee peeking from the inside?


I used Bo Bunny Apple Cider Papers, that are perfect for the upcoming fall season
of crafting and living!  I love the way the flirty Lovebug Creations Buttercream Bow matches the lovely pearl accents.


This is my last official DT post for the Gel-a-tins company.
But, I am sure that you will see me using their stamps again and again.
Stop by my hive sometime!
Dawn Mercedes, of Sunnyside Up

Thursday, August 29, 2013

Thank You Thursday

I thought that instead of doing our usual Throwback Thursday this week, I'd do a little "Thank You" Thursday around here.  You see, this is the last week of the term for the current DT, and they have been amazing.  All you need to do is scroll back through some of the posts over their term and you will be totally blown away by the talent we have been fortunate enough to have as a part of this team.  There have been so many beautiful projects that they have shared that you will have no trouble finding something to inspire you to create.  They have also found so many creative ways to use stamp sets that I constantly find myself wanting some new set so that I can make the same thing!  It has really been wonderful to have them be a part of the gel-a-tins family.

So, THANK YOU, DT girls!  Thank you for being a part of the team and for the time and energy you've put into your art.  I have loved working with you!

And how about a big THANK YOU to our fans!  I love seeing posts and likes on the Facebook and it means a lot to have the support of loyal peeps like you all.  Thanks for stopping by every day and also for being a part of our Facebook page.  We wouldn't be here without you!

Well, I'm off to work on homework.  The fun of being a mom/college student never ends :)  Have a great Thursday!

Tuesday, August 27, 2013

Tuesday Feature!

It's time for the final Tuesday Feature of the month already!  Whew!  This week I thought we'd focus on something yummy...our Sweet Cakes set!

I've always thought this set was so cute.  I really like to stamp over patterned paper to add a little extra interest to my images and this is one of those sets that works perfectly whether you want to do that or not. 

Sweet Cakes

Big cupcakes, little cupcakes, a cherry on top.  What else do you need?  Let's check out some projects!

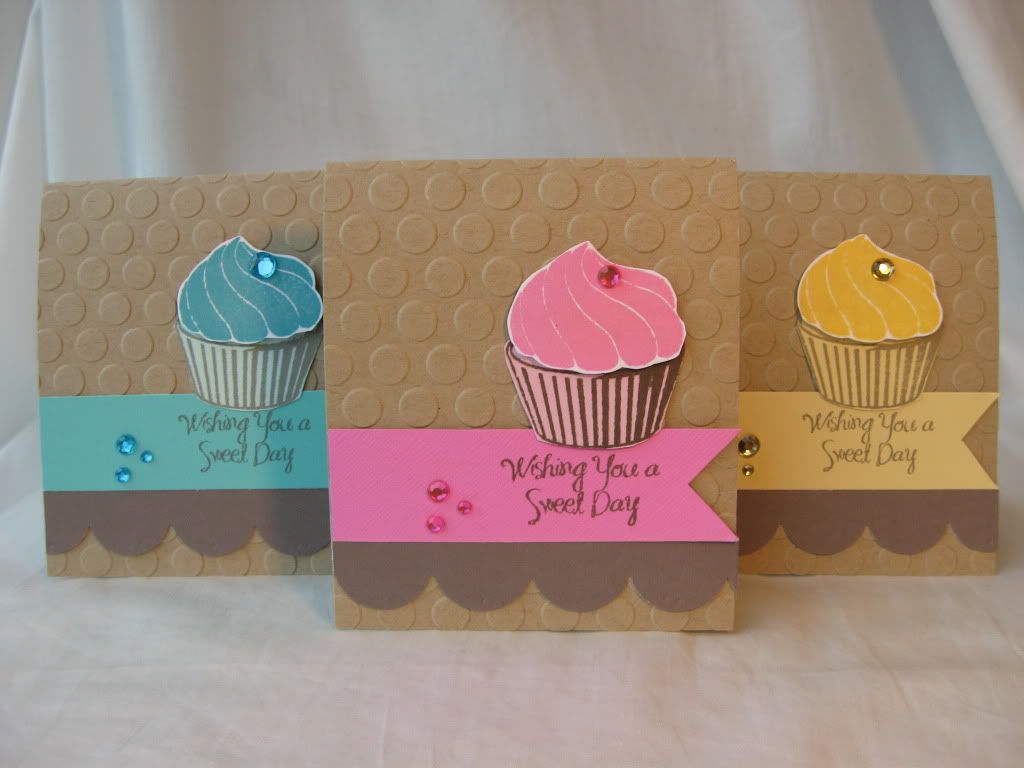
These cards from former DT member Anita are so cute that they make me want to make my own set!

Image

Making the same card in different colors is a great way to save some time, by the way.  If you know you have some birthdays coming up, just design one and get a few done together!  The designs in this set are really cute, but still very simple to cut out and that saves a lot of time.

This card has always cracked me up...


Googly eyes on a cupcake?  Perfect.  :)  I just had to share it for that reason.  Thanks to Donna for this one.

Look at the detail on this one by former DT member Linda:


That mini cupcake stamp combined with some Art Glitter makes for an unbelievable border to this card and then you have a big, beautiful cupcake in the middle! 

This post is making me hungry now. 

Jeannie made a card with some really amazing accents and she even did my favorite thing and stamped her cupcakes on patterned paper...

Image

Good enough to eat! 

I hope you've enjoyed the Tuesday Feature this month!  It has been fun for me to look back at these projects and share them with you.  This set can be found in the store here.

Monday, August 26, 2013

thanks ever so much

Well, my term is over here at Gelatins stamps and for my last project I made a thank you card. Specifically, thank you ever so much - to Bonnie & Jessica and all of the team members who I've worked with over the past several months.

I'm grateful for this opportunity and all you have taught me.

I used the leopard background stamp on this card. The inks are farmer jeans and teal damask, both Prima chalk inks.

For more details about my card, check out my blog.

Hearts a Flutter

It is Monday and we're going to pretend like it's Valentine's Day in August.  Can we do that?  Sure.  I said so.  :)  I have quite a few Valentine's Day stamp sets and I like to use them so last week I decided to make a little set of mini cards with the Hearts a Flutter stamp set.  I like them a lot, even though they're a little wild compared to what I normally make...


Get it?  Wild?  With the zebra?  I'm a dork.  :D  Anyway, I added some Canvas Corp. zebra print paper to the card bases with my Xyron 510, then inked around the edges with Distress ink in black.  The ribbons were added with my Xyron 150, and then I cut a slit along the spine of the card with my craft knife and tied twine by The Twinery around the front of the card.  The hearts were stamped in Stampin' Up inks, cut out, then attached to the front of the cards with foam adhesive (made in my Xyron).  These came together pretty quick once I decided on the design, and they'll be perfect to sneak into the boys' lunch boxes this year on Valentine's Day. 

Have a great Monday!  Happy Stamping!

Saturday, August 24, 2013

Dressed Up Envelopes

So often we leave card envelopes plain.  Why?  Don't they deserve a little primping up of their own?  Today I am sharing two dressed up envelopes I made using Gel-A-Tins Stamps "It's Your Day" and "SWAK" Collections.


I didn't do anything fancy with these envelopes.


For the SWAK envelope I just simply stamped one of the lip stamps with red Chalking Ink where the envelope is sealed.


To make the balloon border using the "It's Your Day" collection, I stamped the border image along the bottom of the front of the envelope in black Archival Ink.  The balloons are colored with Faber-Castell Pitt Pens.  

Aren't these dressed up envelopes fun?  Try making one for the next card that you make!  

~Kate

Friday, August 23, 2013

Blingy Love for gel-a-tins


Did you know that gel-a-tins has blingy gemstones along with all their awesome stamps? Today's project features the gel-a-tins gelly gem rolls.


The gelly gem rolls are available in a variety of colors. Perfect for a variety of projects! 

For this project, I cut the roll to fit the mat of the card. The simple sentiment is made using cardboard glitter stickers.

Looking for the latest gel-a-tins news? Stop by our FACEBOOK page, HERE!

Have a great day!

Wednesday, August 21, 2013

Start revving up those holiday craft engines!

With summer winding down, it's time to start planning for fall and winter holidays.
So, I thought I'd show off a fun card using Groovy Santa from Gel-a-tins!


I used some great glitter papers, so I thought I would carry 
on the glitter theme. 
I used the snowflake from this set to create a background.
Kalidescope Embossing Powder keeps it light and subtle.
Gelly Gems had a a belt of bling to tie it all together. 


I hope you'll pop on by my blog, Sunnyside Up, to let me know what your
holiday crafting plans might be this year!

Apple Greetings


Getting ready to ship those kiddos off to school? 
Why not make a little pocket for them to tuck in their new pencils.
(Or gift to a teacher...who can never have enough in her stash!)

Here I used the Apple Treat Box svg file
from The Cutting Cafe.  Cut two apples and two stems. 
Just remember to "flip" the image if you are using printed paper so that your shapes are irror images.
That way, they line up when you line them up.


Stitch around...or use Glue Dots ©.
Sponge the edges with ink for a vintage look.
I created a tag using Gel-a-tins: Make a Wish.

Green Leaves Rumple Ribbon is the perfect color for implied apple leaves!
Be sure to use Craft Glue Dots © to adhere the ribbon and tag.
Pile in some new #2 pencils...

And, your student, or teacher, will have a smile on their face every time 
they need to get out a new pencil!

Tuesday, August 20, 2013

Tuesday Feature!

Hey there!  I'm back today with another Tuesday Feature!  This week we're going to make it sparkly and show off the gelly gems!

Gelly Gem Roll-Ups- Silver

The gelly gems come in different styles and colors.  These guys can be left in sheets, cut into individual pieces of bling, die-cut, trimmed into strips, you name it!  This stuff is so versatile.  I have had a lot of fun using it on my projects and the DT girls have too.  I thought today that I'd share some of their ideas with you so that you can get an idea of the many ways you can use this super-affordable crafty supply!

First off, let's check out an adorable card by the other Jessica :)


She cut the bling apart and used it as sprinkles on the cupcake on this card.  Isn't that adorable?  This stuff is really easy to trim into individual pieces like this and adds just the right amount of sparkle.

Now Taheerah went all out with the sparkle on this one!

Image

Using the full sheet and just trimming it to fit your card makes a huge impact, but you can easily do this because it's so affordable!

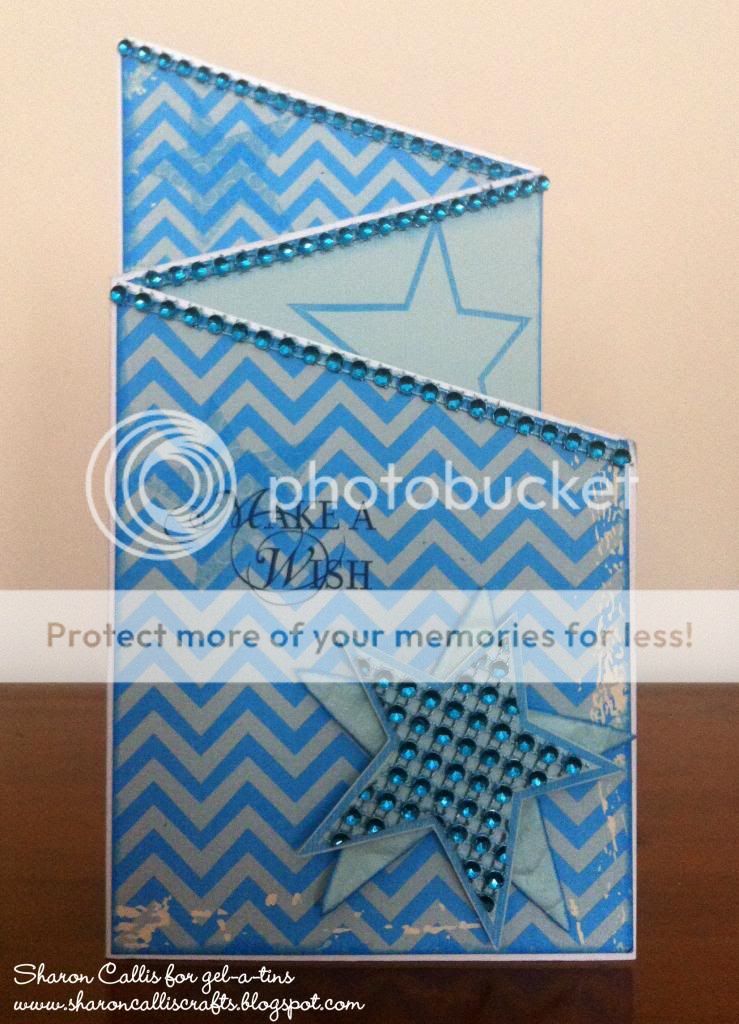
Here's a card by Sharon.  She did a star shape on this card, and some blingy trim. 

Image

Because the individual pieces reflect light like bling but aren't hard, they can be trimmed and die-cut in ways that regular bling can't.  This stuff is perfect for shapes like this.

I could keep going with the amazing DT projects, but I'm going to stop here.  Feel free to keep looking around the blog for more ideas and gelly gem inspiration!  You can also find the products in the store here.

I'll see you again next Tuesday with more inspiration!

Monday, August 19, 2013

HI card

Hi! I made a card today using one of the Amy Tangerine embroidery templates. I thought the "hi" template would look great on a card.

I used the Happiness stamp set from Gelatins stamps. I liked the thin border stamp but I wanted to use it as a background so I stamped multiple times on the background of my card & alternated the acrylic block so the pattern was different.

Happiness stamp set
For my entire supply list, please visit my blog today. Thanks for stopping by!


Saturday, August 17, 2013

Covered in Buttons!

This card is covered in buttons, but it definitely won't break the bank or send you searching for something in just the right size or color.  Plus you don't have to worry about shipping a super thick card through the post office and paying extra fees.  All you need is the Sewing Kit stamp set and inks to match your chosen papers.  I love this card!


I just chose to use one of the stamps because I wanted them to all line up like one the buttons on one of the papers in this Echo Park kit.  They actually looked a lot like this button, but way smaller.  I stamped these right onto my card base with Stampin' Up inks and then layered on a couple of papers and some May Arts ribbon.  That pin is by Maya Road and the sticker and paper accent are from the paper kit.  The sentiment sticker is by American Crafts and I got a few different kinds at Target.  They're pretty handy.

I loved the bright colors in these papers and combining them with my stamps and making a birthday card was a really fun way to use up some of my bitty scraps that I had left over from other projects that I've made with these papers.  Get some cards made this weekend with your gel-a-tins and scraps!

Friday, August 16, 2013

Triple Sweet Card

Happy Wednesday! Kate here. Today I am sharing a triple sweet card with you.  


I used the Sweet Cakes stamp set to create the ice cream cones.  The ice cream was stamped using Quick Quotes Chalking Ink in the same pink tone as the cardstock, creating strawberry ice cream.  Each ice cream was then hand cut out to top the cones.

Have a sweet day!

Gel-A-Tins Stamps:
Sweet Cakes

Other Supplies:
Core'dinations Cardstock
Quick Quotes Chalking Ink
Imaginisce i-rock & Glam Gems

Thursday, August 15, 2013

Throwback Thursday With Kate

Happy Thursday! Kate here today, sharing a couple of fun photos.  All this month the Gel-A-Tinas are hosting Throwback Thursdays.  We are giving you a little peek into our past and hopefully making you smile (and sometimes giggle) with us.

My sister, Sandy, is a huge part of my daily life. When we were young she was a total pain in my tush, but I thought nothing of taking the blame for her mischief time and time again. Check out this photo of us as young children. Totally giving my age away by telling you that this is 1973,  Sandy is two and I am three. Pretty sure I am holding on to the back of her jacket so she doesn't run off.


Now a days, I depend on Sandy for support, laughter and love.  She is a whip, too!  Keeps me in stitches and is quite often the voice of reason.  I love her ability to tell it like it is.  Here is a picture of she and I at a play in the park a few weeks ago.  Somethings just don't change!


Hope you enjoyed a little throwback of my life.  Please come back tomorrow, I'll be sharing a very sweet card.

Kate

Wednesday, August 14, 2013

You're the BEST


Hello, gel-a-tins fans! I decided to continue to use watercolors on my cards lately, and today is not different!
I am sharing a card using the gel-a-tins Butterflies are Free and Merci stamp sets,

The butterflies were just screaming to be done in bright colors!


What to receive the latest and upcoming gel-a-tins news? Join us on Facebook and Pinterest to get the latest news!

Supplies:
gel-a-tins - Butterflies are Free and Merci

Tuesday, August 13, 2013

Tuesday Feature!

Welcome back for another Tuesday feature!  I'm excited for this one because this is a stamp that I can remember talking about with the owner before she even finished designing it.  I kept telling her to get it made because I wanted it right away!  :)

It is still not just one of my favorites, but probably my actual all-time favorite of all of my stamps.  I've used it so much that it's stained (not that you can tell that when it stamps, I just have a tendency to not actually clean my stamps after I use them), and I gave up on putting it away.  it has it's own block that I keep it on at all times so that it's just ready to go. 

Of course I'm talking about Love Knots!

Love Knots - Click Image to Close

The first thing I want to show you is a layout made by current DT member Ashley.  I love the way she used the stamp on this one:


The white ink on the black background is so perfect for this layout and so different from what you expect to see in a woodgrain pattern.  But that's the great thing about stamps, you can do whatever you want with them!

Now, how cute is this magnet made by Taheerah?


Coloring in sections of the grain adds some funky color and interest.  Plus, it's a magnet!  Hello?  How fun is that?  You can definitely see from this project that hearts aren't just for Valentine's Day.

Here's a great idea for another fun and different way to use your stamps.  This project is by former Dt member Donna:


No wrapping paper?  No problem.  The Love Knots stamp is so pretty here and really dresses up this little gift.  Imagine how it would look stamped in silver or gold ink.  I would end up keeping the present and saving the gift box for later too.

I'm sure you can start to get an idea why this stamp is one that I have in my stash and at the ready at all times.  I use it on cards and projects constantly.

I'll see you next week with another stamp feature and more project inspiration!

Monday, August 12, 2013

Bee Thanks


Another lovely thank you card.
This time, I chose to use silhouette images and a sentiment 


Wild Things stamp set has love flowers and insects.  
A few simple pearl halves dot the panel for interest and tie in some of that lovely
apricot color in a deeper shade.

The sentiment comes from Admission is Free.


To create the colored background, I used post it notes to mask the top and bottom edge
of the area I wanted to color.  First I scraped an apricot ink pad
across the middle portion.
Then, I scraped the pink and celery ink to either side.

I stamped and embossed the silhouettes in black.

Propped up the panel using Pop Up Glue Dots ©.
Then added a few pearls for interest.

Thanks for buzzing by today.
Feel free to flutter by my blog: Sunnyside Up


Saturday, August 10, 2013

Just for You card.

Love Knots is probably my favorite Gelatins stamp. It is SO cute.
Love Knots
For my card, I used the Love Knots stamp background + a sentiment from Little Buddies.


a close up of the Love Knots stamped image
Isn't it beautiful?

For more details & a supply list, visit my blog today. Thanks for stopping by today!

Friday, August 9, 2013

Love Ya!

Happy Friday!  I'm back again today to share a little card with you all.  This one was made with some paper that I picked up at that scrapbook convention this last spring (jeez.  How many times have I said THAT over the last few months?  You'd think I went on a major shopping spree there).  The paper is by My Mind's Eye and it is what inspired the card.  Let me show you what I mean.


That background paper reminded me so much of the Put a Cap on it set that I thought I should use them together.  I layered that paper on first and then put the chevron paper over it so that it wouldn't be the first thing you saw.  Then I added a strip of one of the coordinating papers with more stars on it and some grey to tone down all that color.  I tied a bow in three colors of twine by The Twinery and then I added my stamped and cut-out embellishments.

I love the colors in this set and when you combine it with these stamps it all looks adorable!  I can't wait to give this card away.  Be sure to stop back tomorrow for another great project and have a wonderful weekend!

Thursday, August 8, 2013

Throwback Thursday!

Woohoo!  Look out because today I am going to share my jam with ya!  :)

I get teased for it and I don't even care.  This song puts a smile on my face every time I hear it.  It makes me dance in my seat in the car, it makes me shake it while I clean the house and it makes me grab that pretend invisible microphone because you know I have to sing along.  My jam is...


I didn't see a good copy of the actual video posted or I would have shared it.  There are some pretty sweet dance moves in that one. 

As far as the throwback portion of this...wow.  I was in junior high when this came out and I loved it right away.  I always have.  How could I not love a song that's so happy and fun to dance to?

So, what's your favorite?  Over the next two weeks some of the other gelly peeps are going to post on Throwback Thursday so you might just get to hear about their favorite songs or learn a little something about them too.  Be sure to check back!

Wednesday, August 7, 2013

He is All Boy!

Hello Gel-A-Tins Fans.  Kate here today, sharing a layout I created of my sweet grandson, Chase.  Chase is all boy!  The "Hello" stamp set has some perfect adjectives to describe him, so I used these stamps to create a focal point on my layout. 


I used a Core'dinationat Core Bookmark, that was painted a bit with Distress Paints, to stamp several of the adjectives found in the "Hello" Collection.  I stamped the "guarenteed trouble" emblem right onto textured Core'dinations Cardstock and then hand cut it out.

Gel-A-Tins Supplies:
Hello Collection

Other Supplies:

Core'dinations Core Essentials: Brights
Core'dinations CoreTag: Smooth Bookmark
Core'dinations Tim Holtz: Adirondack
Core'dinations Dust Buddy
Core'dinations Sandit Gadget
Fiskars Crimper
Ranger Archival Ink & Tim Holtz Distress Paint
Basic Grey Patterned Paper
Sizzix Dies
Die-namics Alpha Dies

Tuesday, August 6, 2013

Tuesday Feature!


Today I'd like to feature one of our stamp sets and some of the fabulous projects that our current and past DT members have made with it. 

This week I've decided that we're going to be all about the Admission is Free set.  I have loved this set since I first saw it and I've always thought it was so cute and versatile.  The projects I'm about to share with you will give you a small idea of the many ways that you can use this great little set!
Admission is Free
First up I have a project by Kate, one of our current DT members:
 
 
How amazing is that?  I can't tell you how much I've paid for little kraft tickets to use as embellishments, but with this set you can not only make as many as you want, but you wouldn't be limited to one color!
 
Speaking of color, look at this card by current DT member, Dawn:
 
 
Just a few stamps and you have a cheerful card that hardly needs any embellishing at all.  I love the clean and simple look of this one!
 
And here's a blast from the past.  This card is from a previous DT member, Natalie.  It was always one of my favorites:
 
 
The layering with the paper adds so much fun pattern and color, but the focus is all on the stamps.  You can mix and match the sentiments in this set in so many fun ways, it always looks fresh.
 
You can check out the Admission is Free set in our store here.  I'd love to hear what you think of this set and what your favorites are!  I'll be back next Tuesday to share another one of my favorite sets.  See you then!


Saturday, August 3, 2013

A Rainbow Birthday!

Hello and Happy Saturday!  I'm back for the third time this week (sick me yet?) to share a little something with you :)

I decided that I wanted to use my stamps to make the background on this card and so I chose a birthday sentiment in a simple font from the Make a Wish set and stamped it over and over, staggering the placement of each line, with my different colors of ink pads.  I wanted that to be the main focus so when it came time to embellish I kept things pretty simple and just added a few items. 


That scalloped piece is by October Afternoon, the flags are Basic Grey and the ribbon is May Arts.  The star is old, and I can't remember where it came from (sorry!).  Looks like Fancy Pants to me though.  The background paper that I stamped over is my Simple Stories. 

I like this one a lot and I can see myself doing this technique over and over again with different stamps and sentiments.  It really didn't take long at all because I just had everything set out and ready to go.  My ink pads were all lined up in order and my stamp cleaning pad was used in between each color so it went fast.  This would be a lot of fun on a small card with a plain white background as well.  Try it out the next time you're in your crafty space!

Have a fun Saturday!  See you next week!