Showing posts with label Button Up. Show all posts

Friday, January 13, 2012

Sew in Love!

Happy New Year everyone! Even though its only January, I thought I would inspire you with a card that can be used for the upcoming holiday- Valentines Day or if you just want to tell someone special that you LOVE them. I used the SEWING KIT stamp set (found in the store: here) , and this stamp set is AWESOME!

sewing-big.jpg

So versatile, and it comes with super cute buttons, that can be embossed, stamped, threaded etc... I loved the long stitching stamps too, and decided to make the background of my card using them! Here is the card:

IMG_8867 (640x426).jpg

And here is a close up of the sentiment
IMG_8866 (479x640).jpg

Instructions:
1. Stamp in alternating order the three long stitches in three different colors on cream cardstock.
2. Mat this onto black cardstock, and then place on your red cardstock card.
3. Attach the flower.
4. Stamp the LOVE button on red cardstock. Thread bakers twine through the button holes. Tie a bow. Pop the button up on the flower
5. Finish the sentiment by adding "sew in" in tiny alphas.

Materials Used:
Gel-a-tins Stamp: Sewing Kit
Papertrey Ink
Papertrey Cardstock
Ruby Rock-it Alphas
MS Twine
Best Creation Foam Tape

Monday, October 24, 2011

Fun and games!

Happy Monday to you all!  Today I have a very cute project made by our DT member Angela to share with you.  I know I talk a lot about all of the things you can use your stamps for besides card making, and this is a perfect example!

"One of the things I love about stamping is the ability to make something new out of paper and ink. I also homeschool my children and they are just the right age to really enjoy learning and playing games. I made a checkers game by using three buttons from the Buttoned Up set, two round buttons, stamped and heat embossed using Teal You What and Gellin Melon Gelly Powder, then stamped the square button to make a grid on my cardstock. The buttons punched out easily and quickly using a 1" circle punch. The coolest part? The entire game is magnetic - I punched and adhered thin magnetic sheets for the playing pieces, and used a stronger thicker magnet material for the game board (since it had to attract through the cardstock it was glued beneath). I love that my kids will be able to tuck this game board in a bag for travel and that it's flat to store easily!"


What a neat idea!  You could have a lot of fun with that (and what kid doesn't love getting a new game?).
Don't forget the monthly challenge!

Monday, August 29, 2011

Some color for your Monday!

We have a really cute, summery card for you today from Angela!  I love all the color!

"Another colorful card (I call these "popsicle colors!") using the Many Thanks set and Sewing Kit.

Image

For this card I die cut a notepaper sheet using a die from Papertrey Ink and stamped it for my focal point. I inked the large sentiment assortment stamp with three colors of ink, starting with the lightest, inking different areas of the stamp. Where the inks overlap a new color is formed so I ended up with quite a rainbow effect! I stamped it on an angle and then filled in the white spaces with buttons.

Image

The paper is from Sassafras and I added a little vintage button and some baker's twine for an added touch."


This week Bonnie has given a previous surfing layout an update by adding
the perfect gel-a-tins® touch with our new Surfs Up stamp set. 
I knew thatour Surfs Up stamp set would make the perfect embellishments to
the layout I did a bit ago of DH surfing here in California.
On craft paper I embossed with gel-a-tins® White On and Back in Black embossing
powders. I used pop dots to adhere the surfer to the flowers. I took some natural
twill ribbon and stamped the shell images with StazOn ink in Timber Brown.

Here's a quick thank you card Bonnie made using
gel-a-tins® stamp sets Sheltering Tree & Many Thanks stamp set.

I stamped the tree using images from the Sheltering Tree  stamp set in river rock by stampin' up! and timber brown by stazon. I used the thank you sentiment in purely pomegranate by stampin up! 
as the 'apples' on the tree. Papers are BoBunny and nook & pantry from BasicGrey. 
Cloud buttons were from my stash.


Did you see yesterday's post?  We're looking for some new gel-a-tinas!  Be sure to check it out and submit to be a part of our team!


Friday, August 26, 2011

Stay tuned...

We have a BIG announcement on the blog on Sunday, so be sure to check back in for that!

Now that I've mentioned that, let's get to the projects!  We have some great stuff from Ellen and Sharm to share with you today.  Take it away, Ellen!

"So I was making this layout and made a mistake along the bottom where the two pieces of paper meet. At first I was worried and set the layout aside and then I thought, "wait!...this faux stitching stamp is perfect!". So I used a scrap piece of paper, stamped it, cut it out and then made it into a banner shaped and layered it over the mistake.

I used the color scheme from Scrapbook & Cards Today's Colour Suite Challenge."


Patterned Papers: LYB
Chipboard: Maya Road
Mist: Shimmerz
Cardstock: Core'dinationsInk: Stampin' UP!
stamps: gel-a-tins

And now for another sweet card from Sharm!


Materials Used:
Cardstock: Ivory Cardstock
Stamp Set: gel-a-tins Birds of a Feather
Patterned Paper: Melissa Frances
Flowers : Prima
Ink : Staz On and Ranger Distress Inks


Wednesday, August 24, 2011

Cards to greet and cards to thank...

Hello again, gelly fans!  I'm back with more card for you today, this time from DT members Angela and Cassie.

Angela is going to start us off with a cute thank you card made with the Button Up and Many Thanks sets!

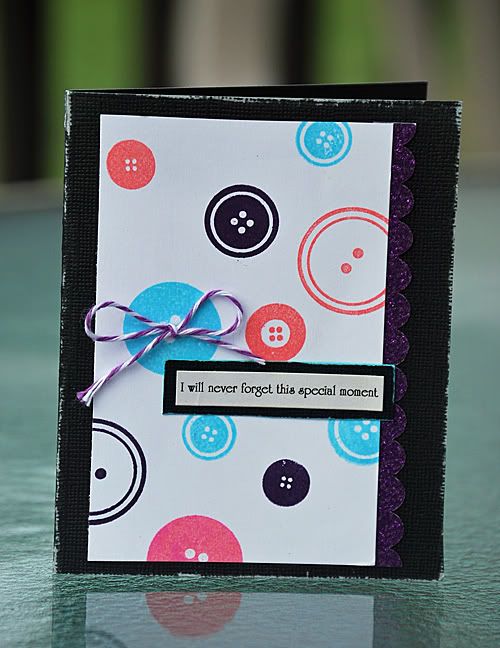
"So if one layer cards have a layer on top of the card base, then I guess this is a zero layer card! I used the Sewing Kit set, stamping buttons in a grid pattern, and added a round sentiment stamp from the  Many Thanks set to give my card a purpose!
This is a supplies-limited card - no patterned paper used, no embellishments, just a handful of inks (Close to My Heart Smoothie & Honey and Stampin' Up! Mellow Moss) and a card base."


Cassie has another card for us that she made with the Thanksgiving set.

"I decided to make a 5x5 card and to show off that fun turkey from the new Thanksgiving set. How could you eat that adorable little guy?!


Ink: Memento Tuxedo Black, SU Crumb Cake, CDS Turquoise Gem
Paper: parchment, buttercream, SU Dusty Durango, SU dp
Accessories: Copics, Circle & Labels 3 Nestabilities, Open Scallop Die-namics, sponge, brown button, teal ribbon, brown fibers

We don't have much time left for you to get in your projects for our monthly challenge!  Check out the post and enter to win!

Monday, August 22, 2011

A card that looks good enough to eat!

Today I have another sweet card from DT member Gladys to share with you!  I love to bake and I have to admit that I still love all the cupcakes you see all over the Internet.  The best things about this one?  No calories and it won't melt in the summer heat!

"I have a Cupcake card for you! I am using the biggest button from the sewing kit set! Love how big it is! I added two leaves and dust some glitters! How cute is that! :)"


Supplies
Paper: White stamper cardstock, Echo park - Little girl and summer days 6x6 pattern paper
Stamp: Sewing kit from Gelatins
Ink: Memento Rose bud
Others:Palette stamp & stick glitter, leave, large scallop border die from pti, pom pom string

This is a project that I made with the Many Thanks set.  I love having wine glass charms for my guests, and the little stamps in this set made me think that I could make custom ones for Thanksgiving.


I used Tim Holtz acrylic fragments for the main parts of the charms.  I stamped onto cream patterned paper, colored in the stamps with markers and then ran them all through my Xyron upside down, so they'd be sticky on the stamped image.  I attached them to the tags, then trimmed around the edges and sealed the paper with Glossy Accents.  Just add a little color around the edge with a gold paint pen and a charm and jump ring and you can use ribbon to tie then around wine glasses.

Be sure to check out our Monthly Challenge!  You can win the set I used to make these charms!

Wednesday, August 17, 2011

Cards that are spooky and cards that are sweet!

More fabulous cards to share with you today!  After you check these out, be sure to stop by our Monthly Challenge and head over to the store for our monthly special!
"I tried a neutral look after liking Karin's card so much. "

Image

"This card is really very simple - no fancy techniques so the emphasis stays on the stamps. Paper is Circa 1934 by Cosmo Cricket.
The pumpkin was stamped on textured card stock which gives it a distressed look, and I inked the card stock (which was a creamy yellow) with mustard ink to emphasize the texture."

Image

Gladys made this sweet card with the Button Up set!

"Here I have created a baby onesie using sewing kit! Love the buttons and sewing stitches in the set!"


Supplies
Paper: White stamper cardstock, Echo pattern paper - little girl, OA - 5&Dime
Stamp: Sewing kit from Gelatins
Ink: Versamagic Aquatic Splash, Memento Bamboo Leaves, Grapes Jelly, Lilac Posies
Others: Baby Onesie die from pti, pom pom string, Limitless diecut from pti, 1 3/4" circle punch, Number die, 1" ciricle punch and 1/2" circle punch, blue twine, pink felt, toothpick, clear jewel

Tuesday, August 16, 2011

Paw print banners and stitching!

The two projects we're sharing today are so cute!  Adding the smaller paw print stamps in the Cosmo Pups set to the banner on Karin's card is making me want to make a banner card of my own, and I think we already know how much I want that Button Up set with the stitch stamps.  I could use that on anything!  Let's see that card by Karin first...
"I've used another of the sweet dogs from Cosmo Pups- I just LOVE that set!!! I stamped it colored it and cut it out and placed it on a doily I cut out with my silhouette. The little banner is stamped with the little paw print that is also from the Cosmo Pup set."


Papers from October Afternoon - thrift shop

This adorable layout was made by DT member Ellen.  How cute are those stitches from the Button Up set?

"Faux stitching is a super quick and easy way to add fun accents to any page. For the bottom of the page, I stamped the entire stamp in black ink and then wiped off some of it so the strip wasn't as long. All you need is a wet paper towel or baby wipe."

Image

Image

Supplies:
Gel-a-tins stamps
Stampin' Up! Ink
Patterned Papers: LYB
Alphas: Bella Blvd
Photo Action: Coffee Shop Blog

Monday, August 15, 2011

The perfect accents!

If you're looking for the perfect touch to add to your project, you really can't beat gel-a-tin stamps!  We have two projects today that have that special something, all thanks to our stamps! 

I (Jessica) made this card with the new Many Thanks set.  I did choose fall colors for it, but I don't think it has to be something that I save to use during that season.  I love the choice of sentiments in this set, and all the different stamps are perfect for cards!


Paper: My Mind's Eye, Cosmo Cricket, Chatterbox
Ribbon flower: Made by me with ribbon from Michael's
Markers:  Martha Stewart
Ink: Staz-On and Ranger Distress inks
Twine:  The Twinery
Leaves:  Recollections
Flower:  Heidi Grace

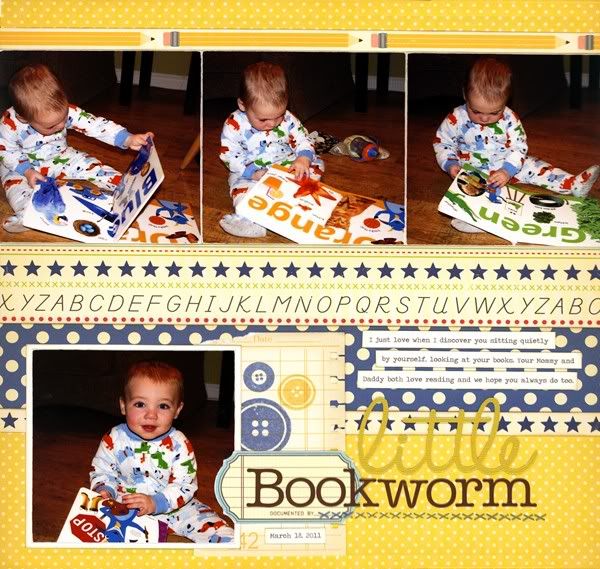
Cherie made an adorable layout even more special with our Button Up set!

"I'm really pleased with this layout. I love that I was able to get four photos on the page without sacrificing title or journaling. I stamped the buttons on the journal paper and the stitches stamp under my title to emphasize the "bookworm" part of my title."


Image

Patterned Paper: October Afternoon
Journal Paper: Jenni Bowlin
Stamps: Gel-a-tins
Die Cut Title: Silhouette
Stickers: Scenic Route
Die Cut: Jillibean Soup

Be sure to check out our monthly special price on the Super Star set and don't forget to work on your layout for our monthly challenge for a chance to win the Many Thanks set!

Friday, August 12, 2011

Friday Fun!

It's time for more inspiration so let's get to it!  First off, it's a card from Gladys!  She used the Button Up sewing kit to make this cheery card!


DT member Angela used the Happy Halloween set to make this card.  I love that resist technique with embossing powder!

Image

"I did LOTS of heat embossing on this card using White On gelly powder for the ghosts. After they were embossed, I sprayed the cardstock with Graphite Glimmer Mist from Tattered Angels and wiped away the excess. Hint: if you miss a spot or two with the white gelly powder, a white gel or paint pen can be used to fill in the hole after misting.
The background was stamped with the moon stamp from the Halloween set and heat embossed using yummy scented Milk & Honey Gelly Powder. It's a beautiful creamy yellow, a little bit transparent when melted.
The sentiment was inked with pumpkin ink, then I rolled the edges of the stamp in black to give that awesome two-tone look. It was a fun card to make and very Halloween-y to me!"

Image

Monday, August 8, 2011

Buttons and Stitches


If you've been visiting the blog you've seen the projects the design team has made with our Button Up set.  This set combines adorable button and stitch stamps that will add that perfect finishing touch to all of your projects.  The two projects we have to share today show just how cute this set is.
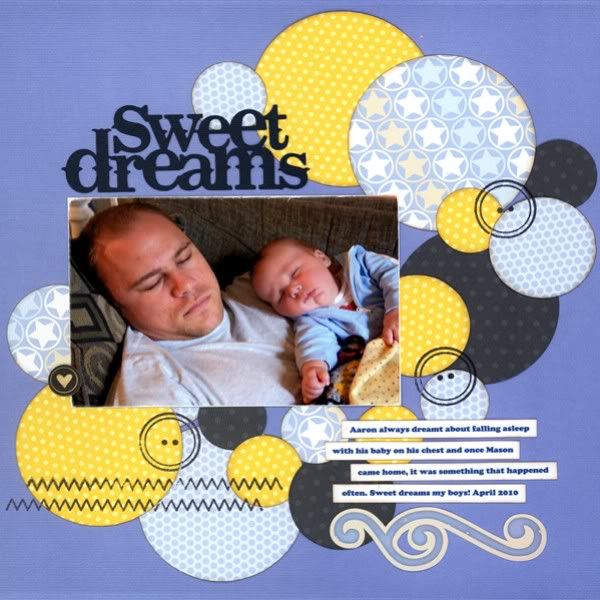
First we have a project by DT member Cherie.  She made this layout and added buttons and stitches to finish it off.

"This layout sort of happened by accident. I saw a layout with circles that inspired me so I started cutting circles. Since I didn't know what sizes I wanted to work with, I cut a whole bunch and when I was done, they were all kind of just lying in the perfect spots so I lifted each gently to glue them down."

Image

Cardstock: Bazzill Basics
Patterned Paper: Pebbles Inc.
Stamps: Gel-a-tins
Sticker: Pebbles Inc.
Chipboard: Basic Grey
Die Cut Title: Silhouette
DT member Ellen made this card that just screams happy!  I love what she did with the stitches!

"Who needs a sewing machine when you can create your own faux stitches with this cute set! It is super easy and this 5x5" card is the perfect size to create your own faux stitched border."

Image

Image


Tuesday, August 2, 2011

Mix and Match Your Sets!

I know that I like to use stamps from different sets on my projects, and the gel-a-tins sets are perfect for this!  Whether you layer your stamps or cluster them together, you can create anything!  Sharm shows us how with our first project today.  She used Birds of a Feather and Many Thanks to make this card.

"Here's my card using the Birds of a Feather and Many Thanks Stamp Set. I love the Birds of a Feather set cause you can build you own lil scenery! It's versatile, and really lots of fun to work with! The Many Thanks stamps is wonderful as well as it has just to many ways to say Thank You! :)"


Materials Used:
Patterned Paper: Cosmo Cricket & My Mind's Eye
Stamp Set : Many Thanks & Birds of a Feather
Punch: Ek Success Border Punch and xCut Scallop Punch
Ink: Staz On
Our Button Up set has stitches and buttons that you can use on just abour anything!  I have got to get my hands on this set!  Gladys used hers to make a cheery card!

"Here is my first Aug card, using the sewing kit stamps. Love the several different buttons stamps in them. I stack different layers up and create a document ring and top it up with rhinestone. So cute!"

Supplies:
Paper: Royal Velet, vintage cream , stamper's select white cardstock from pti, little girl from echo park
Ink: Versamagic pretty petunia, Memento grape jelly, Lilac posies and Lulu lavender, versafine Onxy black
Stamps: Button Up from gel-a-tins and Victorian Summer from skipping stone design
Others: purple burlap string, liquid pearl - lavender lace and basic grey bling it rhinestone, die cut from pti

Monday, August 1, 2011

Monday Greetings!

Today we have two more cards for you from DT members Ellen and Karin.  Let's start with the card Karin made using the Cosmo Pups set!
"The set I got to work with this month is the oh sooo cute Cosmo Pups. I just love the sweet dogs and the sentiments are super!
I stamped my background and the clouds are cut with my silhouette.


That is just the cutest card!  How could anyone stay mad when they see that face?

Ellen made this card with the Button Up set.

Image


"These button stamps are perfect for creating your own backgrounds. Stamp some bright colors on a white background. They really pop off the cardstock. Add some twine and you are good to go."

Monday, July 25, 2011

Gel-a-tins: Here to help you beat that case of the "Mondays"

I hope you're all having a great day out there!  At my house we're counting down the days until school starts (well, I am, anyway).  The kids go back on Wednesday here and I am looking forward to some uninterrupted crafty time!
 
Our first project today is by DT member Cherie made with the Button Up set.  It's an adorable card.  Be sure to leave her some love today in the comments because it's her birthday!!  Happy Birthday Cherie!
 
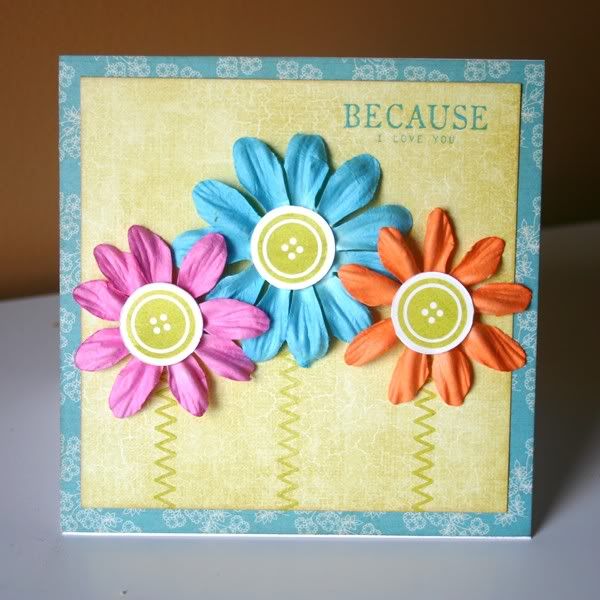
"Here's a card I made with the buttons set. I thought the buttons just screamed flower centers so as soon as I received them I started sketching up this card. The stitching stamps make great stems as well!

Zoom out

Patterned Paper: Pink Paislee & Lily Bee Design
Stamps: Gel-a-tins
Rub-On: Creative Cafe
Flowers: Prima Marketing
Ink: Colorbox
This next card is by Cassie.  How amazing does all the black and white look with those Witchy Poo Halloween stamps?  I think I need to lift this one! 
 
"This new Halloween set has so many great little stamps. A person could have a lot of fun making their own dp with them :) I stamped the banner and then embossed it and cut it out to make a border. The image panel has the spider web and other little images stamped around for the background, and then the cauldron is stamped and embossed in black to make it stand out. "

Halloween1CT3nwm.JPG

Ink: Memento Tuxedo Black, Memento London Fog, Versafine Onyx Black, SU Creamy Caramel
Paper: SU dp, CDS Cottonball White
Accessories: black embossing powder, CDS Designer Label Die, silver brads

Wednesday, July 20, 2011

Wednesday Scrapping!

We have some projects to lift those mid-week blues! 

This first card is from DT member Karin.  I love stamping over patterned paper, and this card really shows off the stamps from the new Witchy Poo set!


I stamped the haunted house on text paper with Walnut Stain ink (TH).
Used spellbinders die for the window and the little tag.
The kraft cardstock is embossed using PTI's text embossing plate.

DT member Cherie made this sweet layout with the new Button Up set.  I have got to get this one!

"I love buttons and the Buttons Set is a great way to add buttons to your page without the bulk. Stamping your buttons is also a great way to add that perfect embellishment by finding an ink that matches your papers. For this layout, I stamped three different buttons onto white cardstock and used a circle cutting template closest to each size button. Then I could place the buttons on my layout wherever I needed to for a custom embellishment. For extra dimension, you could even pop dot the buttons or use thread through the holes of each button."


Patterned Paper: Pebbles Inc.
Stamps: Gel-a-tins
Ink: Stampin' Up!
Chipboard: Pebbles Inc.
Die Cut: Jillibean Soup
Die Cut Title: Quickutz Silhouette
Journal Card: Unknown

Monday, July 18, 2011

Happy Monday!

I hope your week is off to a great start!  Our first project today is this layout by Sheree.  She used the Button Up set to add accents to her page.

"I love using this stamp set to make your own hand made buttons. By stamping the buttons onto patterned paper then adding a crystal lacquer over the top you can customize your embellishments to match your page..."


Products Used
Little Yellow Bicycle Patterned Papers
Prima Canvas letters
Misc Doily
Button Up stamp set - gel a tins

This shadowbox card is by Cassie.  She used the Witchy Poo set and it really shines!
"This set just screamed 'Shadow Box' card to me. I love these kind of cards, because you can really make a fun scene. The images are embossed for added dimension."
Here is a link on Splitcoast for the Shadow Box card.

Halloween1CT2nwm.JPG
Ink: Versafine Onyx Black
Paper: unknown purple, BG Eerie
Accessories: Scor-pal, Circle Nestabilities, dimensionals, black embossing powder