Hi everyone! How are you all doing today?
I'm very sad to be writing this post, because... this is my final post as a member of the Gel-à-Tins DT.
I've had the most amazing time being a member of this Design Team. Jessica and Bonnie have been a dream to work with and have supported me every step of the way, and I truly feel that I have grown as a designer during my term as a direct result of my opportunity here. Unfortunately life just sometimes throws up circumstances where you have to say goodbye, and that time has sadly come here. I want to publicly thank Bonnie and Jessica for taking a chance on me and selecting my for the DT, and the to thank the DT girls themselves - they are a lovely, talented bunch and I hope to cross paths with them all again.
I thought I would finish up my term here by posting some of my favourite Gel-à-Tins creations, some old, some new:
First up, my first ever DT project - a super-fun tag featuring Chevron-Tastic. I named this set you know!
Next, an I Love You card featuring the Laugh Out Loud alphas:
Up next, my ombre card featuring Flutterby:
A couple of Polaroid-style photo frames featuring my most favourite set, Love Knots:
A fun and funky good luck card using the Zebra Print Background:
A fun Robin Hood-like card, using the Crackle Paint stamp as tree bark:
A yummy cupcake using the Sweet Hearts set:
A super-blinged out card using the Gelly Gems Roll-ups:
The SWAK mini set helped me pull off this awesome Pop Art-inspired piece:
And finally, my last card, using the Leopard Background stamp to create a moonscape:
I would finally like to thank all of you readers who have read my posts and posted comments on my creations. It means more to me than you will ever know. I am truly grateful for all things Gel-à-Tins and hope it won't be the last time we meet. If you would like to stay in touch with the rest of my work then please visit and follow my blog *Fill Your Paper With The Breathings Of Your {Heart}*.
Thanks for the memories!! Love you all!!
Taheerah xoxo
Showing posts with label Flutterby. Show all posts
Tuesday, July 30, 2013
Thursday, March 28, 2013
Flutterby Birthday
Here is a delicate card with pastel tones. It's got a femine feel that would be perfect for Mum.
Products Used
gel-a-tins gelly jr 'Flutterby'
gel-a-tins gelly powder 'White On'
Martha Stewart Lavendar embossing powder
Trimcraft 'Spring Drop' 8x8 Stack
Xyron Mega Runner
Spellbinders Shapeabilites 'Moroccan Accents' dies
Paper Doilies
Topper from Stock
8"x8" Card Blank
Adhere the base layer of striped paper and paper doilies to your base card using the Xyron Mega Runner.
Stamp and heat emboss the gel-a-tins butterflies on a strip and cut out. Layer on top of a strip of green paper using the Xyron Mega Runner.
Die cut two border pieces and adhere under the edge of the green base card. Stick the whole piece in place onto the base card over the doilies.
Finish by using the topper at an angle tucked under the border.
Monday, September 17, 2012
Damask and a Flutterby
Hello it's Anita here and today I have a fall card to share! I love the colors
of fall, even though I don't like what it brings, back to school and cooler
weather! Today I am playing with two Gel a Tins stamps the Damask set and a
Gelly Jr Stamp Flutterby!

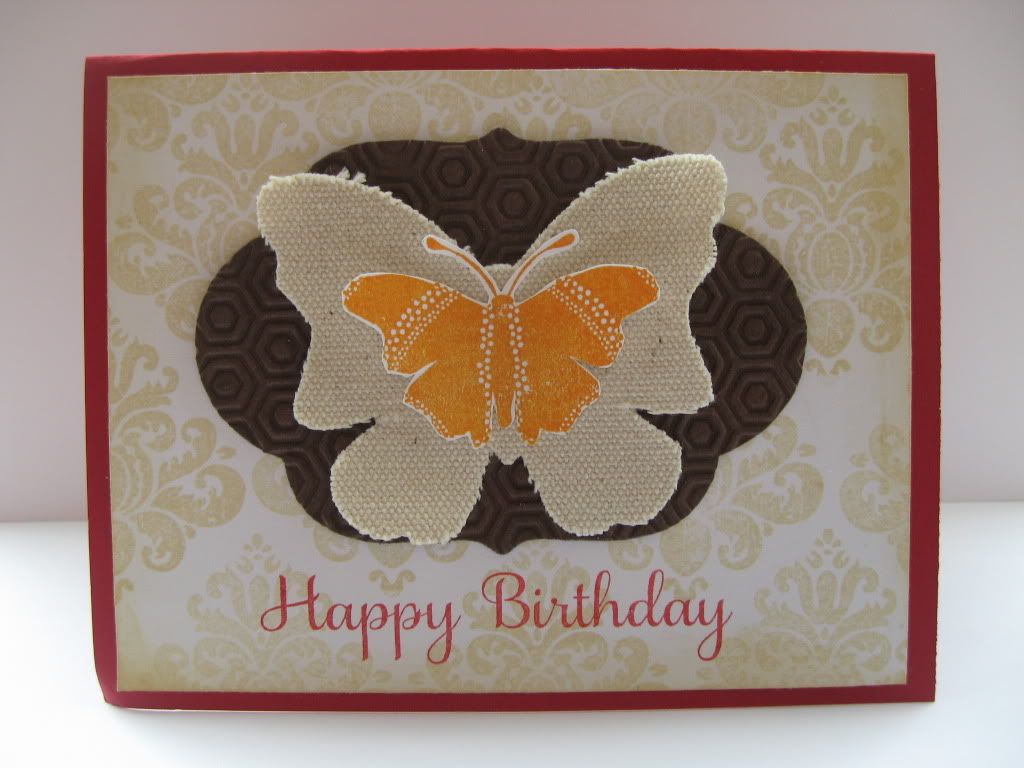
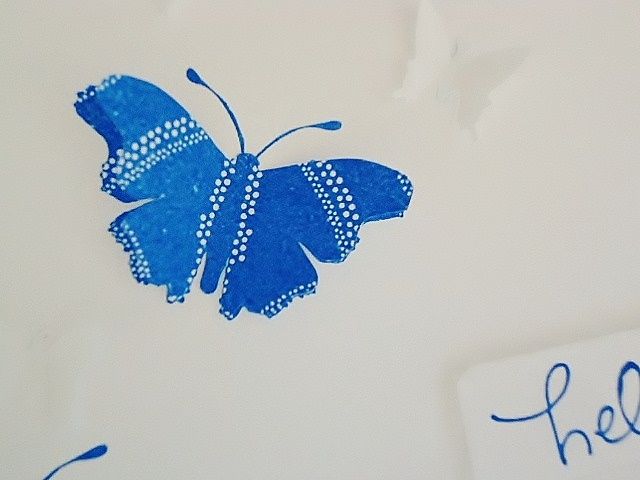
I stamped the Flutterby in orange ink and put behind it a canvas butterfly. I love the texture of canvas! I also added a die cut and embossed it! I love butterflies so much and try to use them in any season! For the background I stamped with linen ink one of the damask stamps repeatedly. I love the damask set because it's a great background stamp or a great main stamp! Here is a closeup of the butterfly:

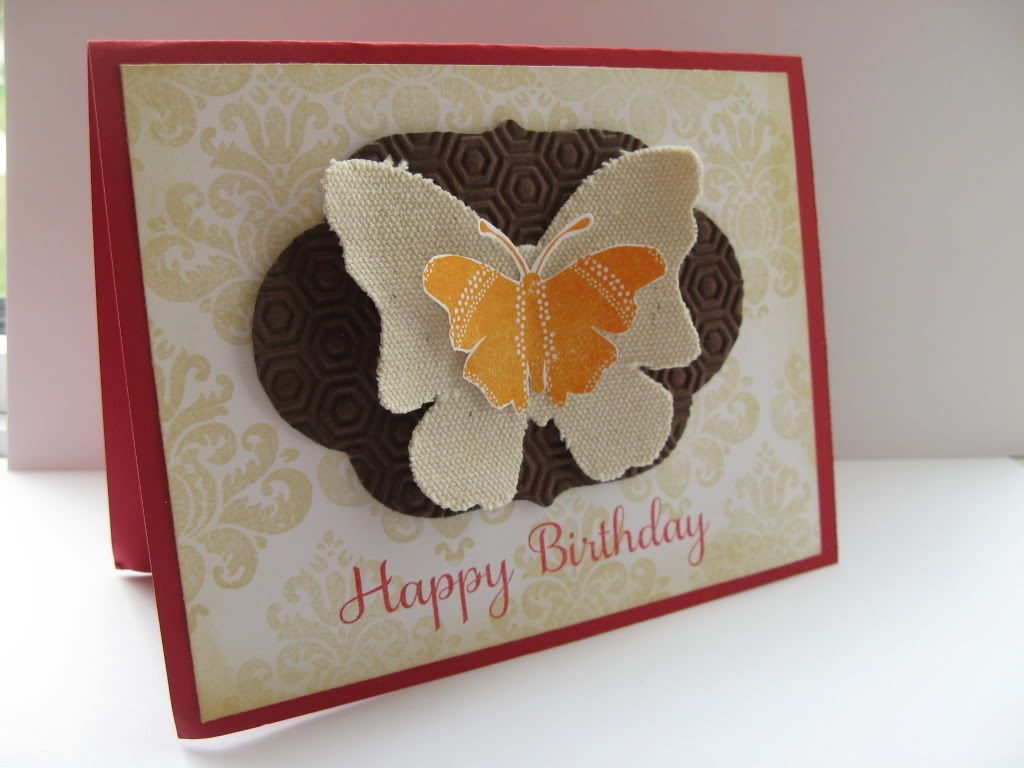
And here is a sideview:

Hope you've been inspired today!
Supplies used:
Damask set by Gelatins!
Flutterby by Gelly Jr
sentiment by Hero Arts
Spiced marmalade, antique linen, red barn by ranger
canvas butterfly by maya road
die cut by papertry ink
Embossing folder by spellbinders

I stamped the Flutterby in orange ink and put behind it a canvas butterfly. I love the texture of canvas! I also added a die cut and embossed it! I love butterflies so much and try to use them in any season! For the background I stamped with linen ink one of the damask stamps repeatedly. I love the damask set because it's a great background stamp or a great main stamp! Here is a closeup of the butterfly:

And here is a sideview:

Hope you've been inspired today!
Supplies used:
Damask set by Gelatins!
Flutterby by Gelly Jr
sentiment by Hero Arts
Spiced marmalade, antique linen, red barn by ranger
canvas butterfly by maya road
die cut by papertry ink
Embossing folder by spellbinders
Tuesday, August 14, 2012
Ombre Butterflies
Hey everyone! Welcome to
another Gel-à-Tins post!
I'm back today with a lovely little card that's right on trend!
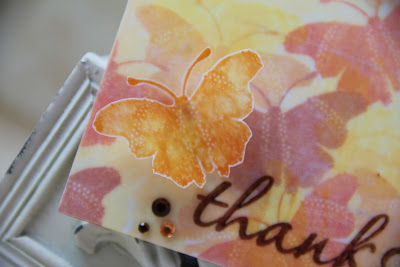
Ombre is really big right now in crafting. You've probably seen it in a few different places now in blogland. Ombre is characterised by a graduation in colours in the same colour palette. I decided to combine this latest trend with the adorable Gelly Jr's Flutterby stamp to create today's beauty:

I love how how this turned out!! I can definitely see this working in lots of different colour palettes!

I started with a white card base and stamped the cute butterfly in various shades in the yellow/orange family. I was quite happy for the butterflies to overlap as it just added to the medley!

When I had completely covered the card front I adhered a layer of vellum to it to give a nice soft finish. I then stamped the sentiment using brown ink.

As a final finishing touch I added some rhinestones and a fussy-cut butterfly floating off the front! I made sure to stamp him using a mix of my colours and onto vellum to continue the floaty theme.
Supplies Used:
Gel-à-Tins:
Flutterby stamp set
Other:
Think Big Favourites #5 stamp set (Papertrey Ink)
Lemon Tart, Harvest Gold, Summer Sunrise, Orange Zest, Canyon Clay and Dark Chocolate inks (Papertrey Ink)
Stamper's Select White cardstock, Vellum (Papertrey Ink)
Pinflair Glue Gel (Olba)
Rhinestones
Scor-Tape
I'd love to know what you think of this little card. I just love how it echoes Autumn and falling leaves.
Thanks for fluttering by!!
I'm back today with a lovely little card that's right on trend!
Ombre is really big right now in crafting. You've probably seen it in a few different places now in blogland. Ombre is characterised by a graduation in colours in the same colour palette. I decided to combine this latest trend with the adorable Gelly Jr's Flutterby stamp to create today's beauty:
I love how how this turned out!! I can definitely see this working in lots of different colour palettes!
I started with a white card base and stamped the cute butterfly in various shades in the yellow/orange family. I was quite happy for the butterflies to overlap as it just added to the medley!
When I had completely covered the card front I adhered a layer of vellum to it to give a nice soft finish. I then stamped the sentiment using brown ink.
As a final finishing touch I added some rhinestones and a fussy-cut butterfly floating off the front! I made sure to stamp him using a mix of my colours and onto vellum to continue the floaty theme.
Supplies Used:
Gel-à-Tins:
Flutterby stamp set
Other:
Think Big Favourites #5 stamp set (Papertrey Ink)
Lemon Tart, Harvest Gold, Summer Sunrise, Orange Zest, Canyon Clay and Dark Chocolate inks (Papertrey Ink)
Stamper's Select White cardstock, Vellum (Papertrey Ink)
Pinflair Glue Gel (Olba)
Rhinestones
Scor-Tape
I'd love to know what you think of this little card. I just love how it echoes Autumn and falling leaves.
Thanks for fluttering by!!
Saturday, August 11, 2012
Paint and Flutterby
Hi dear crafters!
Today I have a new card for you:)
I made project with few layers and beautiful butterflies.


First of all I prepared the paper.Than stamped two butterflies. First with dark ink, second with light. Than made a composition and decorated card with white acrylic paint and the cap from a tube of paint)))
PRODUCTS USED
Gel-a-tins- gelly Butterfly
Brads
Prima Marketing ink
Dovecraft ink Nude
Paper Echo Park
Paper Sassafras
Have a great crafting!
Tanya P.
http://www.diaryofcards.blogspot.com
Today I have a new card for you:)
I made project with few layers and beautiful butterflies.


First of all I prepared the paper.Than stamped two butterflies. First with dark ink, second with light. Than made a composition and decorated card with white acrylic paint and the cap from a tube of paint)))
PRODUCTS USED
Gel-a-tins- gelly Butterfly
Brads
Prima Marketing ink
Dovecraft ink Nude
Paper Echo Park
Paper Sassafras
Have a great crafting!
Tanya P.
http://www.diaryofcards.blogspot.com
Thursday, August 9, 2012
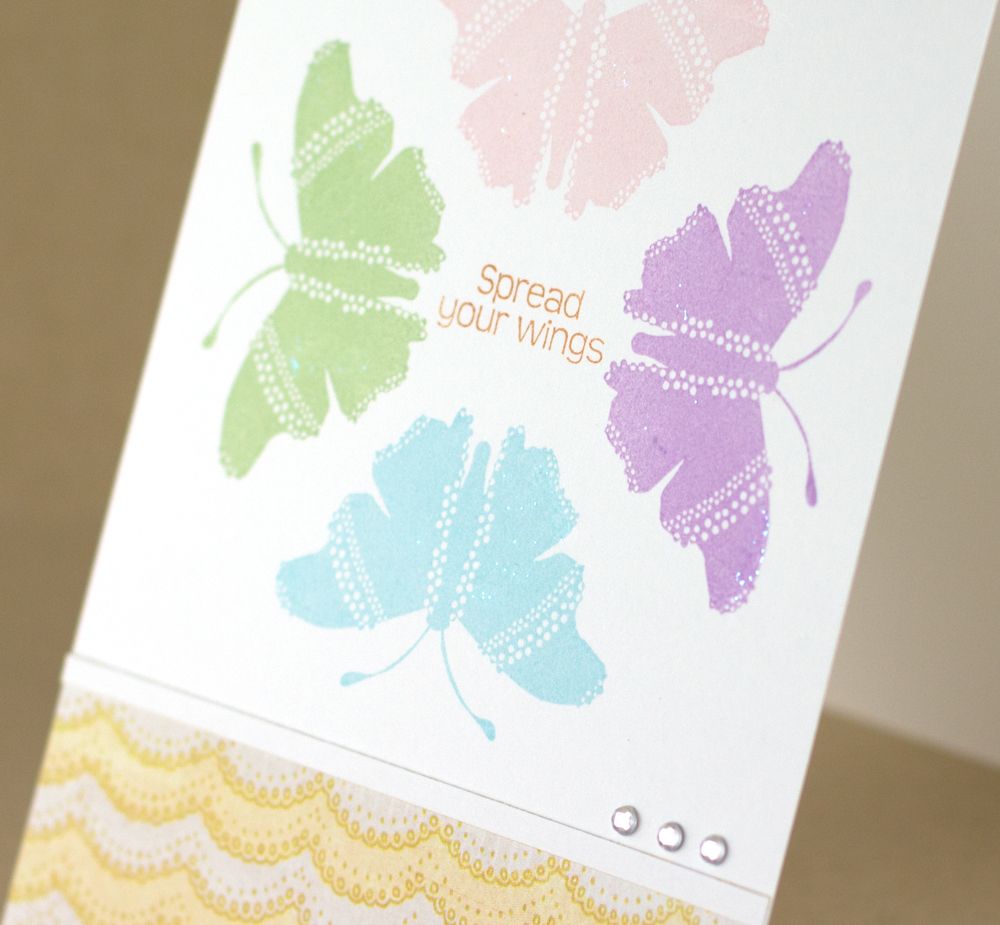
Spread Your Wings
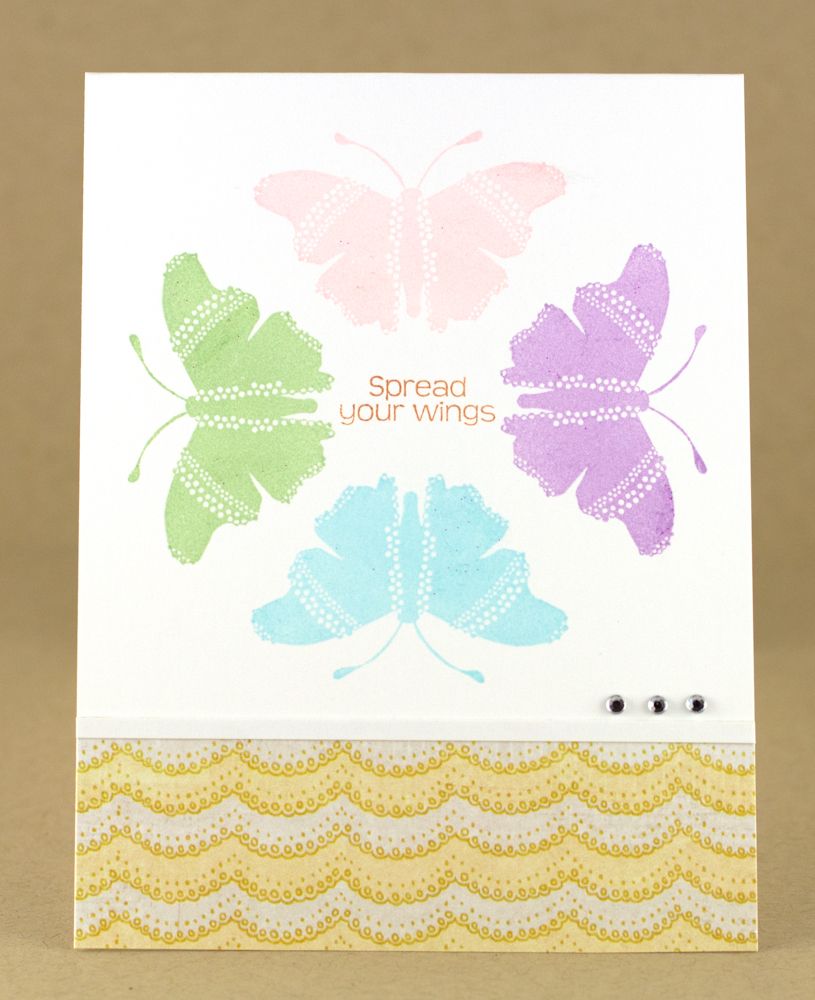
Hello stampers! Nina here with another simple card for pure stamping
fun.

I added some glitter randomly using my fingers:

Supplies:
Stamps: Flutter By (Gelly Jr)
Inks: Pixie Dust, Spring Pansy, Sea Breeze, Aloe Vera (VersaMagic)

I added some glitter randomly using my fingers:

Supplies:
Stamps: Flutter By (Gelly Jr)
Inks: Pixie Dust, Spring Pansy, Sea Breeze, Aloe Vera (VersaMagic)
Friday, August 3, 2012
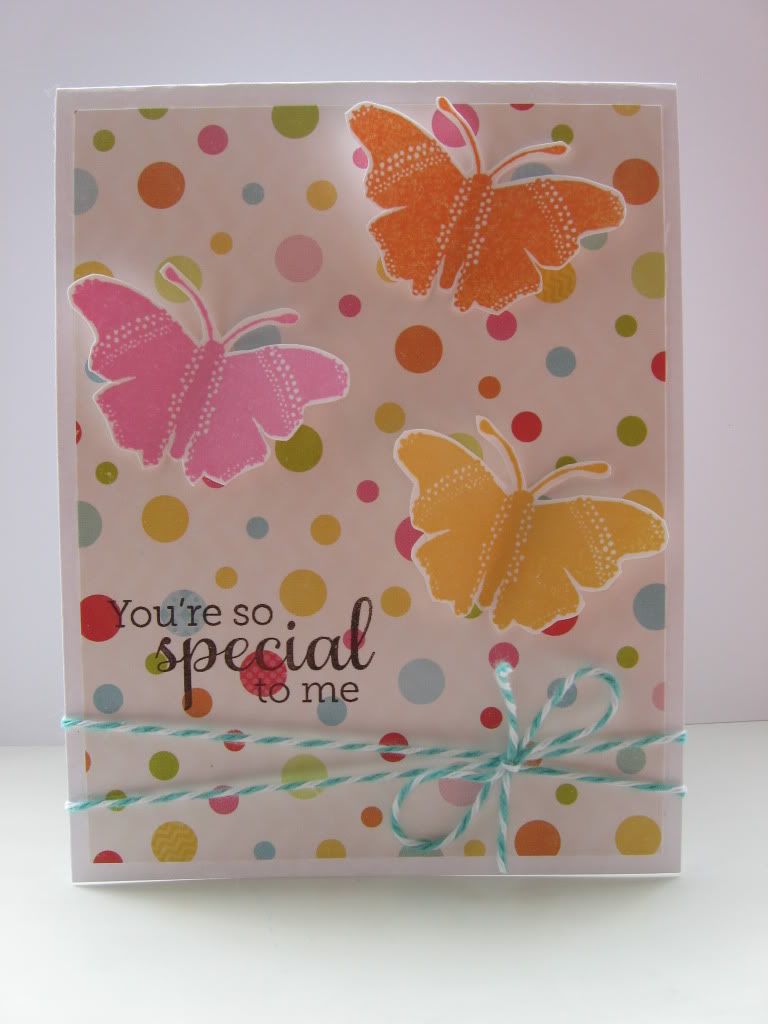
A Special Flutterfly
Hello! Hope you've started August off right! We are still enjoying hot summer
weather and for us school does not start back up till after the September Long
weekend so we are only half way through summer! Today I have a fun summer card
featuring a Gelly Jr Stamp, Flutterfly!

Don't the butterflies on this card look like they are flying off? I used some fun paper and took my colors for the butterflies from there, added a fun sentiment and some twine and there you go! A bright fun summery card! Hope summer is treating you right where you are!
Supplies used:
Gel a Tin's Gelly Jr Stamp Flutterfly
Inks: Tangelo by Memento, Bubblegum Pink and Butterball by Hero Arts
PP by Echo Park Hello Summer
Twine by the Twinery
Sentiment from Hero Arts

Don't the butterflies on this card look like they are flying off? I used some fun paper and took my colors for the butterflies from there, added a fun sentiment and some twine and there you go! A bright fun summery card! Hope summer is treating you right where you are!
Supplies used:
Gel a Tin's Gelly Jr Stamp Flutterfly
Inks: Tangelo by Memento, Bubblegum Pink and Butterball by Hero Arts
PP by Echo Park Hello Summer
Twine by the Twinery
Sentiment from Hero Arts
Tuesday, July 24, 2012
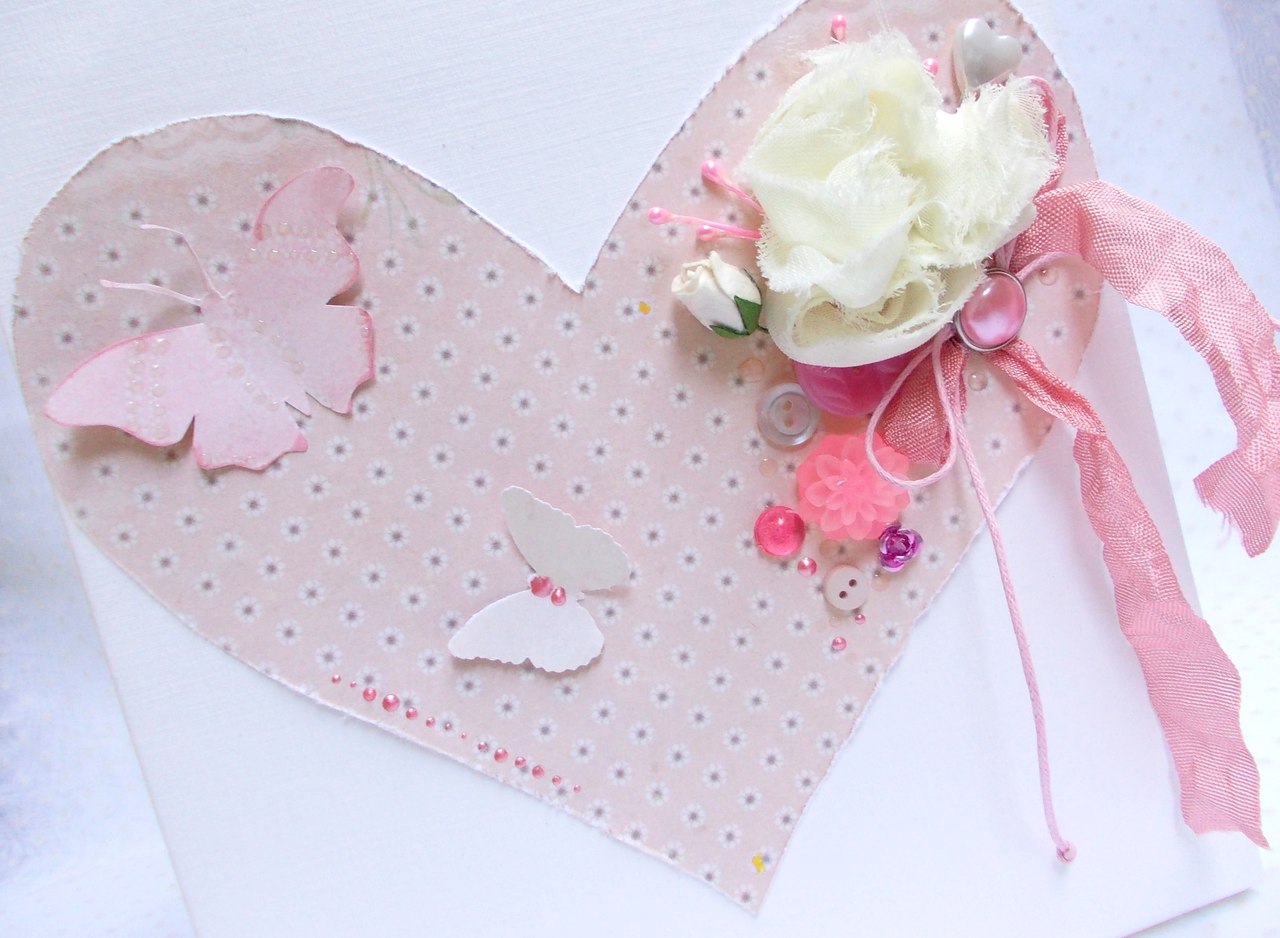
A pretty package
Hi dear crafters!
Today I have for you an easy packagе.
I made it like a package from shop and decorated with heart and flowers.

I cropped heart from Pion Designs Paper and put on it flowers, brads, ribbon, cabochon, buttons, glossy, butterflies!

PRODUCTS USED
Gel-a-tins- gelly jrs. Flutterfly
Pion designs paper
Brads Echo Park
Cabochon
Buttons
Flowers Maya Road
Glossy Accents Ranger
Have a great crafting!
Tanya P.
http://www.diaryofcards.blogspot.com
Today I have for you an easy packagе.
I made it like a package from shop and decorated with heart and flowers.

I cropped heart from Pion Designs Paper and put on it flowers, brads, ribbon, cabochon, buttons, glossy, butterflies!

PRODUCTS USED
Gel-a-tins- gelly jrs. Flutterfly
Pion designs paper
Brads Echo Park
Cabochon
Buttons
Flowers Maya Road
Glossy Accents Ranger
Have a great crafting!
Tanya P.
http://www.diaryofcards.blogspot.com
Thursday, July 19, 2012
Pretty Pink Flutterby card
I love Butterflies, especially on crafting materials like paper and ribbon so I
was beyond excited to get my hands on the latest gel-a-tins gelly jr 'Flutterby'
2 x 2 stamp. I used the stamp on printable acetate to create a dimensional
effect.

Products Used
gel-a-tins gelly jr 'Flutterby' Stamp
docrafts Papermania Lucy Cromwell Designstax
docrafts Papermania Lucy Cromwell Sentiments
Colorbox Pink Ink Pa
Xyron 9" Creative Station
Xyron 150 X
Xyron Mega Runner
Printable Acetate
White Shimmer Paper
White Satin Ribbon
How It's Made
Cut a piece of polka dot paper measuring 4 1/1" x 7 1/2" and run through the Xyron 9" Creative Station and place onto the front of the card, cut the second piece of patterned topper paper 3 3/4" x 6 3/4" and run through the Xyron 5" Creative Station and layer on top.
Using the gel-a-tins 'Flutterby' 2x2 gelly jr stamp and the colorbox pink ink pad stamp three Flutterby's onto the printable acetate and two onto the white shimmer paper. Cut out the Flutterby's. Turn the white Flutterby over so that the back is showing and run through the Xyron 150 X (inked side down) and place on the front of the card. Bend the wings of the acetate Flutterby's and using the Xyron Mega Runner down the underside of the body of the flutterby and place on top of the white Flutterby's.

On the bottom of the card run the Xyron mega runner across the the patterned paper and adhere the white satin ribbon and then place the sentiment on top. Put the final 'Flutterby' on the corner of the sentiment.

And that's it.
To buy this amazing stamp set please go to http://gelatinstamps.com/ . For more ideas and inspiration you can visit the gel-a-tins blog at http://gelatinstamps.blogspot.ie/ and on Facebook at https://www.facebook.com/gelatinstamps .

Products Used
gel-a-tins gelly jr 'Flutterby' Stamp
docrafts Papermania Lucy Cromwell Designstax
docrafts Papermania Lucy Cromwell Sentiments
Colorbox Pink Ink Pa
Xyron 9" Creative Station
Xyron 150 X
Xyron Mega Runner
Printable Acetate
White Shimmer Paper
White Satin Ribbon
How It's Made
Cut a piece of polka dot paper measuring 4 1/1" x 7 1/2" and run through the Xyron 9" Creative Station and place onto the front of the card, cut the second piece of patterned topper paper 3 3/4" x 6 3/4" and run through the Xyron 5" Creative Station and layer on top.
Using the gel-a-tins 'Flutterby' 2x2 gelly jr stamp and the colorbox pink ink pad stamp three Flutterby's onto the printable acetate and two onto the white shimmer paper. Cut out the Flutterby's. Turn the white Flutterby over so that the back is showing and run through the Xyron 150 X (inked side down) and place on the front of the card. Bend the wings of the acetate Flutterby's and using the Xyron Mega Runner down the underside of the body of the flutterby and place on top of the white Flutterby's.

On the bottom of the card run the Xyron mega runner across the the patterned paper and adhere the white satin ribbon and then place the sentiment on top. Put the final 'Flutterby' on the corner of the sentiment.

And that's it.
To buy this amazing stamp set please go to http://gelatinstamps.com/ . For more ideas and inspiration you can visit the gel-a-tins blog at http://gelatinstamps.blogspot.ie/ and on Facebook at https://www.facebook.com/gelatinstamps .
Monday, July 9, 2012
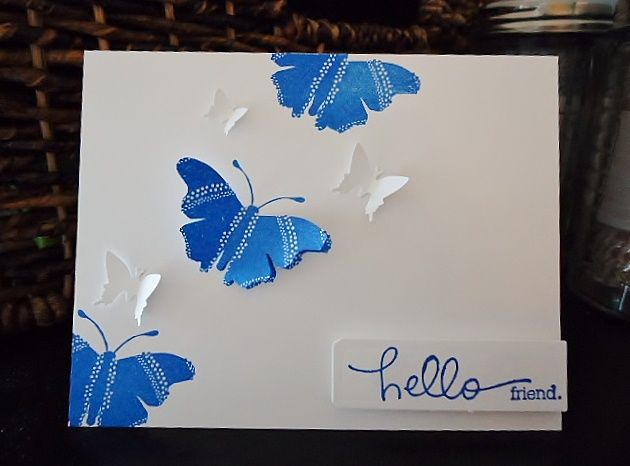
A Flock of Flutterflys
Happy Monday, everyone! Hope your weekend was wonderful! I am so excited
to be sharing my first gelly jr. project with you today!
I am working with the adorable butterfly - "Flutterfly" that is part of the latest product line Gelly jrs! I have always loved the color combo of blue and white. And I thought this would be a perfect image to use with that combo!
Here it is:

A close-up of the 3D butterflies on the card:

I really like large images that are easy to 'fussy' cut! And this "Flutterfly" was perfect for just that! To add dimension to the card, I folded the wings up to add that special 3D effect. To add to the card, I used a variety of butterfly punches to add white butterflies to the card.
The finishing touches were to stamp the sentiment and attach with foam dots.
Supplies:
Gel-a-tins- gelly jrs. Flutterfly
Other:
Mohawk White Cardstock
Hampton Art Navy Ink
Fiskars Butterfly Punches
Studio G Friend Stamp
Foam Dots
Thank you for stopping by today! Please check back all month long for more project reveals using our new Gelly Jrs. line!
Jessi
I am working with the adorable butterfly - "Flutterfly" that is part of the latest product line Gelly jrs! I have always loved the color combo of blue and white. And I thought this would be a perfect image to use with that combo!
Here it is:

A close-up of the 3D butterflies on the card:

I really like large images that are easy to 'fussy' cut! And this "Flutterfly" was perfect for just that! To add dimension to the card, I folded the wings up to add that special 3D effect. To add to the card, I used a variety of butterfly punches to add white butterflies to the card.
The finishing touches were to stamp the sentiment and attach with foam dots.
Supplies:
Gel-a-tins- gelly jrs. Flutterfly
Other:
Mohawk White Cardstock
Hampton Art Navy Ink
Fiskars Butterfly Punches
Studio G Friend Stamp
Foam Dots
Thank you for stopping by today! Please check back all month long for more project reveals using our new Gelly Jrs. line!
Jessi
Monday, July 2, 2012
Happy Birthday!


Hello, everyone. I hope you had a good weekend. I would like to start the week off with a birthday card. I used the Flutteryby stamp from the new gelly jr's collection.
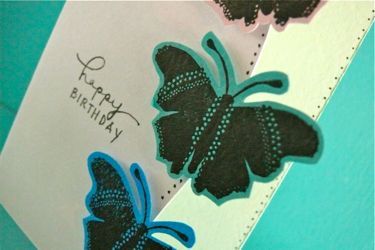
To make this card, start with a white card base. Use a craft knife to cut a curved line down the right hand side of the front only. This will symbolize the flight path for your butterflies. Add a piece of light green cardstock to the inside of the card base. Add a dotted line to each edge.
Stamp the butterflies onto colorful cardstock with black ink. Cut them out. Adhere along the curved front panel with foam adhesive dots for some dimension.
Stamp or hand write a sentiment on the front. A pretty simple card that will make anyone smile. Thank you for stopping by and starting the week with us!
Supplies:
gelly jr's Flutterby stamp
Other:
Adirondack Ink in Pitch Black by Ranger
Cardstock by Prism
Black Pen by ZIG
Foam Adhesive Squares.
Subscribe to:
Posts (Atom)