
Hello, everyone! Yep, you guessed it. I just can't get enough of this cute
little monkey from the Safari Friends collection. My previous card had him
saying "hi!" This time, he is here to say, "thank you." And...I also turned him
into a sock monkey. He is just as fun with this new identity.

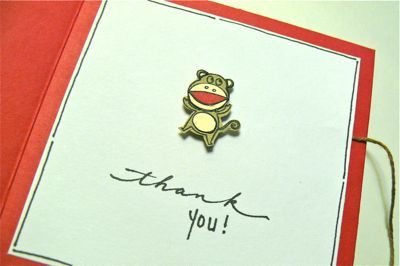
To create the sock monkey look, simply stamp the image onto cream and light brown cardstock. Cut out the pieces and reassemble. I added the pointed football shape over his mouth in red. This small touch makes all the difference.
I added him to a 4x4 card. Start with a red card base. Punch a square out of the front. Add a piece of white cardstock to the inside. Adhere the monkey with a foam adhesive square, making sure he is visible through the punch out. Hand write (or stamp) a sentiment on the inside.
I added a button brad and a piece of twine for a fun closure. Simply adhere one end of the twine behind the white cardstock. Wrap the other end around the button brad. For additional detail, use a black marker with a thin point and outline the front and inside of the card.
Thank you for stopping by the blog today. I hope you try making this cute little guy. He has lots to say, that is for sure!
-Kim F.
Gel-a-tins:
Safari Friends
Other supplies:
Cardstock by Prism
Distress Ink by Tim Holtz
Twine by Martha Stewart
Black Marker by ZIG Memory System
Button Brad (source unknown)
Square Punch by Punch Bunch
Adhesive Foam Squares
1 comment:
This is adorable!
Post a Comment