Wednesday, October 10, 2012

A Fall Kitty card

Hi dear stampers!
today I want to show you a card with fall kitty gely`s stamp.
I took few pieces of paper of two colors.Stamped a kitty. Decorated card with silk ribbon, buttons and marbles.

Image

Image

Hope you've enjoyed this card!

PRODUCTS USED
gel-a-tins fall kitty
Echo Park paper
Buttons
silk ribbon

Have a great crafting!
Tanya P.
www.diaryofcards.blogspot.com

Tuesday, October 9, 2012

Haunted House Card

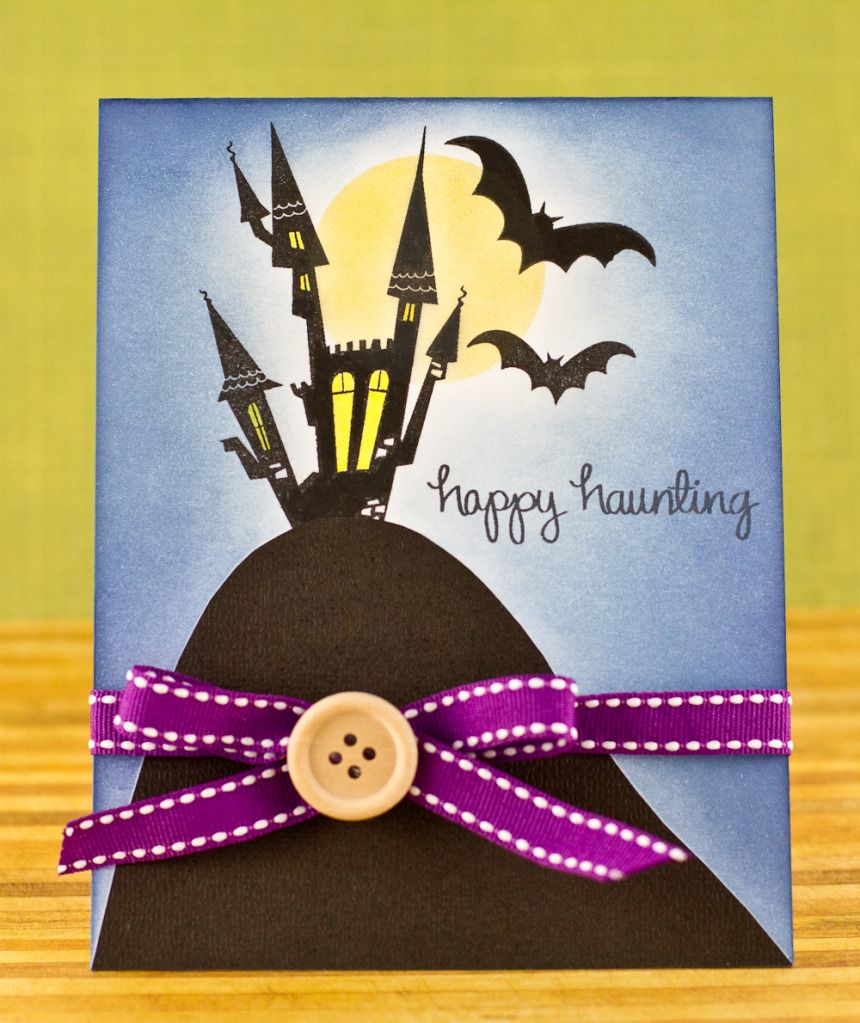
Hello, everyone! Nina here with a fun Halloween card! I free hand cut the mountain from black cardstock.

Image

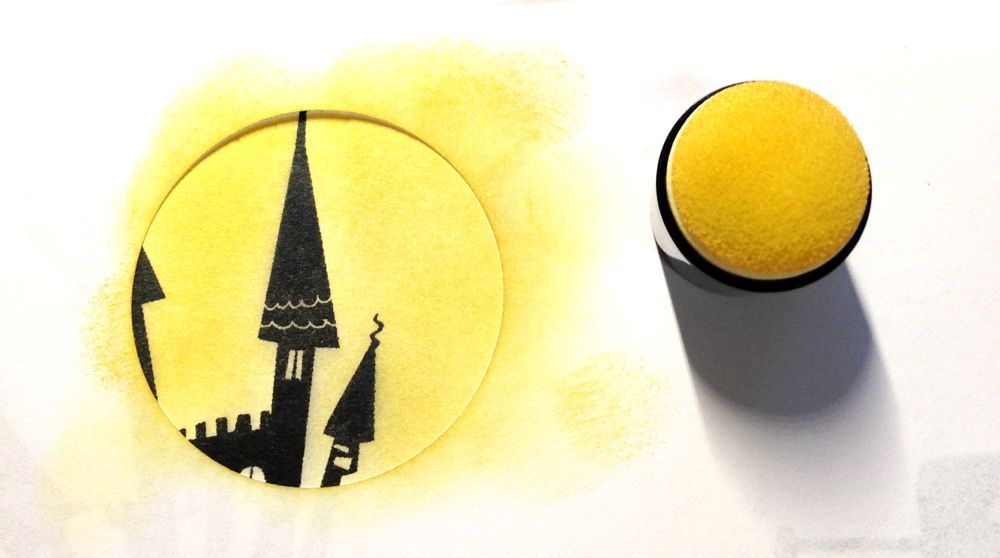
Stamps except the sentiment are from Gelatins Witch Poo set. I love the silhouettes in this set! I used a ink dabber and the negative of a punched circle to create the moon:

Image

I then inked the white card base with some blue ink for the sky.

Image

fun and easy! :)

Monday, October 8, 2012

Let it Snow!

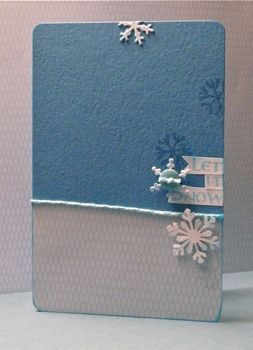
Ok...maybe we don't want snow quite yet! But we can certainly get ready for it. This card uses the "Let It Snow" stamp from the gelly jr's collection.

Image

Create a card base from blue cardstock and a small piece of pattern paper. Add some twine to hide the seem.
Use a watermark ink to stamp just the snowflake randomly on the cardstock. Use blue ink to stamp the words, cut them out, and adhere just above the pattern paper.
I used various punches and dies to create the additional white snowflakes. Adhere to the card with foam adhesive squares.
A cute little button adds a bit of color and interest.
To blend all of the elements together, I used the blue ink and lightly swiped it across everything. It softens the edges a bit.

Thanks for stopping by today. I hope you enjoyed this simple sentiment to what most of us are (or aren't) looking forward to! Let it snow!
-Kim F.

Supplies:
Gel-a-tins Let It Snow gelly jr stamp
Blue cardstock by Prism
Pattern Paper by Die Cuts With A View
Twine by My Mind's Eye
Snowflake Punch by Martha Stewart
Snow Flake Die by Cuttlebug
Chalk Ink by Colorbox
Watermark Ink by Ranger
Button

Saturday, October 6, 2012

Creepy Candle

I made this Creepy Candle wrapper using the gel-a-tins 'Halloween Greetings' stamp set. This fabulous set comes with two sentiments, four super cute mini stamps of a moon, pumpkin, bat and a ghost and three fabulous backgrounds. The backgrounds are amazing for layering with the sentiments.

My first project this month is a wrapped candle

Image


Products Used

gel-a-tins 'Halloween Greetings'
K&Company Jen Yanook Halloween
Xyron Mega Runner
Xyron 150 X
Black and Orange Ribbon
Dress It Up Buttons

How It's Done

Start by wrapping the candle with the cobweb print paper and then a band of the striped paper and hold in place with the Xyron Mega Runner and a lenght of orange ribbon run through the Xyron 150 X.

Image

Stamp the 'Happy Halloween' sentiment onto plain orange paper and layer onto a piece of the cobweb paper using the Xyron mega Runner. Add the dress it up buttons to the front and a box made with the black ribbon to the rear.

Image

Place on the front of the candle using the Xyron Mega Runner

Friday, October 5, 2012

A Spooky Ghost!

Hello, Gel-a-tins fans! Jessi, here! I am super excited for October to be here! Are you enjoying all the Halloween projects the talented design team has been sharing? I know that I am!

Today I have another project for you using the Witchy Poo stamp set.

Image

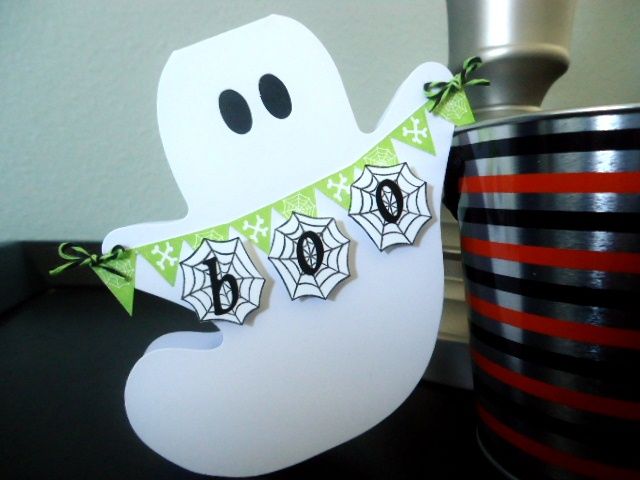
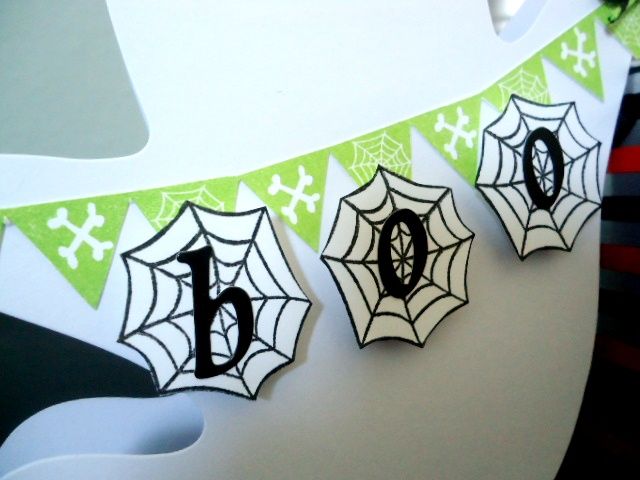
When I saw these ghost shape cards, I instantly visioned the ghost holding a banner. So I stamped the Witchy Poo banner and cut the banner out. I also stamped the spider webs and attached stickers to spell B-O-O. The final touch was adding the twine bows.

Image

Thank you for stopping by Gel-a-tins today! Please share any of your Gel-a-tins projects with us on our Facebook page.

Thursday, October 4, 2012

New Design Team Call!

gel-à-tins design team call
gel-à-tins stamps is excited to announce our next design team call! We are looking for talented scrapbookers, card makers, altered & mixed media artists who love stamping and embossing.
We are filling the shoes of 8 extremely talented paper artists who have been with gel-a-tins for 6 months! No easy task!! We are so grateful for the past gel-a-tina's who have showcased our products wonderfully! And we are excited to see what YOU can do!!

Design Team Requirement:
~ Each design team member will receive at least one full stamp set per month and will be required to create unique and creative projects once a week- (4 per month)
~ Each DT member will be required to post their weekly projects on their blogs with information about what stamp set was used along with an active link back to the gel-a-tins store.
~ DT will be required to email high quality photos of their projects to use on the gel-à-tins blog, the gel-à-tins gallery, and the fan page on facebook.
~DT will be required to have a link in a side bar on their blog linking back to gel-à-tins, we will supply badge/banner/blinkie for you.
~DT will be required to follow on twitter and facebook and post comments supporting all DT projects posted. The main requirement is to promote gel-à-tins stamp sets, tinted acrylic blocks, scented powder, and gelly gems.
~ Once DT is decided each DT member must commit to a 6 month term.
November 1012-April 2013
~ DT call is open to any happy creative stamper around the world!!

Design Team Benefits:
~ Get to play with and keep the DT requirement stamps/embossing powders.
~ Be one of the firsts to have input on new products and play with them prior to their release.


To Apply Please:
~ Submit 1 new stamping project that you have completed especially for us to view your work and style.
~ Submit up to 3 of your favorite stamping projects that you have created at any time- something that shows your stamping skills; a mix of cards, layouts, mixed media or altered arts are appreciated
~ Please submit your full name, address, email and phone number
~ A short bio about you and your papercrafting history, be sure to add why you would like to be on the DT
~Submit links to your blog, forums and galleries that you would like us to see more of
~ Include previous and current DT positions
~ email all information to: calls@*gelatinstamps.com   (be sure to remove the * before sending email; this prevents an overwhelming number of spam emails, thank you)
~ Deadline for Submissions are October 23th
~ Announcements of new DT will be on October 27th

http://www.gelatinstamps.com/
Thank you for your interest in designing for us!
We can't wait to see your work!!

Way to Go!

Hi everyone! Welcome back!

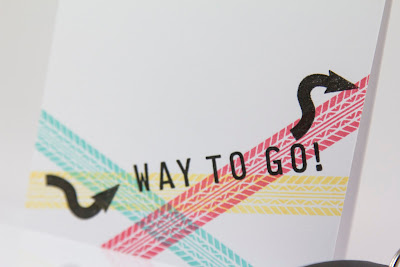
Today I'm bringing you a quick and easy card featuring the Traffic Signs set from Gel-à-Tins! This set is so versatile and fun!

I kept this very CAS and wanted to do something congratulatory:

Image

What do you think? Fun huh?!

I started by stamping the tyre tracks repeatedly in different colours on my card base.

Image

I then made my sentiment from the letter stamps included in the set. I love how there are extras of the commonly used letters so I could stamp my sentiment all in one go! After that all that was left was to add my arrow images and voila!


Supplies Used:

Gel-à-Tins:
Traffic Signs stamp set

Other:
Berry Sorbet ink, Hawaiian Shores ink, Harvest Gold ink (Papertrey Ink), Versafine Onyx Black ink (Tsukineko)
Stamper's Select White cardstock (Papertrey Ink)


I'd love to know what you think of this project. Thanks for stopping by, see you again soon!!

Wednesday, October 3, 2012

Happy Canadian Thanksgiving!

Hello! Well October is here already! And with that here in Canada it brings Thanksgiving! We celebrate Thanksgiving next Monday October 8th! I like to make a Thanksgiving card each year for my inlaws! I decided to use the Gel a Tins stamp set Damask! In the set there are two similar stamps that are leaves that are quite damask! I decided to stamp them like leaves flying around in the wind!

Image

I basically stamped the leaves over and over again in various inks, cleaning the stamps each time in between with a wet paper towel! Embossed the sentiment onto red cardstock and made a banner out of it!

So if your a Canadian like me, Happy Thanksgiving! :>


Products used:

Gel a Tins Damask Stamp set
Inks: Evergreen, Red Barn, Spiced Marmalade, Vintage photo by Ranger
Sentiment by Hero Arts

Tuesday, October 2, 2012

Boo!

Hi dear stampers!
Today I want to show you a Halloween card.
I took scrap paper and stamped on it castle and flags.Then decorated flags with marbles and made a sign BOO.

Image

Image

PRODUCTS USED
gel-a-tins Witchy Poo set
Paper My Little Shoebox
marbles

Have a great crafting!
Tanya P.
www.diaryofcards.blogspot.com

Monday, October 1, 2012

Fall Kitty Tin

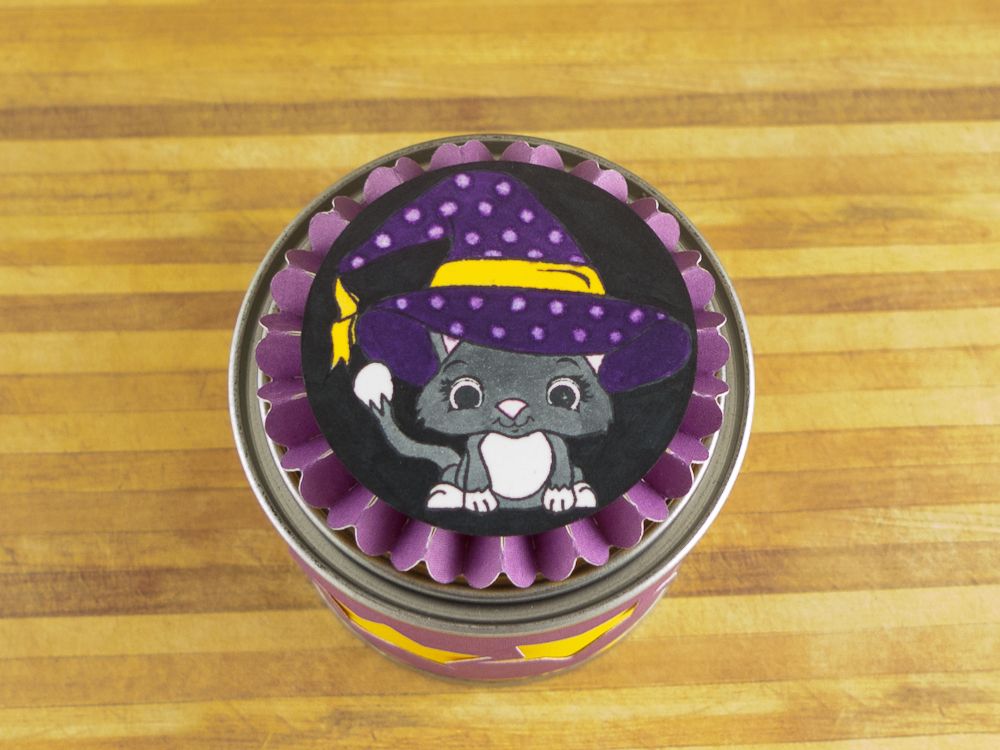
Hello stampers, Nina here with a little favor tin! I can't believe we are creating Halloween projects again! Now, meet my little fall kitty:

Image

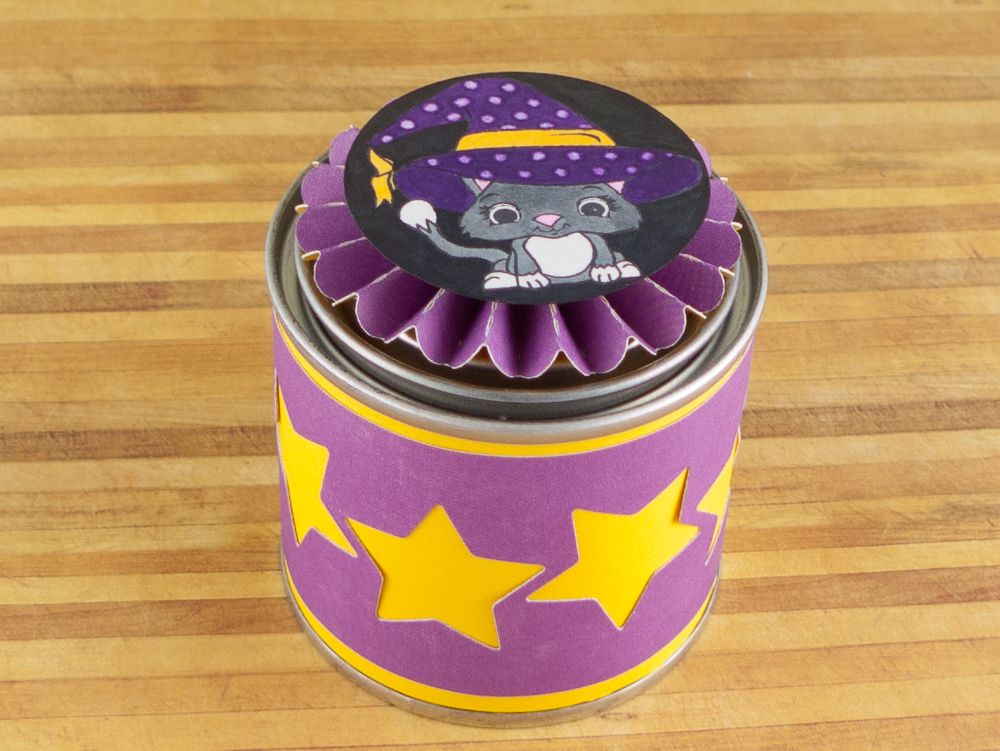
I used a pretty fun Copic technique with the 0 Colorless Blender: I first saturated the kitty hat with a purple marker and then used the blender to create the polka dots :) Super fun to do to give your kitty a little character :) And here is how the rest of the tin looks like:

Image

I used a 1-3/4" circle punch to punch the kitty out and the circle fits right on the Tim Holtz Mini Rossette (the bigger one in the set), perfect!

Thank you for stopping by and happy crafting!