Wednesday, June 12, 2013

A Father's Day (or any day) Brostache Card

I can't even tell you how much fun I had making this silly card.  I still love the mustache trend (even though I know it has been around for a while now).  It just makes me smile.  Around here we like to give out mustaches as party favors and my sister-in-law even threw my brother a "brostache" themed birthday party a year or two ago.  We're dorks.  I know.  When I saw the Mustache Mania stamp set I knew that I had to have it.


I used the stamps with a light brown distress ink over the patterned paper to make this look for the card base.  I knew that the card was going to be pretty busy, but I still thought that it could use more mustaches!


The ink, ribbon, twine, pen, buttons and stamps were not in the paper kit by MAMBI, but everything else was, including that hilarious mustache on a stick.  I didn't put a real sentiment on this card, but I think that I can choose whether to give this to my brother for Father's Day or for his birthday and it will work either way now. 

Everything is put together with my awesome Xyron adhesives (mostly the Mega Runner on this one).  And when I finished I had a big smile on my face.  I hope you like it too!  Have a great week!

Tuesday, June 11, 2013

Crackled Tree Bark


Hi everyone! So nice to see you again! :-)

I'm back today with a fun card featuring the Gel-à-Tins Crackle Paint stamp!

This stamp is great for grungy backgrounds and many other looks, but I saw something a bit different in it with my out-of-the-box thinking:


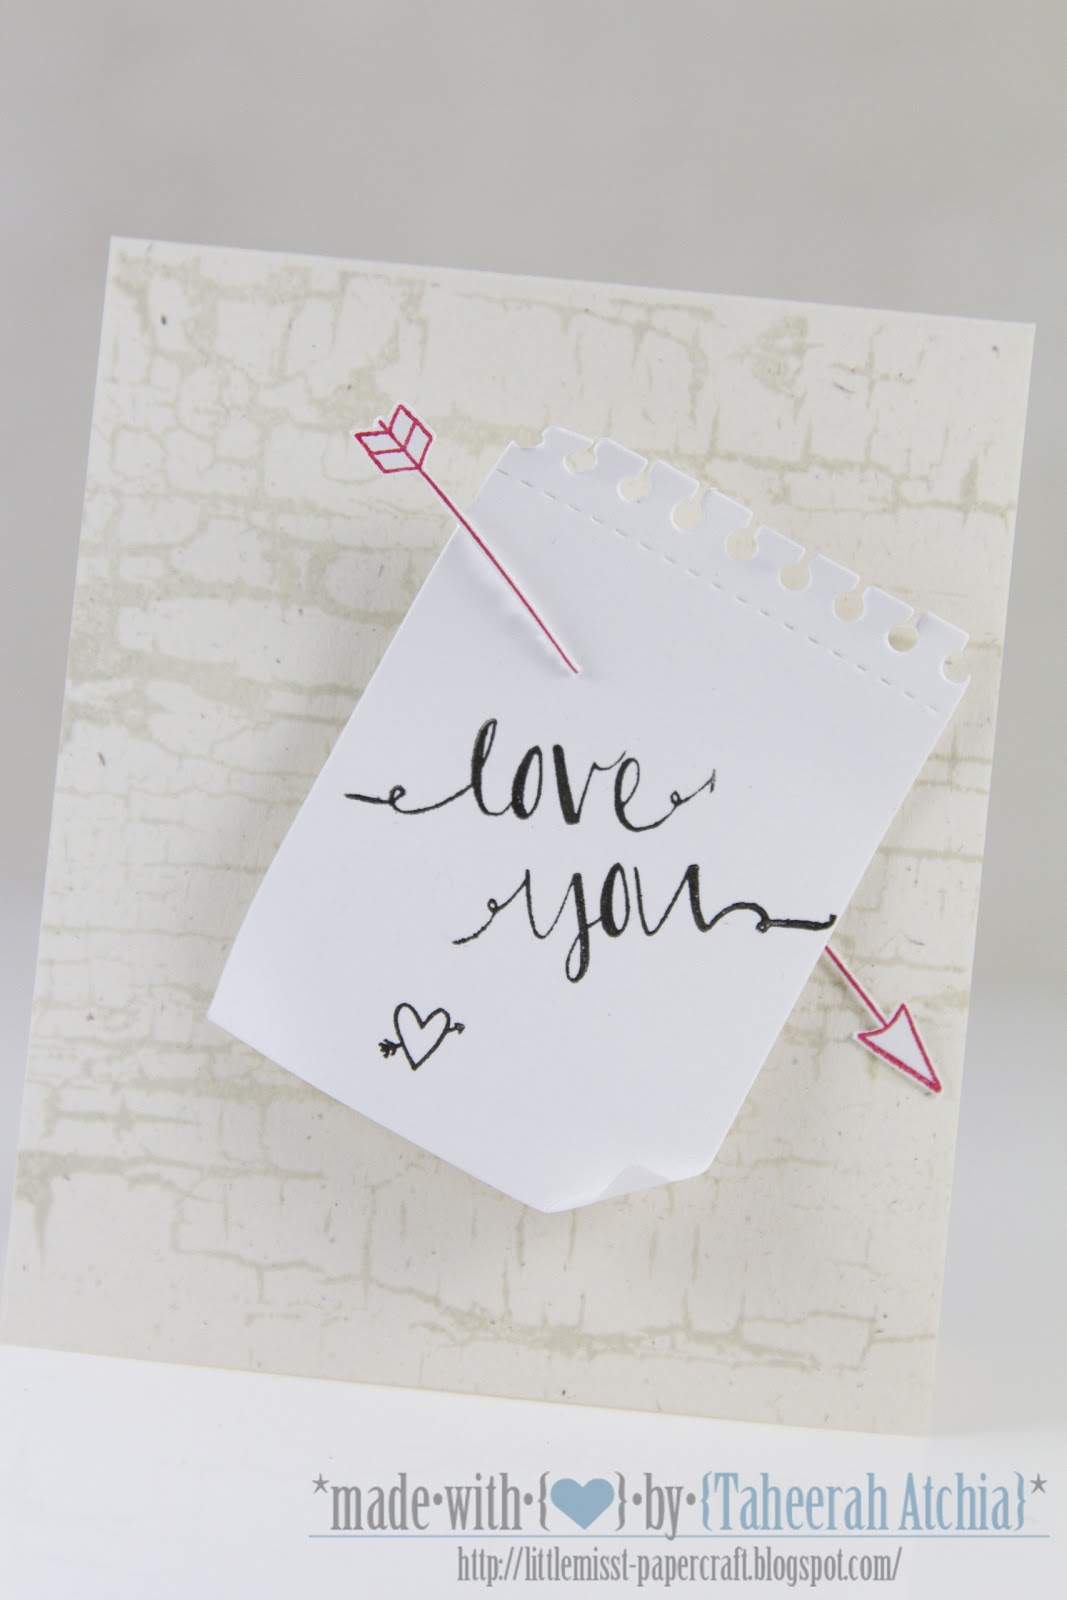
That's right - tree bark!! To me this looks a lot like birch bark and I just had to try that idea out!!


I started with some rustic white cardstock and stamped the crackle effect with a pale grey ink to create my tree bark effect. Then I had an idea which was very Robin Hood - pinning a note to a tree using an arrow! I trimmed out a piece of white cardstock and used a die to give it a notebook page effect, then stamped my sentiment and a little heart. 


To finish up the design I adhered the note to the base using dimensional glue gel, then stamped an arrow using red ink, trimmed it out and cut it in half before adhering the pieces to my card to look as if it had gone through the paper!


Supplies Used:

Gel-à-Tins:
Crackle Paint

Other:

Oh Happy Day stamp set (Avery Elle), Love & Marriage stamp set (Papertrey Ink)
Pressed Greige Linen ink (Clear And Simple Stamps), Versafine Onyx Black ink (Tsukineko), Pure Poppy ink (Papertrey Ink)
Rustic White cardstock, Stamper's Select White cardstock (
Papertrey Ink)
Spiral Notebook die (Papertrey Ink)
Pinflair Glue Gel (Olba)


I'm looking forward to seeing you again when I next post! Have a great day everyone and thanks for stopping by!

Monday, June 10, 2013

Gel-a-Tins and Xyron

This week gel-a-tins teamed up with Xyron to bring you some amazing projects and inspirations.


I am the luckiest girl in the world because I am fortunate to be on the Design Team for both Xyron and gel-a-tins and long before this team up I have always used Xyron when making my gel-a-tins projects.  I'm sharing two cards here on the gel-a-tins blog and two more over on the Xyron Facebook page.


Products Used
 
gel-a-tins Zebra Background Clear Stamp
gel-a-tins Gelly Gems Roll-up Silver
Xyron Mega Runner
Xyron 5" Creative Station
Momenta Paper


Products Used
 
gel-a-tins 'Little Buddies' clear Stamps
Xyron Mega Runner
Crafters Companion Lace Border die
docrafts 'New Baby' Papers


Saturday, June 8, 2013

Intergalatic Card


Hello Gel-A-Tins fans!  Kate sharing with you today. 

I got a package with a bunch of stamps from Gel-A-Tins Stamps a couple of weeks ago and was absolutely thrilled with the cool "Take Me To Your Leader" Collection and was inspired to created this intergalatic card right away.  


I used Core'dinations Cardstock for the whole card, even the stamping.  I love the textured look of my stamped planets!


Here are the simple instructions for this card:

  1. Create a 4.5" x 6" card base with Core'dinations Neutral Cardstock.
  2. Emboss a piece of 4.25" x 5.75" Black Magic Core'dinations Cardstock.
  3. Sand the embossed cardstock so the blue shows.
  4. Add round spots of color with Distress Paints to the round Core'dinations Core Tag.
  5. Stamp Alien image from Gel-A-Tins TMTYL collection onto the painted Core Tag.
  6. Stamp planet images from Gel-A-Tins TMTYL collection onto cardstock and fussy cut. 
  7. Half-way down the left side of the embossed Black Magic cardstock, cut a circle shape out big enough to place the decorated Core Tag into.  (I left enough room in my circle to let the background grey show through and for the tag to overlap off the Black Magic cardstock)
  8. Adhere the embossed Black Magic Cardstock onto the cardbase with Helmar Premium Craft Glue. 
  9. Use Helmar ZapDots to give the planets and alien a bit of a boost! 
  10. Add random brads to finish off the card. 
  11. Share with someone special. 
Hope you have a lovely weekend!

Friday, June 7, 2013

Neon Butterfly Fun


Good morning, gel-a-tins friends! It's Jessi  from Kissin' Krafts! Today I am excited to be participating in the gel-a-tins and Xyron cross promotion. (Psst. check out their blogs for details of the amazing prizes they have up for grabs!) 

I had so much fun creating this card using gel-a-tins Butterflies are Free stamp set.  The butterflies were just screaming to bring out the neon!


The first step was to stamp the butterflies and color them in. I normally use markers to color in, but decided to break out the colored pencils for this project. Once the coloring was complete, it was time to cut it out and attach them to the card matte. The simple sentiment is stamped on the bottom right corner. The final touch was to add the sequins,


I don't know about you, but I always seem to struggle attaching sequins to my projects. But Xyron to the rescue! I had never thought about running the itty bitty sequins through the Xyron's Create a Sticker machine to add adhesive to the back of the sequins. It made it so simple! Will be using that more often!


Thank you for stopping by today! I hope you are enjoying this week's projects showcasing the gel-a-tins and Xyron cross promotion! 

Supplies:
gel-a-tins- Butterflies are Free
Xyron Create-a-Sticker
Colored pencils
Sequins

Thursday, June 6, 2013

Gel-a-tins mashes up with Xyron!


This week, the Gel-a-tinas are working with Xyron!  What a great adhesive to use on your paper crafting projects.  Today, I used the 2" Cheetah with Permanent Adhesive, as well as the Xyron Gluestick.


Tomorrow will be the birthday of one of my friends. I created this fun ensemble using Gel-a-tins: Cosmo Pups and Make a Wish Sets!  Such a cheery set of images and words!


A plain pad of white paper gets the birthday treatment!!  Lots of stickles...and my new favorite color of Rumple Ribbon:  Crazy Coral!  (Can there be a limit to favorite colors??)

The 2" Xyron Cheetah made applying adhesive a snap on such large paper panels.


Basically, a card stock cover with a pocket on the inside!


Note card that just barks "Happy Birthday!"


 And...to top it off...a book mark for her summer reads!
To get my poochies to lie flat, I applied the Xyron Glue Stick to the back of the cut out image.
(Remember to place it on top of a piece of scratch paper.)  Great coverage!!

I enjoyed this mash up...be sure to scroll through the Gel-a-tins blog for more Xyron inspired ideas!

Thanks for stopping by today...
Dawn Mercedes, of Sunnyside Up!

Wednesday, June 5, 2013

congratulations award pin/card.

Hey everyone! I have an award pin/card to share today. I had a few different ideas for this project so I'll share a few with you & you can also check them out in more detail on my blog. Here's what I started with:
First, I cut this using the My Community Cricut cartridge at 5 1/2 inches. I used a mask & some misting for the background. The Gelatins stamp set I used is actually a baby shower themed set - little buddies. I used the circle stamps + the 'congratulations' sentiment. The inks are Prima chalk inks - farmer jeans & teal damask. I also used the small star stamp from the Little Buddies stamp set & heat embossed it with aqua ZING! embossing powder. 

When I was finished, I had a few ideas. Of course you could adhere a pin to the back of it so that it could be pinned onto your clothing. Or you could attach it as is to a card (misted with the same mask)...


 Or I thought you could even make it into a card. Simply cut a second shape in the same size & attach them at the top...

What other ideas do you have?

Tuesday, June 4, 2013

Hot Dog! It's a Birthday!

Hello again!  It's Jessica again with another fun card to share with you.  I have loved these sets since I first saw them and I had to use them together on this card.  I love the bright colors and I think it will be the perfect thing to give to a friend for a birthday along with a gift card to the movies.  Check it out...


I stamped the background with the Hot Diggity Dog set using yellow ink on yellow striped paper. I didn't want the patterned paper to just be a strip behind the sentiment, so I decided to punch out some pieces and line them up on the card.  The paper adds a little more color into the card as well.  The ribbon was added after running it through my Xyron 150 and then pleating it as I attached it to the card.  This is a really easy technique and adds a little dimension to the card as well.  The buttons and the background paper were also attached with Xyron machines and my chipboard and stamped sentiment are attached with some foam adhesive that I made with my (you guessed it) Xyron machine.  :)  This was a pretty quick card, and I can't wait to get back in my scrap room and play with these sets some more.  Be Sure to check out the gel-a-tins Facebook page as well as the Xyron Facebook page this week.  You won't want to miss a thing!

Monday, June 3, 2013

Father's Day Shifting Gears


Hi everyone! I hope you aren't suffering too much from the Monday Blues! :-)

Father's Day is fast approaching so today I'm bringing you a great card for Dad featuring the Gel-à-Tins Shifting Gears set!

I went for a CAS-meets-grunge effect and came up with this:


Perfect for an engineer or geek dad huh?!


I started with some silver cardstock and embossed the gears using a brass embossing powder. Then I tried something new - sprinkled embossing! I dipped a wide, flat, soft brush into my embossing powder and tapped it above the card base to sprinkle on the powder before heating it. Love how this turned out!


To finish up the design I rubbed a couple of different grey inkpads over the card to dirty it up a little, then embossed a Father's Day sentiment - and that's all there is to it!


Supplies Used:

Gel-à-Tins:
Shifting Gears

Other:

World's Greatest Dad stamp set (Papertrey Ink)
Pressed Greige Linen & I Steel Got It inks (Clear And Simple Stamps), Versamark ink (Tsukineko)
Sterling Silver cardstock (Clear And Simple Stamps)

Metallic Brass embossing powder (WOW!)


I'm looking forward to seeing you again when I next post! Have a great day everyone and thanks for stopping by!

Saturday, June 1, 2013

Happy Birthday!

Sweet Hearts is a a great set to help celebrate any Valentines Day or Just for fun hand made card, layouts or other paper-crafting projects. This sweet set with 7 stamps.
Comes packaged in our signature medium 4.5" x 5.5" metal storage tin.  I used the cupcake stamp and some co-ordination paper from docrafts to give someone a little Birthday Treat!
 
SKU SHR-3589
 
HAPPY BIRTHDAY!


PRODUCTS USED
 
Gel-a-tins 'Sweet Hearts' Stamp Set
Xyron Mega Runner
Xyron 150 X Create-a-Sticker
Crafters Companion Embossalicious 8x8 'Grande Dots' folder
Spectrum Noir Pens
docrafts 'Little Cake Shoppe' Papers
Spellbinders frame die