Friday, November 11, 2011

Once Upon a Time

When I opened my stamp set for the month, I fell in love with this ONCE UPON A TIME stamp set! It is perfect for little girls! My first project was making a card:


Instructions:
I wanted the prime focus of the card to be the adorable image, so I stamped it in black ink, and colored the image in with my copics. I then added some glitter, with my 2-way glue! Love how the unicorn sparkles! I made the card as girly as I could with my favorite color gray with lots of pink! I tied a bow and then added a button with a bow of twine

Supplies Used:
Gel-a-tins Stamp: Once Upon A Time
Other: Black Cardstock, Momenta Patterned Paper, Jillibean Soup Patterned Paper, Ribbon, Twine, button, Signo White Pen

Thursday, November 10, 2011

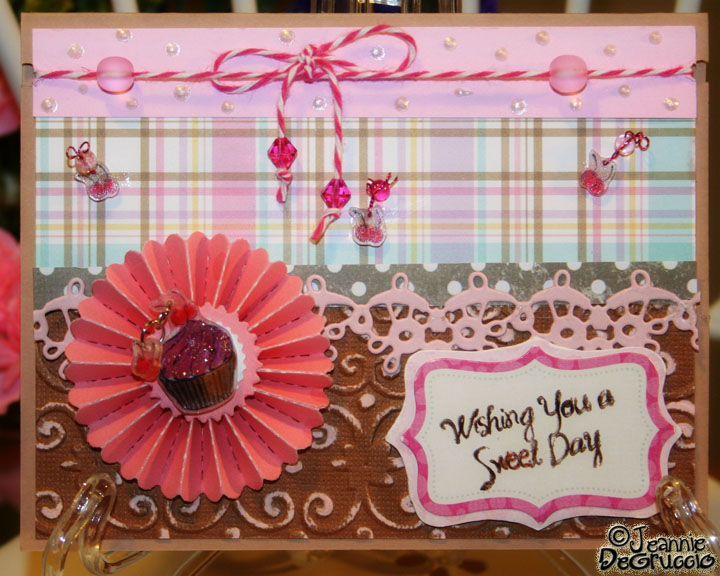
Cupcakes and shrinky plastic from Jeannie!

Today I get to share my first project that I have designed for Gel-a-Tins Stamps.

I am having so much playing around with Shrink Film lately, I am going to show you how to use it for your cards and other projects.

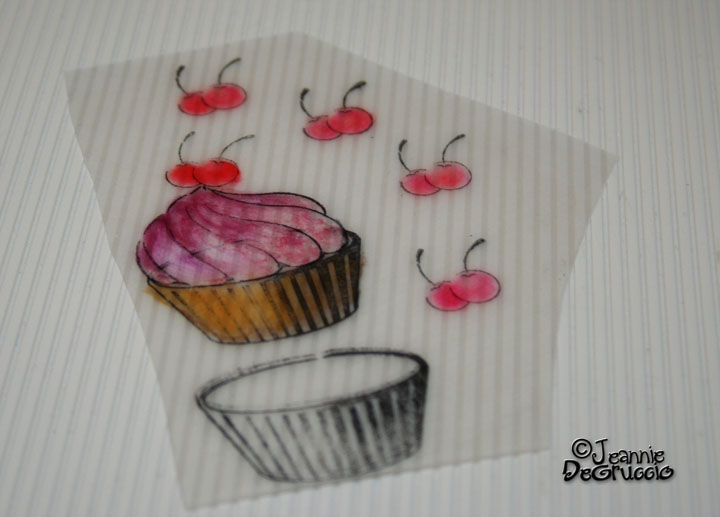
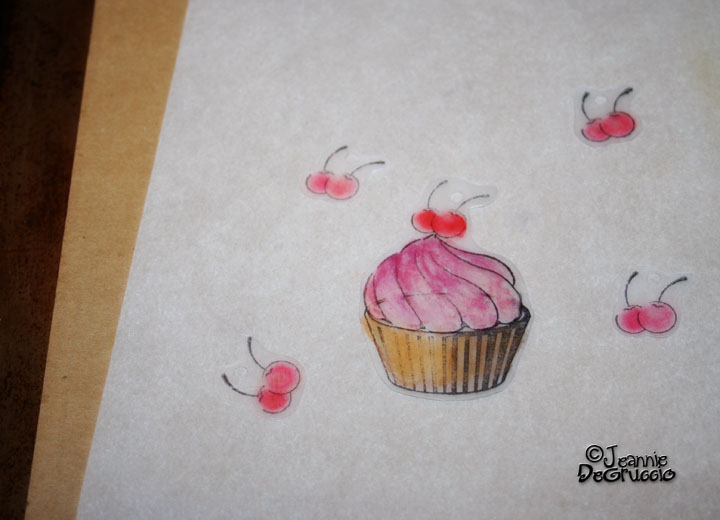
Here you can see I have already stamped with a solvent ink and colored in with various permanent markers and colored pencils.

Image

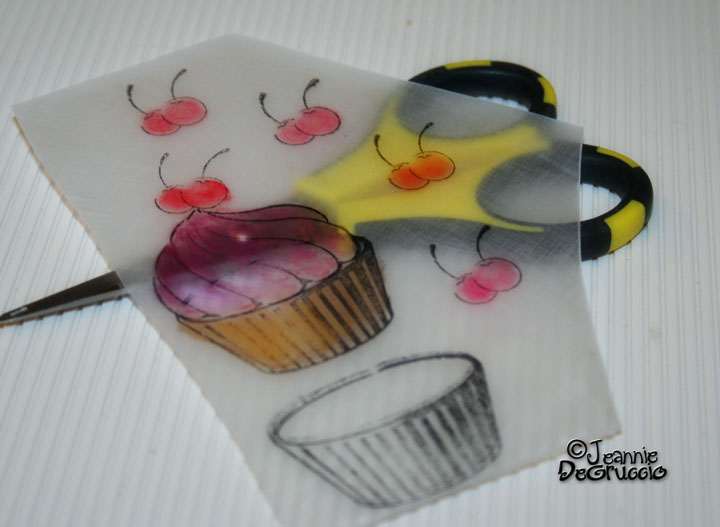
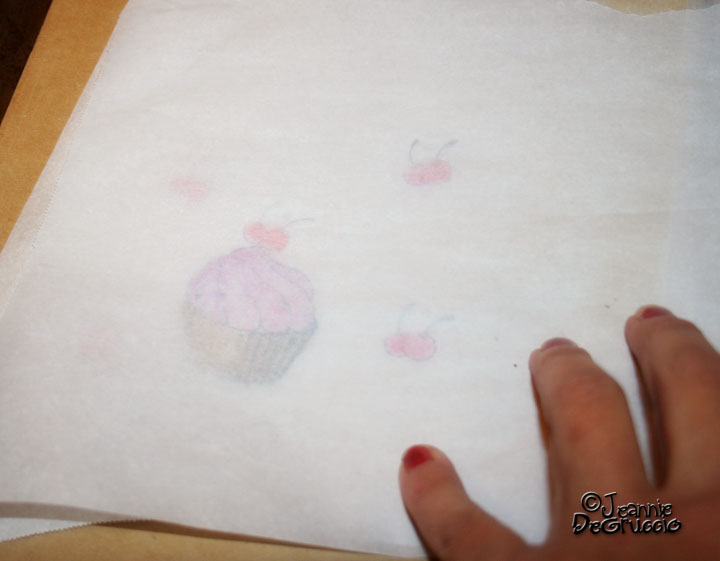
Here you can see that the film is somewhat see thru.


Image

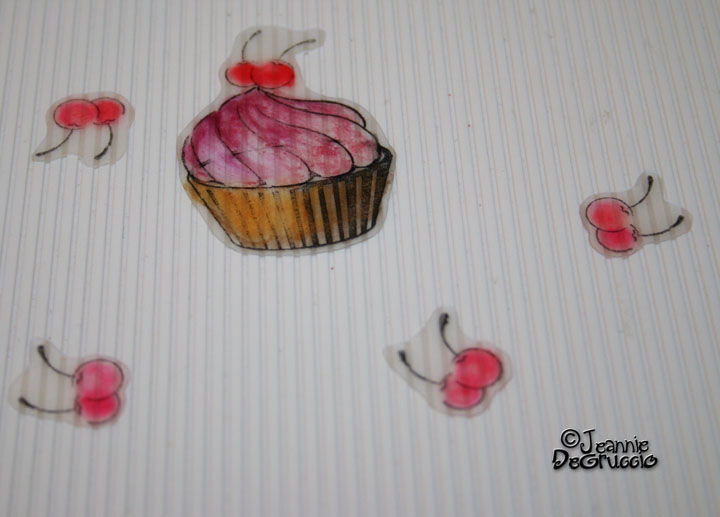
Now I have bubble cut around all the images.


Image

The thing about shrink film is that you really have to plan ahead and know how and where you will use your images once they are shrunk.

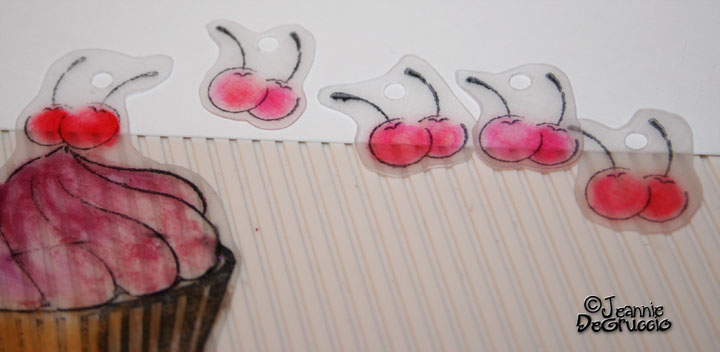
Since you need to attach them somehow you need to punch the holes with a normal size paper punch, before you shrink the plastic.

Planning ahead will help you know where you want to punch out those holes.


Image

I have punched all my holes now I am getting ready to bake them.

I place them on the cookie sheet on top of a piece of cardboard covered with parchment paper.


Zoom out

I place another piece of parchment over the plastics to help keep them somewhat flat. They will curl, but I like to have the slight added weight to flatten them.


Image

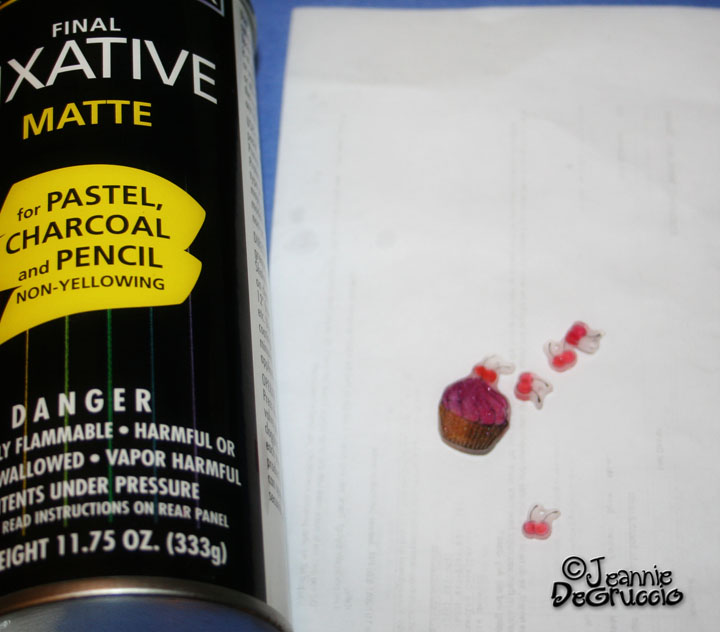
When they are shrunk and cooled off, I spray the pieces with a fixative. Even though I will use the side opposite of the side I colored, I still want to protect the colored surface.


Image

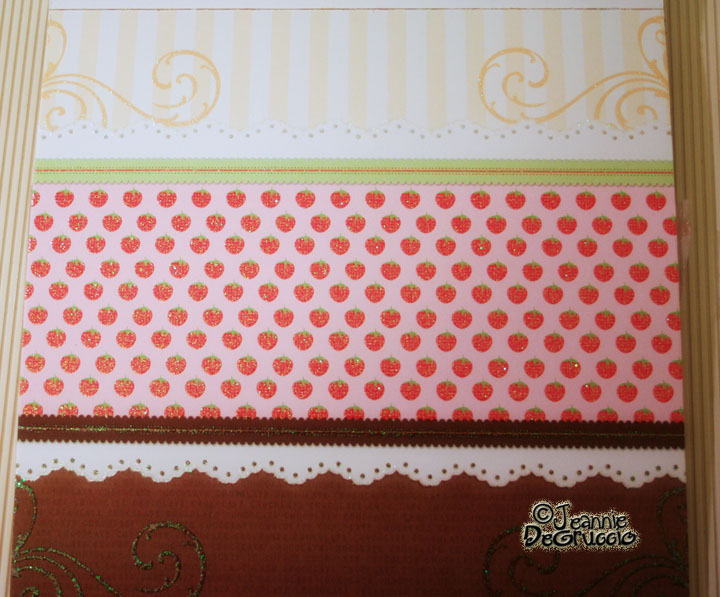
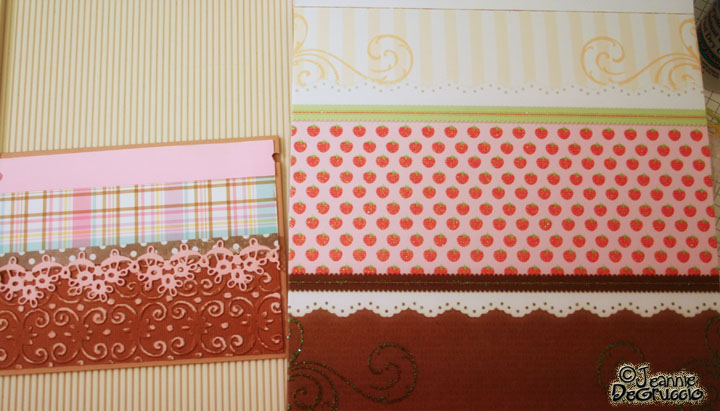
Moving on to my card base, I have this paper from a DCWV pad. I love the pattern and will mimic it for my card base.


Image

Here you can see my card base done, next to the sheet of paper I have mimicked.


Image

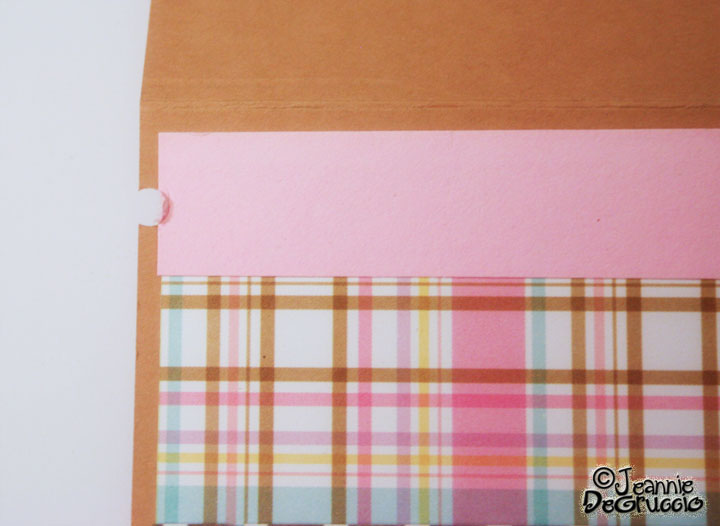
I like to punch a little notch off the card base when attaching ribbon and twine to avoid the twine/ribbon from shifting.


Image

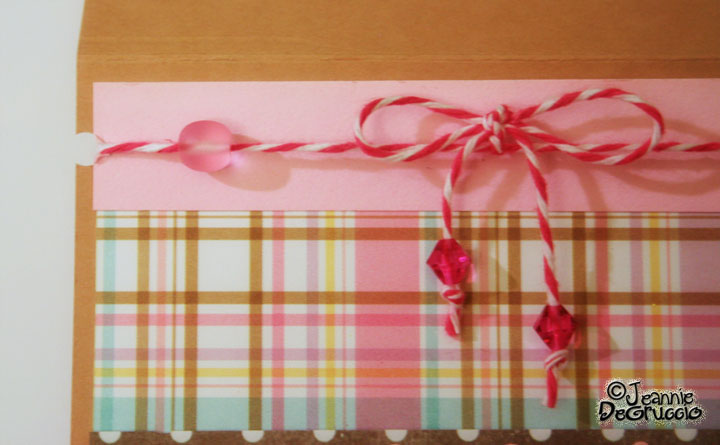
Here is the twine all attached.

Image

After that, I attached the rest of my card embellishments.


Image

To attach my shrunk plastic images, I put some decorative wire and beads through my punched holes.

Image

After I have them all done with the beads and wire, I attach them with a really strong adhesive.


Image

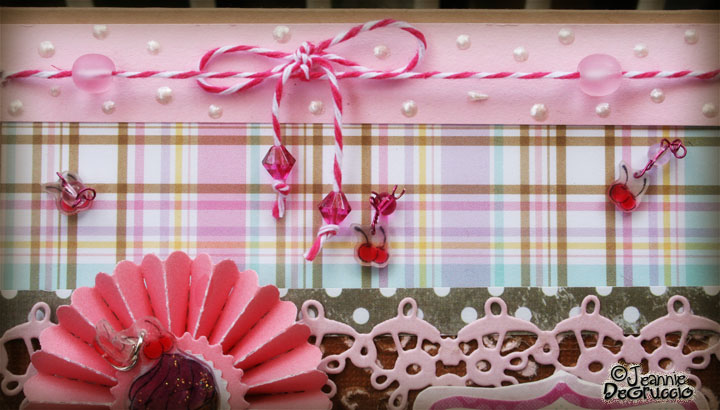
Here is a close up of how cute these little trinkets are.


Image

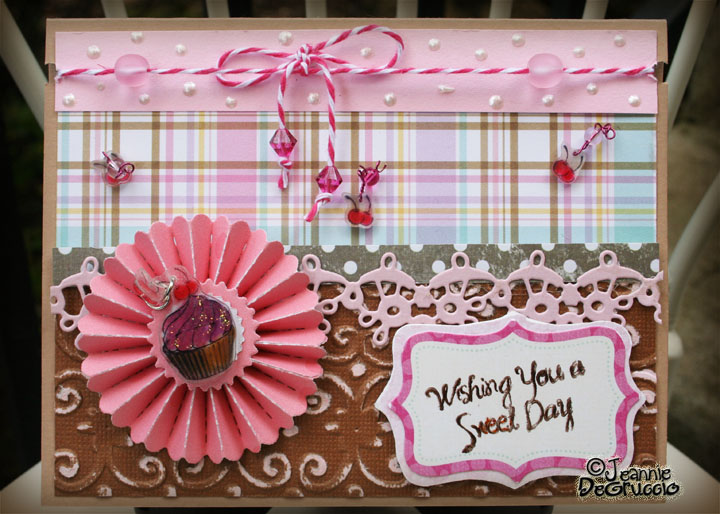
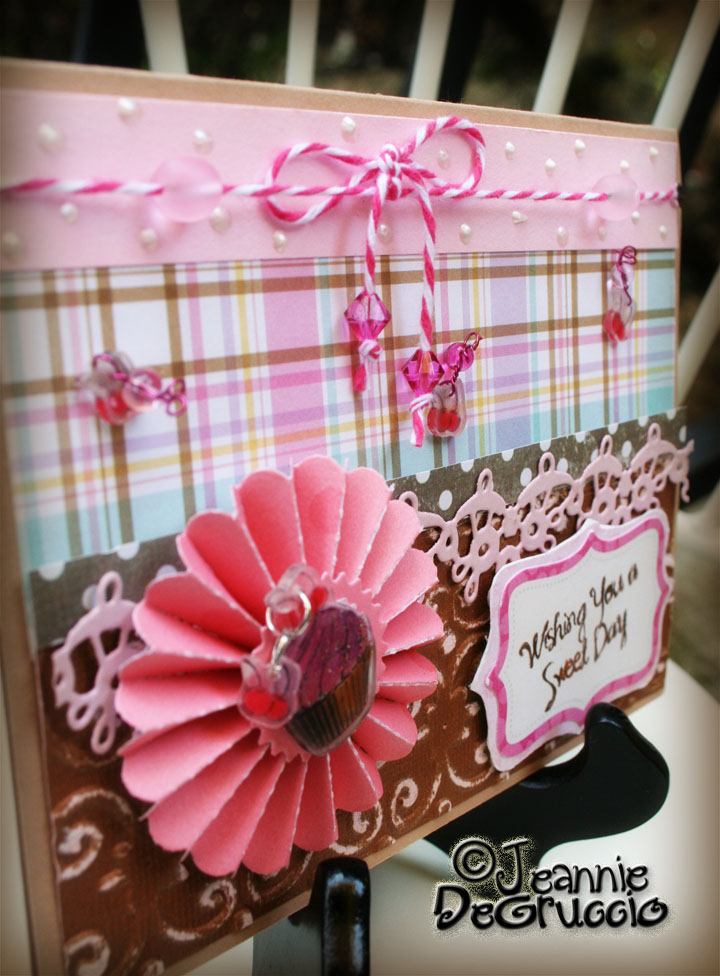
One last look at the final product.


Image

I hope you have liked my card today. I am so happy to be working with Gel-a-Tins stamps, I will be here again next week.

This has been Jeannie from The Polka Cabana http://polkacabana.wordpress.com/ with today's post.

Wednesday, November 9, 2011


This is a gift tin that holds a gift card inside. You could also put candy or a set of gift cards inside. It's fun and easy to make.

To create the cover of the tin I made a Rose Red panel, rounded the corners and adhered it to the front. To make the background, I created a slightly smaller panel and stamped the Medallion stamp from the Fancy Doily stamp set multiple times using the distress inks Victorian Velvet, Broken China and Bundled Sage, then I adhered it to the Rose Red panel. Next, I made a scalloped circle from blue decorative paper using a Nestabilties Die and adhered it to the panel. Finally, I created an oval with a Nestabilties Die and stamped Congratulations on it using Victorian Velvet distress ink and sponged around the edges using Bundled Sage distress ink and adhered it to the scalloped oval.


To create the inside of the tin, I created a Rose Red panel and rounded the corners. Then I stamped the Medallion on white paper using the distress inks and cut out another scalloped oval and a rectangle. I adhered the scalloped oval to the Rose Red panel and then attached the rectangle using Tim Holtz Tiny Attacher.


A closer view.


Materials1. Card Stock - Rose Red, Whisper White (Stampin' Up)
2. Decorative Paper - Out of Print (Basic Grey)
3. Stamps - Fancy Doily (Gel-a-tins)
4. Ink - Victorian Velvet, Bundled Sage, Broken China (Tim Holtz Distress Ink)
5. Dies - Scalloped Oval, Oval (Spellbinders Nestabilities)
6. Corner Rounder - Corner Chomper (We R Memory Keepers)
7. Tools - Tiny Attacher (Tim Holtz)
8. Tin (Stampin Up)

Tuesday, November 8, 2011

Now let's see some new projects!

Today we get to start showing you the projects made by our new DT!  They are amazing and I know you'll love them as much as I do!  Andrea is going to go first...

Image

From time to time we need those cards just to let the ones we love know they are missed and maybe take a little break from the hustle and bustle of everyday life. Gel-A-Tins coffee break stamp set is a perfect set to send this very message in a fun and sweet manner. Simple to create and a perfect way to utilize those tiny scraps of paper you probably have lying around.


Image

Supplies:
Gel-A-Tins Coffee Break Set
Gel-A-Tins New Woodgrain Stamp
Crate Paper paper
My Mind's Eye paper
Bazzill Basics cardstock
Glue Arts Perma Tac and UCut-It Foam
Prairie Bird Boutique ribbon
KaiserCraft adhesive pearls
Martha Stewart glitter glue and glitter
Quickutz circle die cut
button

Monday, November 7, 2011

Meet Design Team member Linda!

Today we're getting to know new DT member Linda Abadie! 


My name is Linda Abadie. I am a papercraft artist and a registered nurse practicing as an Assistant Director of Nursing in the state of Virginia. I married my wonderful husband and have two boys. They are my inspiration and have been very supportive and enthusiastic about my hobby as I am. I have a passion for stamping with various techniques, hand-doodling with marker and paint and love to create my own unique embellishments. Creating art has become therapy for me. It brings me happiness and helps me stay positive in life. I consider my style as happy and full of bright colors. My work has been published in various idea books and magazines including Paper Trends, Somerset Memories, Scrapbook magazine (UK), Memory Makers, Cards, CardMaker, Card Creations, and Scrap & Stamp Magazine. I am very thrilled to be part of the Gel-a-Tins team and am excited to start this creative journey and share my creations with all of you. Please feel free to visit my blog at http://lindaabadie.com. Takecare...

Saturday, November 5, 2011

Meet Design Team Member Kim!

We're still getting to know the new team and today it's all about Kim Sonksen here on the blog!  Leave her some love or just say hello!


I am Kim, a 47 year old German National living, loving and working in the United Kingdom for over 12 years, having become completely britified by now.

During the day I work as a Customer Relations Executive for the biggest cruise line company in the World, which is one of the most exiting jobs I have ever had. Papercrafting is therefore my artistic vent to relax after a stressful day at work and many of my projects do feature photographs of my travels on board Queen Mary 2.

I started papercrafting more seriously in 2004 when I dabbled more in cardmaking but soon crossed over to scrapbooking, and my proudest moment had to be when I was voted Best New Talent 2006 by the UK print magazine Scrapbook Inspiration.
Stamping has always featured heavily on my projects, as there are so many possibilities. You can use your stamps to create background, embellishments, layer the images, emboss the images and so much more.

I am so excited to call myself a Gel-a-tina and hope that you will enjoy looking at my projects as much as I enjoy creating them. If you would like to see more of my work (papercraft and crochet), please feel free to pay me a visit on my personal blog: http://kimsonksen.blogspot.com/

Friday, November 4, 2011

Meet Design Team member Jodi!

I hope you're having as much fun getting to know the new team as I am!  Today we're learning more about Jodi!


My name is Jodi Wilton, and I live in Welland, Ontario, Canada. I have been married to my husband for 8 years, and have three wonderful kids. I have the pleasure of running my own daycare from my home, and have been doing this for over 5 years. I first got interested in scrapbooking when I worked on a cruise ship, as a way to document my travels. That was over 10 years ago, and today I enjoy all types of papercrafting! I love the versatility of stamps, and love teaching classes using stamps on cards, layouts, and altered projects! I am constantly searching for new techniques to try! I am absolutely thrilled to be designing for Gel-a-tins stamps! I look forward to inspiring, and to be inspired! Feel free to come and visit my personal blog: http://luvalotland.blogspot.com/

Thursday, November 3, 2011

Meet Design Team member Jeannie!

Today we're all about getting to know Jeannie!  Welcome to the team!


I am Jeannie DeGruccio, native California girl.  I am so excited to be on the Gel-A-Tins Design Team.  A little about me:  I am a mom, I have 7 kids, ranging from 20 years to 4 years old. My hubby and I have survived, so far through 22 years of marriage.  I have been Scrapbooking/Stamping /Paper Crafting for at least half of my life.  I started crafting as a young mom to decorate my home on a very tight budget.  From there I got into scrapbooking and card making and moved onto various forms of art and crafting as the trends changed.

I am a down to earth person, the things I make are for real people, not meant to be on display shelf in a museum or too thick to put in a scrapbook. I make things and show things to people to inspire them, not to scare them or show off.  If I had to describe my style I would say I am a whimsical scrapper/crafter.  My things tend to be bright and cheery and I love to think outside the box.  I want to help people realize their own potential as crafters/artists.  I do not feel like I have any more talent than the next crafty person. I guess it’s just that I’m just not afraid to take risks and I make what I love.  I do not fear paper and I can tame any piece of paper.  I think all the above is why I am so in love with stamping and paper crafting.  I hope to inspire and entertain and show you some real doable things to recreate in your own fashion! 

Now, where are my stamps??

Wednesday, November 2, 2011

Meet Design Team member Donna!

Today we're all about new DT member Donna!  I'm having a lot of fun getting to know our team a little better and I hope you are too!


Hi, my name is Donna and I live in Irmo, SC. I’m so excited to be a member of the Gel-a-tins Design Team!! I’m a high school teacher and my favorite classes to teach are Photoshop and Web Page Design. I enjoy exercising and you can catch me at the gym several days a week at 5am on a cardio machine browsing through current card making magazines. I also love to travel. My two favorite places to visit are London, England and Cabo San Lucas, Mexico.

I started making cards and scrapbooking in the late 1990s when a friend of mine introduced me to stamping. I have always loved card making and a little over a year ago I rekindled my love of papercrafting. My favorite things to make are cards and mini-scrapbooks. I started my current blog, The Crafty Corgi, in February 2011. Since then I have placed in several online challenges including the Moxie Fab World Chevron Chic Challenge. I’ve also had cards published in Paper Crafts, Card Maker, Take Ten and CARDS magazines. I love to try different styles and techniques, but my favorite style is probably Clean and Simple. I really love graphic cards and I believe less is more.

Tuesday, November 1, 2011

Meet Design Team member Andrea!

Good morning!  For the next week we're going to start getting to know our new DT a little better, and after that we'll be all about the beautiful projects they've been working on.  Today we're going to start with Andrea!


Hi my name is Andrea and currently reside in the sunny, and sometimes too warm, state of Florida. I am a stay at home mom of two boys, one cat and a house that never seems to keep clean. During the day, and many late nights throughout the week, you can find me surrounded by all things crafty. My crafting began in college, oh...several years back, when my friend and I combined a love for shopping and all things creative. I remember spending hours in our local craft store just wandering the aisles and tossing this and that into our shopping cart. Guess you can say this habit still lives on today, just less frequently. Don't believe I could pick just a handful of favorite items, but find that stamps are always a part of every project whether it is to create a background, border or tag. I truly enjoy incorporating new techniques, colors and tools in my everyday crafting. From bright and bold to the shabby chic vintage, I love it all.