Friday, July 29, 2011

Friday Halloween fun!

Today we have some more great projects to share with you!  I have been having a lot of fun on the net lately, looking at Halloween ideas.  Making treats for three classes worth of kids is something that I have to plan and start early.  Today's projects combine gel-a-tin stamps and easy to find supplies to make treats that you'll love giving away!  First, we have a little something from Karin.
"This little goodie bag I made using a template from Silhouette and cut it out in kraft cardstock. Stamped it with the bats and cob web images from the Halloween set before I glued it together."


Angela made this cute set with a Halloween treat bag and matching card.  Projects like this are perfect for giving to friends and neighbors!

Image

"I love the big pumpkin stamp and I embossed it with black powder and then inked the cardstock with a shimmery orange-red ink. The same ink stamped on a black cardstock was used for the small pumpkins. I embossed the sentiment with White On! Gelly Powder."

Image


Image

"I stamped a little acetate bag with the big pumpkin stamp using Staz-On ink, then I filled it with peanut butter cups."

Image

"I border punched the bag topper with a Kreaxions punch from Just Imagine crafts, then stamped the sentiment and spiders. Love these little spiders!"
Image

"I stamped the bats on grey cardstock and then cut them out and glued them to wire spirals for a fun little detail. What a fun treat to give on Halloween!"

Thursday, July 28, 2011

Lots of treats, but no tricks here!

We have been having so much fun with the two new Halloween sets this month.  I hope you've been enjoying all the inspiration and are ready to get a head start on your own Halloween projects!

This project is by Jessica (that's me :)  I used to teach cake decorating and I love making cupcakes for parties and gifts.  The banner that's part of the Witchy Poo set made me think of the banners you see so much on cakes lately.  I just sized it down and attached it to twine.  I also used that banner (attached to my block on a curve) to stamp around the bottom edge of the cupcake wrappers I cut out.  The spider is from the other Halloween set and the bones are from Witchy Poo.  I think a table full of these would be so fun at a party!


Supplies:
Paper by Basic Grey, ink by Staz-On, twine by The Twinery, 
bamboo skewers from kitchen store, beads from Wal-Mart

Gladys made this adorable card with the Halloween set.  How amazing does that spider stamp look with that stitched web?!


Supplies:
Paper:plum pudding cardstock, webster pages paris, Scenic Route - Metropolis Yasoda Street, Cosmo Cricket - Material girls
Ink:Vesafine Sepia, Onyx black
Stamp:Gelatins Halloween
Others: Green and black floss

Wednesday, July 27, 2011

More ways to say "Thank You!"

Happy Wednesday everyone!  We have more projects to share today so let's get to it!  Sharm has a card for us first.

"I would’ve probably shared before that I’m a vintage freak and that I can never steer away from having a couple of butterflies or flowers on my layouts or cards..and this card, just proves that I love those three elements..

This month, I was lucky to get the gel-a-tins Put a Cap on it stamp set which is D E L I G H T F U L! the stamp set also has simple sentiments that you can use on it’s own, or within the cap stamp. So here’s my project, using the single simple sentiment from that set."

Materials Used:
Cardstock: Bazzill Basics
Stamp : Gel-a-tins Put a Cap On It
Patterned Paper : My Mind’s Eye – Stella & Rose
Die: Sizzix Layered flower (for handmade flower embellie)
Flowers : Craft Supply
Grommet : Moof
Inks : Ranger Distress Inks, Staz On

Jessica made this Halloween tag to share.

"I love the Witchy Poo and Halloween sets and I combined them to make this cute tag.  I think it would be great to give away attached to some baked treats or a bottle of wine for friends."


I stamped the images from both sets on a white cardstock with Versamark ink and used the White Gelly powder to emboss them all.  I sprayed over all the stamped images with orange and silver mists and then wiped the excess off the images.  I cut out two die shapes, one from my stamped paper and one from black cardstock.  I stamped the greeting on the black cardstock just like the other images.  Add some more stamped, embossed images and twine, a little sparkle to the ends and you have a quick tag that your friends will really appreciate!

Supplies Used:
Versamark Ink
White On and Storm gelly powders
Heidi Swapp crystals
Twinery Twine


Tuesday, July 26, 2011

Fun for your whole family!

Both of today's projects were made with some of our great new stamp sets.  The Thanksgiving sets are so cute and versatile, you'll find a million ways to use them before and during the holiday.  The Button Up set is just perfect for any time you need that special button you want to add to a page, or for when you want to add the look of stitches without having to get out your needle and thread!

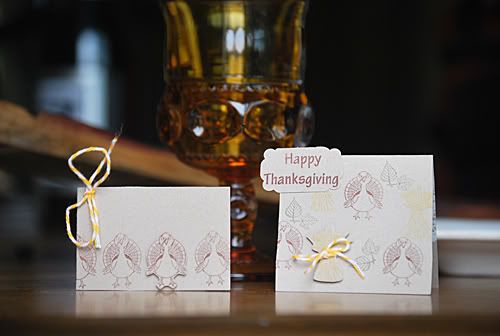
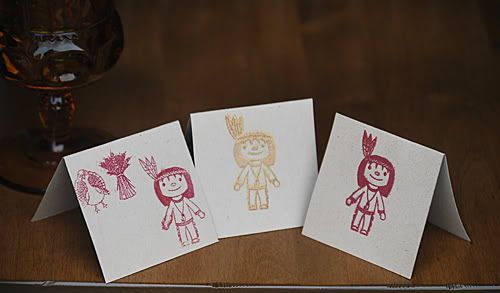
DT member Ellen made these pretty place cards with her kids! 

"When my son, Owen, saw these little Pilgrims and Indians he got so excited! Every year he makes the place settings for Thanksgiving so that is what we did with these stamps.

AND we embossed some of them! He had such a good time embossing. And his vote for favorite scent is watermelon ;) As for me, I cannot get enough of that cute little Turkey!!!

Image


Image

Supplies:
Kraft Bazzill
Ink: Stampin' Up!
Embossing Powders and stamps: Gel-a-tins
Twine: The Twinery
DT member Natalie made these fabulous cards with the Button Up set.  Cutting your stamped images out and using foam dots on the back is such a great way to draw attention to them!

Image

Monday, July 25, 2011

Gel-a-tins: Here to help you beat that case of the "Mondays"

I hope you're all having a great day out there!  At my house we're counting down the days until school starts (well, I am, anyway).  The kids go back on Wednesday here and I am looking forward to some uninterrupted crafty time!
 
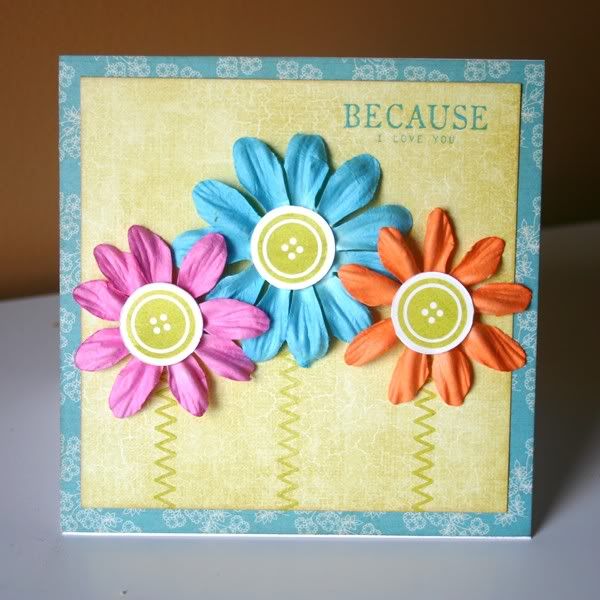
Our first project today is by DT member Cherie made with the Button Up set.  It's an adorable card.  Be sure to leave her some love today in the comments because it's her birthday!!  Happy Birthday Cherie!
 
"Here's a card I made with the buttons set. I thought the buttons just screamed flower centers so as soon as I received them I started sketching up this card. The stitching stamps make great stems as well!

Zoom out

Patterned Paper: Pink Paislee & Lily Bee Design
Stamps: Gel-a-tins
Rub-On: Creative Cafe
Flowers: Prima Marketing
Ink: Colorbox
This next card is by Cassie.  How amazing does all the black and white look with those Witchy Poo Halloween stamps?  I think I need to lift this one! 
 
"This new Halloween set has so many great little stamps. A person could have a lot of fun making their own dp with them :) I stamped the banner and then embossed it and cut it out to make a border. The image panel has the spider web and other little images stamped around for the background, and then the cauldron is stamped and embossed in black to make it stand out. "

Halloween1CT3nwm.JPG

Ink: Memento Tuxedo Black, Memento London Fog, Versafine Onyx Black, SU Creamy Caramel
Paper: SU dp, CDS Cottonball White
Accessories: black embossing powder, CDS Designer Label Die, silver brads

Friday, July 22, 2011

Happy Friday to you!

TGIF!!  It's time to get ready for a relaxing (but creative) weekend.  I see a lot of stamping in my future.  I hope all you gelly fans out there get some time to be creative this weekend too!

"I love layers and clustering..lots of it..! and vintage of course *lol* so here's another one from me, using the Put a Cap On It stamp set teamed up with the pretty Pink Paislee Butterfly Garden collection."


Materials Used :

Stamp : Gel-a-tins Put a Cap on it

Patterned Papers : Pink Paislee Butterfly Garden - Botanical Gardens, Girls Paperie Vintage Whimsy - Frou Frou

Ephemera : Pink Paislee Butterfly Garden - Ephemera Bits

Punch : Martha Stewart Border Punch, Carla Craft Corner Punch

And this card is by Natalie!  The Hot Diggety Dog set makes me want to throw a movie-themed party!

Image

 
Have a great weekend! 

Thursday, July 21, 2011

Thankful Thursday!

Today we have some fabulous projects for you that were made with our Thanksgiving stamps.  Cassie is going inspire you first!
 "As soon as I saw all the adorable people in this set, I knew some napkin rings would be perfect! They will look so lovely on our table for Thanksgiving. Just think of the fun name cards you could make to match. . .hmmm, I guess I'll have to do that ;)"

NapkinRingsCT1nwm.JPG

Ink: Memento Tuxedo Black
Paper: Bazzil Pomegranate, buttercream, Imaginisce - Apple Cider
Accessories: Copics, dimensionals, Labels 11 Nestabilities

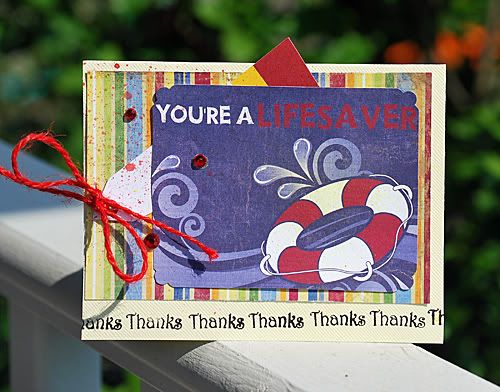
Ellen used her stamps to make this summery thank you card. 

"I love love how versatile Gel-a-tins stamps are! Just because this is a Thanksgiving themed set, doesn't mean you can't use these stamps for every day "thank you" cards. You can never have to many of these cards in your stash for quick gifts and notes and this stamp set is perfect for that!"

Image

Stamps: Gel-a-tins
Ink: Stampin' Up!
Mists: Tattered Angels
Paper: BoBunny
Misc: hemp

Wednesday, July 20, 2011

Wednesday Scrapping!

We have some projects to lift those mid-week blues! 

This first card is from DT member Karin.  I love stamping over patterned paper, and this card really shows off the stamps from the new Witchy Poo set!


I stamped the haunted house on text paper with Walnut Stain ink (TH).
Used spellbinders die for the window and the little tag.
The kraft cardstock is embossed using PTI's text embossing plate.

DT member Cherie made this sweet layout with the new Button Up set.  I have got to get this one!

"I love buttons and the Buttons Set is a great way to add buttons to your page without the bulk. Stamping your buttons is also a great way to add that perfect embellishment by finding an ink that matches your papers. For this layout, I stamped three different buttons onto white cardstock and used a circle cutting template closest to each size button. Then I could place the buttons on my layout wherever I needed to for a custom embellishment. For extra dimension, you could even pop dot the buttons or use thread through the holes of each button."


Patterned Paper: Pebbles Inc.
Stamps: Gel-a-tins
Ink: Stampin' Up!
Chipboard: Pebbles Inc.
Die Cut: Jillibean Soup
Die Cut Title: Quickutz Silhouette
Journal Card: Unknown

Tuesday, July 19, 2011

Time to Get Spooky!

Hello gelly fans!  Today we have more Halloween for you!

First up, this Halloween decor project by Jessica (that's me :).  I used some frames I was given to make these cute little shadow box style decorations for my house.  I can set them on a table or hang them on the wall.  Can't wait to use them!  That Halloween banner that comes in the Witchy Poo set might just be my new favorite stamp.


Supplies Used:
Witchy Poo stamp set and Storm scented embossing powder by gel-a-tins
Cardstock by Coredinations
Texture rollers by Xyron and texture folder by Provo Craft
Versamark and Staz-On inks
Twinery twine, Daisy D's stickers, Martha Stewart accents


Next up is this adorable tag by Gladys.

Halloween Tag
Supplies list
Paper: Stamper white cardstock from pti, webster page ladies and gentleman 6x6 and crate paper portrait 6 x6 collection
Ink: Chicken feed and Lemon drop from jenni bowlin, versafine onxy black and grey, versamagic pretty petunia
Stamp:Halloween from gel-a-tins, Love live here from pti
Others: Green floss. satin black ribbon, purple rhinestone, floral border punch from martha stewart, love live here house die, big shot

Monday, July 18, 2011

Happy Monday!

I hope your week is off to a great start!  Our first project today is this layout by Sheree.  She used the Button Up set to add accents to her page.

"I love using this stamp set to make your own hand made buttons. By stamping the buttons onto patterned paper then adding a crystal lacquer over the top you can customize your embellishments to match your page..."


Products Used
Little Yellow Bicycle Patterned Papers
Prima Canvas letters
Misc Doily
Button Up stamp set - gel a tins

This shadowbox card is by Cassie.  She used the Witchy Poo set and it really shines!
"This set just screamed 'Shadow Box' card to me. I love these kind of cards, because you can really make a fun scene. The images are embossed for added dimension."
Here is a link on Splitcoast for the Shadow Box card.

Halloween1CT2nwm.JPG
Ink: Versafine Onyx Black
Paper: unknown purple, BG Eerie
Accessories: Scor-pal, Circle Nestabilities, dimensionals, black embossing powder

Saturday, July 16, 2011

It feels like Fall!

I'm sure you've noticed that our newest stamp sets that the team has been working with are Halloween and Thanksgiving themed.  It's never too early to start planning if you're hosting.  And if your kids are helping with the projects, you might like having the extra time! :)  I know I need it!
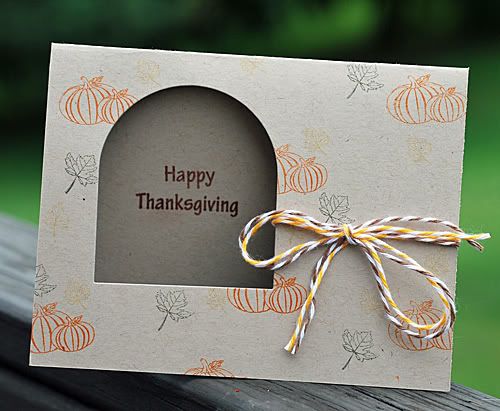
Ellen made this simple, but beautiful Thanksgiving card with one of our new sets.

"I love these mini stamp sets. They are perfect for creating your own backgrounds, especially for cards since the images are scaled down ."

Image

Supplies:
Bazzill Kraft
Ink: Stampin' Up!
Stamps: Gel-a-tins
Die: Papertrey Ink (for window)
Twine: The Twinery

Karin used the Witchy Poo set to make this adorable treat box.  I think my kids will be wanting some of these for sure!

"I used the Silhouette gable box template for this box of treats, and Spellbinders dies to create the little label. The cute cat is from the new Halloween set which I loved working with - so many possibilities!!!."


Papers from BoBunny and Arkivet

Friday, July 15, 2011

Cheers!

It's all about the cards today!  Sharm used the Put a Cap On It set to make an accent for that sweet card.


Cardstock: from craft store
Stamps: Gel-a-tins Put a Cap On It Stamp Set
Patterned Papers : Martha Stewart & MME
Punch : Martha Stewart Border Punch
Ink : Ranger Distress Inks

Jessica used the new Halloween set to make this flat card that would make a great party invitation!

"I love all the detail in that pumpkin stamp!  I could use it on cards and layouts for Halloween over and over!  The bats and spiders and even the little moon make great accents whether they're stamped on an envelope or cut out."


Card blank: DCWV
Alpha: Making Memories
Papers by Target, Junkitz, K & Co. and Echo Park
Tag and sticker by Daisy D's
Pinking Shears by Fiskars
Ink by Ranger and Staz-On
Xyron adhesives


Thursday, July 14, 2011

Creativity coming your way!

Our first project today is by Natalie.  She made this adorable cards with the Hot Diggity Dog set.  You could easily print out information for a movie party and attach it to the back.  Who wouldn't love to get that ticket?

Image
Sheree made this fab layout with the Halloween set.  I love the dimension!

"Although in Australia we don't tend to celebrate Halloween much, my daughters birthday just happens to fall very close to it so this year we decided on a big Halloween birthday party for her 10th birthday... she of course had to go as the young Vampire girl (Twilight fan of course). This Halloween stamp set worked perfectly with these photos... loved the little spiders and flying bats..."


Supplies Used:
Gel A Tins Halloween Stamps
Kraft Cardstock
DCWV Gitter Chipboard alphas and embellishments
Kaiser Craft grid stamp

Wednesday, July 13, 2011

More Fun Cards!

When was the last time you had a Thanksgiving set that you could use any day of the year?  This new set is so cute that you could use it for your projects any time!  Ellen made our first card today with it.

I know I got a Thanksgiving set but I had these papers on my desk and the stamps were there, too. So I thought they would be cool as thank you cards.
Image

Supplies:
Stamps: Gel-a-tins
Ink: Stampin' Up!
Punch: Creative Memories
Papers: Webster's Pages
Misc: embellishments
Twine: Twinery
Mists: Tattered Angels

 Now this great card by Angela that was made with the Spin Cycle set.
you spin me right round

Tuesday, July 12, 2011

Tuesday Fun!

We have some great cards to share with you today!  The first is by Cherie.


I adore this Shifting Gears set. It has so many different ways you can use it to make each project unique. When flipping through some of my embellishments this afternoon, I came across these super cute Fancy Pants Rub-Ons that worked perfectly with the Shifting Gears Stamp Set.


Zoom out

Zoom out

Cardstock: Bazzill
Rub-Ons: Fancy Pants
Ink: Stampin' Up!
Stamps: Gel-a-tins Shifting Gears & Honey Bear

And this adorable Halloween card is by Cassie.

I thought it would be fun to get away from the traditional orange and black by using kraft in a nighttime setting. I punched a circle in some scrap paper and then airbrushed the moon in. I covered the moon with another circle punched out of a post it so that I could airbrush the rest of the night sky around the moon. After that was accomplished I stamped the haunted house. The main panel for the card was embossed with an embossing plate.
Zoom out


Ink: Memento Tuxedo Black
Paper: CDS Worn Parchment, CDS Cottonball White
Copics: B95, B97, YR31, YR21
Accessories: Square Nestabilities, airbrush, circle punch, yellow ribbon, Halloween button, navy wire, TE Woodgrain Impression Plate

Monday, July 11, 2011

Blog Hop Winners and More Projects!

First off, let's congratulate some Blog Hop winners!  Thank you to everyone that took part and shared our hop with their friends!  We have more to come for our fans so be sure to follow us if you haven't already.  You don't want to miss out on the projects and prizes!

Our winner for our new followers drawing (who will get the Surf's Up stamp set and the teal blue Hawaiian Paradise scented embossing powder to go with it) is.....
SuzyQ!!

The winners for each blog are:
gel-a-tins blog:  Bobbi-Lynn and "amy"
Ellen:  Kelly
Karin: Alex
Cassie:  Rebecca
Jessica:  Bishop's Mommie
Cherie:  Kim
Natalie:  Elin
Gladys:  Linda Johansson
Sharm:  Cathy
Angela:  Dot L

These winners get to choose from the three stamp sets, Admission is Free, Peace on Earth and Butterfly Love.  Just contact us with your mailing information so we can get those prizes out to you!  Our address is info@gelatinstamps.com .  Congratulations everyone!

Now let's talk projects.  This first card is from Karin.  She used the Witchy Poo set to create this dimensional Halloween card. 


I stamped the haunted house and embossed it in black.
Daubed /distressed around it with tea dye cham but made sure I left the windows clear.
I stamped the bats on a separate piece of paper and cut them out and glued them on.
The background is stamped with the web using snow white ink.

This adorable card is by Gladys.  I love how she took those pumpkin stamps and made them look like suckers!  Isn't that fun?


Paper: White cardstock from pti
Stamp: Halloween stamp from gelatins and Friendship jar from pti
Ink:versafine onxy black, chicken feed from jenni bowin
Others: Black satin ribbon, dark green thread, toothpick, picnic plaid impression plate

Have a great week everyone!

Sunday, July 10, 2011

LAST DAY TO HOP!!

That's right!  It's the final day of our gel-a-tin stamps blog hop!  Thank you to those of you that have gone to our DT blogs and left comments!
If you haven't done the hop yet, this is your last chance!  You have until midinght EST to hop and comment for chances at our prizes!  Just go here to start.
Winners will be chosen by random and will be announced tomorrow.

Get to hopping! :)

Saturday, July 9, 2011

July Guest Designer - AnnCaryl Worland


Our first Guest designer this month is AnnCaryl Worland!  She worked with our Witchy Poo and Give Thanks sets to make these great projects!  Let's hear what she has to say about herself and gel-a-tins!


"I go by a double name. I always tell people not only is my name backwards, but it is spelled weird!
I graduated from High School at The American School of London in 1963. Then I got a Bachelor of Fine Arts from the University of Oklahoma in 1967.  I was an Elementary School Art Teacher for almost 30 years. I am now retired.  I have been published in “Clear Albums for Scrappin” by Design Originals. I have also done layouts for several scrapbook stores. I was the winner of the School Division for ProvoCrafts 1st Cricut Contest in 2006.  I am the mother of a boy and a girl. They are both adults now. I am the very proud grandmother of two girls, ages 7 and 4. I sure wish they lived close by.
I am very pleased to be chosen as a Guest Designer for Gel-a-tins . The best thing about Gel-a-tins is how deeply carved they are. It makes the images show up much better than so many other clear stamps. I also love their very timely subjects."


Thank you AnnCaryl for the great work!