Wednesday, September 12, 2012

A Cure for the Grumpies!

What better way to cheer yourself up than a nice cupcake!, give your friend a treat and use the gel-a-tins 'Sweet Cakes' cupcake stamps to make this tasty card.

Image

Products Used

gel-a-tins 'Sweet Cakes' Clear Stamps
Dovecraft 'Tea Party' Stack
American Crafts Shimmer Paper
Xyron 9" Creative Station
Xyron Mega Runner
Foam Pads
Websters Pages trim
Tim Holtz Embossing Power
Adhesive gems
Promarkers
Staz-On Ink Pad


I started by matting and layering the American Crafts and the Dovecraft papers.

Image

Next I took the sentiment stamp and used the Staz-On ink to make a topper, I used foam pads to add to the bottom of the top layer.

Image

I then used the cupcake stamp and using the Staz-On ink I stamped the image onto white cardstock, I used the 'filler' stamp with an embossing pad and the embossing power to give a textured frosting to the cupcake

Image

Using the adhesive gems to add sprinkles on the frosting.

Image

I again used foam pads to give dimension to the cupcake.

Image

To finish I placed a lenght of the Webster Pages trim under the sentiment and a bow on top.

Image

There you have it a delicious treat for a friend.

Tuesday, September 11, 2012

Damask Flowers Card

Happy Tuesday, Gel-a-tins fans! Thank you for stopping by! Today I am showcasing the new damask set that I am sure you will all love!

Yes, I know I said damask! But it shouts flower to me. Here is my card:

Image

I choose do to the card in bright cheery colors. With it being a 'thinking of you' card, I figured it would brighten the recipient's day!

Image

I absolutely love the quality of the Gel-a-tins stamps! It was so easy to stamp a crisp, solid image! To add another pop of color, I added yellow buttons to the 'center' of the flowers. The sentiment is stamped on a diecut and adhered using foam dots to add some dimension to the card.

Once again, thank you for stopping by today! I cannot wait to show you more project from this amazing stamp set!

Have a great day!
Jessi P.

Supplies:
Gel-a-tins Damask Stamp Set

Monday, September 10, 2012

Sweet Cakes Tag

Hi everyone! Great to see you here again!

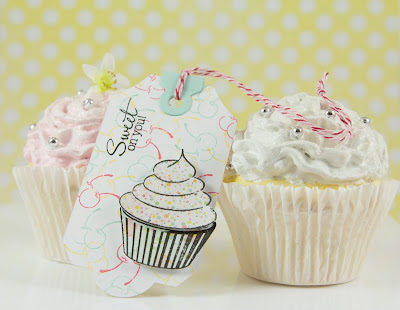
Today I'm bringing you a sweet tag featuring the Sweet Cakes set from Gel-à-Tins! It's no secret that I have a sweet spot for cupcakes and cupcake stamp sets - and this set is no exception! I just love the mix 'n' match options for the cupcake frosting and the little extra images too!

I wanted to create a quick little gift tag and this one came together pretty quickly:

Image

What do you think? Good enough to eat?!

I started by stamping the cupcake frosting and wrapper onto patterned paper and trimmed them out. I sprayed the frosting with adhesive and added some glitter before adhering the frosting to the case.

Image

I then die cut a tag from white cardstock and stamped it repeatedly with the cherries stamp to create a fun background. I added the hole reinforcer, cut from a different colour cardstock and some twine.

Image

Finally I added a sweet sentiment and adhered my cupcake and I was done!


Supplies Used:

Gel-à-Tins:
Sweet Cakes stamp set

Other:
Fruit Fusion: Cherries stamp set (Papertrey Ink)
Berry Sorbet ink, Aqua Mist ink, Harvest Gold ink (Papertrey Ink), Versafine Onyx Black ink (Tsukineko)
Stamper's Select White cardstock, Aqua Mist cardstock (Papertrey Ink)
Neapolitan Pattern Paper (Dear Lizzy)
Tag Sale #6 die (Papertrey Ink)
Pinflair Glue Gel (Olba), Scor-Tape, Stick & Stay adhesive spray
Glitter (Martha Stewart)
Twine (Divine Twine)

I'd love to know what you think of this project. Thanks for stopping by - and have a sweet day!!

Saturday, September 8, 2012

Some Pretty Damask for your Saturday!

Hi there! It's Anita Rex here with a card to share! I recently got some new Gel a Tins stamps and I am quite smitten with this damask set! Got the set and was inspired to make this card right away! I used two of the stamps from it to make a background:

Image

Image

I stamped the large damask in teal and brown ink, I stamped the smaller damask in linen. So easy to make a background with these stamps and fill up a card! Added some bakers twine and some flowers! Left it sentiment free as it doesn't need it!

That's it from me! I can't wait to play with this set again! :>

Friday, September 7, 2012

A Doodle Flower Wreath

Hi dear crafters.
In the first days of autumn I want to show you a wreath of willow branches.

Image

Image

Image

I took a few willow branches, fix them on the edges of twine and formed the heart.
Than stamped the doodle flower, cropped them and decorated with half pearls.

PRODUCTS USED
gel-a-tins "doodle flower"
half pearls


Have a great day!
Tanya P.
www.diaryofcards.blogspot.com

Wednesday, September 5, 2012

Love Me, Love Me Knot

Image

I made his card in honor of my fiance. We knew each other growing up. About 6th grade, we decided to carve our initials in the tree out front of my house. Many years later, we assume those initials are still there as that tree is much, much taller.

This background stamp, Love Knots, is perfect for a tribute to that expression of our childhood love.

To make this card, stamp the image onto light brown cardstock with brown ink.

Stamp it once more using red ink. Cut out part of the heart knot and adhere it with a foam adhesive square for some dimension. Add letter stickers. I used light brown stickers and just darkened them a bit with a colored pencil.

Adhere the stamped panel to a darker brown card base.

I hope you "love" this quick and easy card. Thank you for stopping by today!
-Kim F.

SUPPLIES:
Gel-a-tins Loveknots Background Stamp
Red Chalk Ink by Colorbox
Brown Distress Ink by Tim Holtz
Letter Stickers by Jillibean Soup
Cardstock
Foam Adhesive Squares

Tuesday, September 4, 2012

Have a Sweet Day!

This month I am creating projects using the gel-a-tins 'Sweet Cakes' set of gorgeous stamps. In this set there are a total of 12 stamps and all are equally delicious. For my first project I took the Cherries, Strawberry and Wishing You a Sweet Day stamp and made a card.

Image

Products Used

Gel a tins 'Sweet Cakes' Clear Stamps
Docrafts 'The Little Cake Shoppe Collection' Papers
Staz-On Black Ink Pad
Xyron 9" Creative Station
Xyron 150 X
Foam Pads
Letraset Promarkers
Peel Off White Glitter Strips


I stamped the cherries and strawberry in a repeated pattern on a white piece of paper and cut into a strip.

Image

Then I ran the strip through the Xyron 150 X and layered in onto a red strip of paper and again ran through the Xyron 150 X and placed along the centre of the card from left to right.

I then used the 'Wishing You A Sweet Day' Stamp and again used white card .

Image

I layered this on top of green and red card. I placed this on the right side of the card using foam pads on to of the strip.

Image

To finish I used some white glitter peel off strips along the lines.

So there you have it!

Monday, September 3, 2012

Make your own wedding invitations!

Hello, Gel-a-tins fans Thank you for stopping by today! We are switching it up a bit today. With the fall approaching, the wedding fever starts to spread. With that in mind, I am showing you a simple, but elegant wedding invitation using our damask stamp set.

Image

This stamp set would be perfect for any formal occasions coming up. Are you having a dinner party for the holidays? Need to send out cute invitations, but don't want to spend an arm and leg for them? Why not make your own!

Image

I shared this tip before, but to make sure the image stamped crisp, I first used Versamark ink and then applied the chosen ink color to the stamp.

Once again, thank you for stopping by today.

Jessi

Supplies:

Gel-a-tins Stamps - Damask
Mohawk White Cardstock
Bazzill Cardstock
Michael's Ribbon

Saturday, September 1, 2012

Love Knots Polariod Photo Frame

Hi everyone! Happy September! I can't believe how fast the year's going!

Today I'm bringing you a project that is a true work of heart - one that I'm truly proud of!!

I saw a great use for a polaroid frame die out in blogland recently - someone had taken one of these to create a photo frame! Genius! I read the tutorial with interest. I was sure I could create a 'version 2.0' that would be better and have my own spin on it. And I couldn't think of a more appropriate stamp set to use than my all-time favourite Gel-à-Tins stamp set - Love Knots!!

In the back of my mind I wanted to evoke the feel of expensive wood furniture - the kind with a a mix of a cream and proper wood tones finish, glossy, modern, funky. You can tell me if I've managed to succeed:

Image

What do you reckon? I'm so über-proud of how this turned out - completely in love with it!!

Image

I started by die-cutting the frame from cream cardstock and cream coasterboard. I wanted quite a few layers to make the frame sturdy. I stamped the Love Knots stamp on the top layer with a linen coloured ink, inked the edges then adhered all the layers together. Between the coasterboard and final layer of cardstock I sandwiched a piece of acrylic sheet to create the frame 'glass' (the original idea didn't have this).

Image

I hand-cut a piece of chipboard to the same dimensions as the frame front, the cut a wider gap in the top and further down than the frame aperture ended. This is to serve as the 'spacer' between the front and back to slot a photo in. Once this was adhered in place I could add the back piece/layers, cut by hand to match the frame dimensions and stamped with Love Knots as well for a cohesive look.

Image

I trimmed a strip of cardstock to the depth of the frame and stamped it with Love Knots using brown ink. I adhered this in place with adhesive tape. Once all the layers were adhered I 'painted' the frame with Mod Podge (which I'd also used to adhere the layers) then sprayed with a couple of coats of gloss spray to give that shiny expensive look I was after.

Image

To add the photo I measured the gap at the top and trimmed a rectangle of brown cardstock that could be slotted into the gap and have some overhang to finish the top and make it look seamless (again a modification from the original). I added a fold for the top so that the tab could be pulled in and out. It looks like a distorted 'T' shape when unfolded.

Image

I stamped the top with Love Knots and brown ink as before, painted with Mod Podge and sprayed with gloss spray as before. I added some thin foam adhesive squares to the tab to adhere the photo in place. Before adhering the squares I repeatedly pressed them between my fingers to remove some of the tackiness, so that they became more 'temporary' - meaning the photo can be switched if desired! The photo, by the way, is of one of my sweet cats - isn't he adorable?!

Image

To make the frame usable I wanted it to be able to stand by itself. The original idea in blogland was a piece of cardstock cut at an angle and adhered to the back, but I wanted mine to be like a real frame - I wanted a hinged stand!

Image

I set about creating one with some chipboard and stamped brown cardstock pieces (all stamped and prepared as mentioned with the pieces above). I backed each side of the chipboard with stamped pieces and inked the chipboard edges before painting and glossing as before. I used some dimensional glue gel (for extra strong hold) to adhere a hinge in place - and my frame was done!!


Supplies Used:

Gel-à-Tins:
Love Knots stamp set

Other:
Fine Linen ink, Dark Chocolate ink, VintageTouch Tea Dye Duo ink (Papertrey Ink)
Rustic Cream cardstock, Coasterboard, Clear Cardstock (Papertrey Ink), Brown Leather Satchel cardstock (Clear & Simple Stamps), Chipboard
Pinflair Glue Gel (Olba), Scor-Tape, Mod Podge, Spray & Shine, foam adhesive squares
Hinge

I'd love to know what you think of this project. It took many hours and a lot of thinking to plan the design out before executing but I think it was totally worth it! Would love to know if you agree! Thanks for stopping by!!

Blog Hop Winners!

Hey there and happy Saturday, gelly fans! 

I hope you all had fun with the blog hop!  I know I enjoyed seeing everyone's favorite projects and I loved reading all of your kind comments.

Speaking of comments...we have some winners!  We chose a random name from each DT member's blog and one name from our blog followers here.  That's a total of nine prizes!  Here are the lucky peeps that won!

Jessica B's blog - Тамика

Tanya's Blog - Anastasiya Vlasova

Anita's Blog - Robin K.

Taheerah's Blog - Aimes

Jessi P.'s Blog - Miriam Pratner

Sharon's Blog - Lillian Child

Kim F.'s Blog - Mary-Anne V

Nina's Blog - Alexandra Sirugue-Macleod

And the blog follower winner is Cathy La Hay

All you winners need to do is email bonnie@gelatinstamps.com and share your address to claim your prize.

Thank you all so much for playing!  I hope you'll keep on watching the blog and Facebook page to see more of the amazing work this team has to share with you!