Showing posts with label Cassie. Show all posts

Friday, October 28, 2011

Are you ready for the weekend?

Maybe you have some fun and crafting planned and maybe you'll just be trying to keep your kids (or spouse) away from all the Halloween candy.  We're having a Halloween party at my house and I can't wait!  I've been working on cards and decor this month and it's going to be a blast!  Of course, I have been using my gel-a-tins a lot this month, and I'm sure that today's projects will make you want to get crafty too!

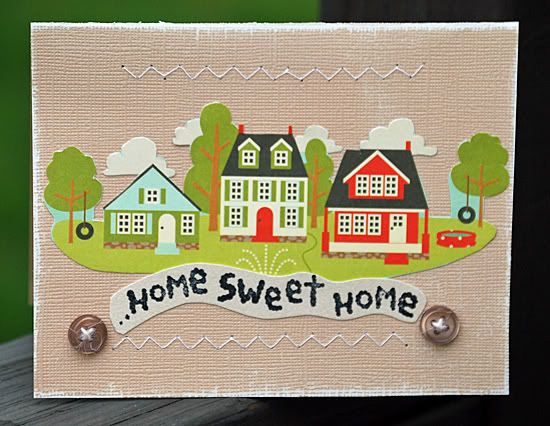
Ellen made this cute card with the Home Sweet Home set!

Image

"I love love this Home Sweet Home set for cards, too! Everyone has friends that move so having one of these in your card stash is a must!"

Supplies:
Patterned Paper: Pink Paislee
Carstock: Core'dinations
Buttons: misc

Cassie altered a small gift box with the Chocolate Bliss set.  I love this set and it's so fab on this little box!

ChocolateBlissCT1nwm.JPG

"I found some small old boxes the other day, and I thought 'these need a makeover'! I covered them in patterned paper, and decorated it with some ribbon to make it look like a gift box. "

ChocolateBlissCT1anwm.JPG

Stamps: Chocolate Bliss
Ink: Memento Tuxedo Black, CDS Hot Cocoa
Paper: BG Sweet Threads, buttercream
Accessories: pink ribbon, Scallop Circle & Circle punch, Magenta Viva Pearl Pen, box

Have a great weekend!  We'll be back Monday with even more inspiration for you!

Monday, October 17, 2011

Merry Monday!

Hello again to all you gelly fans!  I hope you all enjoyed your weekend and are ready for some more crafty goodness!  Today I have projects to share with you that were made by DT members Cassie and Gladys.  Let's get started with a card from Cassie!

"This set is perfect for brides that want to get the word out well in advance to 'Save the Date' about their wedding. It was beyond easy to make, and a bride could even simply it even more. So easy and fun!"

SavetheDateCT2nwm.JPG

Stamps: Save the Date
Ink: SU Bermuda Bay, SU Soft Suede, SU Melon Mambo, SU Kiwi Kiss
Paper: buttercream, BG Hello Luscious
Accessories: Soft Suede ribbon, Peacock Liquid Pearls, Circle Nestabilities

Now I have another card, this time by Gladys.  Check out all the pattern and texture on this one!

sillyyou1.jpg

Supplies:
Paper: Sweet blush cardstock from pti, Melissa Francis - 5th Avenue
Ink: Versafine smokey gray, Memento rose bud
Stamp: hello from gelatin, tiny tags from pti
Others: Edger#2 collection die, doily collection die, tiny tags die, favorite words die, white buttons, scallop circle felt and candy strip circle from my etsy, 1 3/4 circle punch, 1" circle punch, pearl

That's it for today, but don't forget about our Monthly challenge!  Head over to this post to check it out and make your entry!

Wednesday, October 12, 2011

Too much good stuff!

I have such amazing projects to share with you today!  Angela and Cassie really went all out with these and I know you'll be glad you stopped by today and got to see them!

Angela made a set of cards with the Chocolate Bliss set that is wonderful!  I love that she did this color combo and I'm sure you'll love it too :)

"Had a lot of fun making a little gift set using the Chocolates set!"

Image

"I made a card, a little gift bag which I filled with mini chocolate bars, and a tag and matching envelope."

Image

"I stamped the chocolates in Desert Sand and Chocolate Chip ink and then glittered some using a Spica glitter pen. The paper is Farmhouse by Crate Paper."

Image

"This is a detail from the front of the bag."

Image

Image

"I cut the library card style envelope using my Silhouette digital cutter, and then made a tag to fit inside."

Image

"The sparkly bits are Pink Paislee glitter stickers, and that Spica glitter pen again!
The chocolate stamps stamp so smoothly and I confess I had a chocolate craving or two - that chocolate bag is not as full as it should be!"

Every one of those is awesome!  Thank you, Angela!

Cassie made a card with the Save the Date set that I can't wait to lift.  The colors are so perfect together and if you look closely you'll see that she made everything from the patterned paper to the embellishment with the stamp set.  What a great way to save money (and you end up with a card that looks a million times better than anything you can find in a store!)

"I made an anniversary card for my in-laws using the Save the Date set. The circles could be used on all sorts of projects, but I think they made a great background paper. There are just so many possibilities with this set!"

SavetheDateCT1nwm.JPG

Stamps: Save the Date
Ink: SU So Saffron, SU Baja Breeze, SU Real Red
Paper: SU Saffron, CDS Cottonball White, SU Baja Breeze
Accessories: red ribbon, dimensionals, Circle Nestabilities

Now, the Operation Write Home challenge may be over, but we still have this month's challenge going on.  Head over here to check it out and then get going on a project to enter!

Friday, October 7, 2011

Fabulous Fall Friday!

We're enjoying beautiful fall weather here in Arizona and I love it!  I have my Halloween decorations up and I've been doing some fall/Halloween crafting this week.  The nice weather makes crafting even more enjoyable for me.

Our DT has been working with their sets to make some projects that should inspire you whether you're ready for the weather to keep cooling off or not.  Let's see what Cassie and Gladys have to share!  First up is Cassie...

"I really enjoyed using the Save the Date set. I'm not a scrapbooker, so it was a challenge to think of how to use it. However, I discovered that this set has tremendous usability for a card maker! Here is a treat container I made for my husband in honor of our anniversary."

SavetheDateCT4nwm.JPG

Stamps: Save the Date
Ink: SU Pink Pirouette, SU Ridinghood Red, CDS Hot Cocoa
Paper: SU dp, buttercream, Chocolate Chip
Accessories: Circle & Scalloped Circle Nestabilities, twine, paper crimper

I love those little favors!  I made them one year for my kids to take to school and give to the kids in class for Valentine's Day.  Gladys made such a beautiful card to share with us today and I know that I need to lift it!

"This card is made using the Hello gelatins stamp set. Love how the big stamp show through the pattern paper!"
  
hellomyname1.jpg

Supplies:
Paper: Kraft cardstock from pti, Emma's Shoppe Collection 6 X 6 Pad from crate paper
Ink: versafine Onxy black, vintage photo distress ink from tim holtz
Stamp: Hello from gelatins
Others: Edger #3 die, turning a new leave and Bloom builder #3 die, button from pti

Check back tomorrow for the winner of our Operation Write Home challenge!

Friday, September 30, 2011

What a week!

Busy times for me!  We're coming up on fall break which means that right now it's all about half-days, assemblies and parent-teacher conferences.  Throw in a new DT to choose and you have one busy girl! :)

Our current team has been wonderful and they're still working hard on projects to share with you!  Let's check out one from Ellen to start off this fall Friday!

"I love love to create my own backgrounds with cardstock, stamps and ink!"

Image

Here are a few more with the save the date stamp set
Supplies:
Core'dinations Cardstock
CI button
Twinery Twine
Cosmo Cricket alpha stickers

We have another card by Cassie today for you!  I love the Halloween set and this card is making me think about all the other projects I need to make with it for October!

"I didn't just want to use black, although I struggled not to, haha. I pulled out some navy paper, and gave it a roughed up look by rubbing the ink pad directly onto the paper. For the main panel I used my Copics and my airbrush system to get the same sort of color as the navy paper, and then I embossed the little ghost in white."

GhostCTnwm.JPG

Ink: Craft White, Black Soot distress ink
Paper: SU Not Quite Navy, CDS Cottonball White, MME Gertie
Copics: T3, B39, BG75, & airbrush
Accessories: Circle & Labels 11 Nestabilities, white embossing powder, white Liquid Pearls

I hope you're all inspired to get crafty this weekend!  Don't forget that tomorrow is the day that we announce our new monthly challenge (and the winner for this month)!  See you then!

Friday, September 16, 2011

More new projects and a reminder!

It's Friday!  I'm looking forward to a weekend with temps under 100.  When you live in AZ, it's the little things like that that can make you day :)

This is your final weekend to get in your Design Team application!  Go here for the details and don't forget!

Today we have projects from Angela and Cassie.  Check out these adorable cards!  First up is Cassie.

"This big pumpkin image is great, because it encompasses all of what makes Halloween spooky. I used the Rock 'n Roll technique for the pumpkin. It was first stamped in the lighter orange, and then the edges were rocked and rolled around in the darker orange. The card was topped off with a black rose. . .ooo so spooky, hehe."


PumpkinCTnwm.JPG

Ink: SU Pumpkin Spice, SU Tangerine Tango, SU Crumb Cake, and Memento Tuxedo Black
Paper: BG Hello Luscious
Accessories: black felt & black ribbon, orange button, staples, sponge, MFT Rolled Rose Die

Angela has been working with the Build Your Own Paisley set this month and has made some amazing cards.  Check this one out!

"I loved the idea of making the paisley shapes into the petals of a flower. I stamped several in two shades of aqua (Baja Breeze by Stampin' Up!), stamping off on a scrap paper to get the lighter shade. I then masked the petals and stamped the leaves using a Christmas tree stamp from the Oh Christmas Tree set!"

Image

Image

"A pretty button and a sentiment (from the Many Thanks set) stamped on a die cut tag finish off the card!"

Wednesday, September 7, 2011

Wednesday cards!

Hello again!  Today was have cards by Cassie and Ellen to share with you.  Be sure to read through our other recent posts.  We have the Design Team call still going on and you have a chance to win a stamp set again this month with our monthly challenge (not to mention that you'll want to check out any projects you may have missed).
First up today is Cassie!

"It's hard to believe that October is right around the corner! The bats in this set are so cute, and I really wanted to highlight them. I used scraps of 4 different designer papers, each from a different collection to make my back panel. They were glued down to another lightweight paper so that I could stamp and emboss each bat."

BatsCTnwm.JPG

Ink: Versafine Onyx Black
Paper: SU Sahara Sand, CC Mitten Weather, MME Gertie & Mabel, CC Social Club
Accessories: black embossing powder, dimensionals

Now it's time for Ellen's project, this sweet pink card.

Image

Core'dinations Cardstock
Stampin' up! Ink
misc. Ribbon
PTI die for the window

Save the Date Gel-a-tins stamp
*I also used the Beary Much stamp sent for the sentiment*

Thursday, September 1, 2011

Let's kick September off right!

Good morning!  Today we've got some more cards for you that are full of gel-a-tins goodness.  Gladys made two, onesie-shaped cards and used the Admission is Free set on them.  I love the look of white ink on Kraft paper and how cute are those boy and girl themes!

admission2.jpg

Paper: Echo paper - Little girl and boy series
stamp: Admission is free, crown from 100 proofpress
Ink: fresh snow from pti, rose buds from memento, versamark
Others: felt, clouds die from pti, baby onsie shape-up die from pti, limitless layer scallop die, liquid pearl petal pink, pearl and crystal from prima


Cassie used the new Happy Halloween set to make a scary, spider-covered card for us!

"What's scarier than a spider? How about a bunch of them crawling across the surface of something! I started out by crumpling a piece of CDS Smoke Stack cardstock, and then marking it up with some Memento London Fog ink. After flattening it out as much as I could, I stamped the spiders with Versafine Onyx Black and then embossed them with some black embossing powder. How's that for creepy?! "

SpidersCTnwm.JPG

Ink: Memento London Fog, Versafine Onyx Black, SU Concord Grape
Paper: CDS Cottonball White, CDS Grape Jelly, CDS Smoke Stack
Accessories: black embossing powder

Wednesday, August 24, 2011

Cards to greet and cards to thank...

Hello again, gelly fans!  I'm back with more card for you today, this time from DT members Angela and Cassie.

Angela is going to start us off with a cute thank you card made with the Button Up and Many Thanks sets!

"So if one layer cards have a layer on top of the card base, then I guess this is a zero layer card! I used the Sewing Kit set, stamping buttons in a grid pattern, and added a round sentiment stamp from the  Many Thanks set to give my card a purpose!
This is a supplies-limited card - no patterned paper used, no embellishments, just a handful of inks (Close to My Heart Smoothie & Honey and Stampin' Up! Mellow Moss) and a card base."


Cassie has another card for us that she made with the Thanksgiving set.

"I decided to make a 5x5 card and to show off that fun turkey from the new Thanksgiving set. How could you eat that adorable little guy?!


Ink: Memento Tuxedo Black, SU Crumb Cake, CDS Turquoise Gem
Paper: parchment, buttercream, SU Dusty Durango, SU dp
Accessories: Copics, Circle & Labels 3 Nestabilities, Open Scallop Die-namics, sponge, brown button, teal ribbon, brown fibers

We don't have much time left for you to get in your projects for our monthly challenge!  Check out the post and enter to win!

Thursday, August 11, 2011

Gratitude

I hope you're all having a wonderful Thursday!  The gel-a-tinas are playing with the new "Many Thanks" set this month and I know that I'm enjoying seeing all the projects they have to share!
Cassie has our first project today, made with the Many Thanks set.  (Don't forget that this is the set you can win this month as part of our Monthly Challenge!)

"Here is another card using the adorable new Thanksgiving set. I wanted to use some vibrant colors, so that my little Native Americans would really stand out. These sweet characters just make me smile. . .so much so that I wanted them to hold hands :)"


GratitudeCTnwm.JPG

Ink: Memento Tuxedo Black, CDS Spring Leaf, CDS Tempting Turquoise, CDS Fresh Papaya
Paper: buttercream, Lagoon blue, unknown brown, MME-Gertie
Copics: E31, E33, E11, E13, BG72, G94, R32
Accessories: rhinestone brad, pink ribbon, brown skeleton leaves, lace border punch, dimensionals

Sharm has another card to share.  She used the flourishes from the Birds of a Feather set to embellish it!

"Here's another card I made using the Birds of a Feather Stamp set, only this time, I didn't use the Birds from the stamp set. I opted the use the flourishes and tried the different designs available in the set to serve as a flight path for the cut-out butterflies and vine for the flowers.

This set is so versatile, I have to say I love it to bits! :) 


Materials Used :
Cardstock : Craft Supply
Stamp Set : Birds of a Feather
Patterned Paper: Melissa Frances & Bo Bunny
Sentiment Sticker : Glitz Design
Ink : Staz On
Bling
Don't forget about the chance to win if you play along with our monthly challenge!

Friday, August 5, 2011

Feeling like Fall...

Okay, it doesn't actually feel like Fall.  It feels like it just keep getting hotter, but the gel-a-tinas are here to help!  Stay inside, turn on the a/c and check out more great Fall-themed projects to help you think about cooler temperatures and falling leaves.

Cassie made this Fall card with the Giving Thanks set. 

"I was on a roll with this cute set, so I thought I'd make a CAS card with the sweet little images as the main focal points. Of course now I'm hungry for pie, and green bean casserole, and anything made with pumpkin!"

GivingThanksCTnwm.JPG

Ink: Memento Tuxedo Black, SU Crumb Cake
Paper: unknown orange, buttercream, Imaginisce - Apple Cider
Accessories: green gingham ribbon, dimensionals, Copics

Angela used the Happy Halloween set to make this adorable Halloween layout. 


"I had fun making this cute layout featuring my kids dressed as Star Wars characters last Halloween. I stamped the images using different inks and layered it with some fun Cosmo Cricket "Matilda" paper. I stamped the pumpkin and bat on separate cardstock and popped them up with foam tape. For the pumpkin, I first stamped it in grey ink on the page, inking a little grey around it for shadow, then popped it up. Love that big pumpkin image - it makes a great focal point!"


Image

Monday, July 25, 2011

Gel-a-tins: Here to help you beat that case of the "Mondays"

I hope you're all having a great day out there!  At my house we're counting down the days until school starts (well, I am, anyway).  The kids go back on Wednesday here and I am looking forward to some uninterrupted crafty time!
 
Our first project today is by DT member Cherie made with the Button Up set.  It's an adorable card.  Be sure to leave her some love today in the comments because it's her birthday!!  Happy Birthday Cherie!
 
"Here's a card I made with the buttons set. I thought the buttons just screamed flower centers so as soon as I received them I started sketching up this card. The stitching stamps make great stems as well!

Zoom out

Patterned Paper: Pink Paislee & Lily Bee Design
Stamps: Gel-a-tins
Rub-On: Creative Cafe
Flowers: Prima Marketing
Ink: Colorbox
This next card is by Cassie.  How amazing does all the black and white look with those Witchy Poo Halloween stamps?  I think I need to lift this one! 
 
"This new Halloween set has so many great little stamps. A person could have a lot of fun making their own dp with them :) I stamped the banner and then embossed it and cut it out to make a border. The image panel has the spider web and other little images stamped around for the background, and then the cauldron is stamped and embossed in black to make it stand out. "

Halloween1CT3nwm.JPG

Ink: Memento Tuxedo Black, Memento London Fog, Versafine Onyx Black, SU Creamy Caramel
Paper: SU dp, CDS Cottonball White
Accessories: black embossing powder, CDS Designer Label Die, silver brads

Thursday, July 21, 2011

Thankful Thursday!

Today we have some fabulous projects for you that were made with our Thanksgiving stamps.  Cassie is going inspire you first!
 "As soon as I saw all the adorable people in this set, I knew some napkin rings would be perfect! They will look so lovely on our table for Thanksgiving. Just think of the fun name cards you could make to match. . .hmmm, I guess I'll have to do that ;)"

NapkinRingsCT1nwm.JPG

Ink: Memento Tuxedo Black
Paper: Bazzil Pomegranate, buttercream, Imaginisce - Apple Cider
Accessories: Copics, dimensionals, Labels 11 Nestabilities

Ellen used her stamps to make this summery thank you card. 

"I love love how versatile Gel-a-tins stamps are! Just because this is a Thanksgiving themed set, doesn't mean you can't use these stamps for every day "thank you" cards. You can never have to many of these cards in your stash for quick gifts and notes and this stamp set is perfect for that!"

Image

Stamps: Gel-a-tins
Ink: Stampin' Up!
Mists: Tattered Angels
Paper: BoBunny
Misc: hemp

Monday, July 18, 2011

Happy Monday!

I hope your week is off to a great start!  Our first project today is this layout by Sheree.  She used the Button Up set to add accents to her page.

"I love using this stamp set to make your own hand made buttons. By stamping the buttons onto patterned paper then adding a crystal lacquer over the top you can customize your embellishments to match your page..."


Products Used
Little Yellow Bicycle Patterned Papers
Prima Canvas letters
Misc Doily
Button Up stamp set - gel a tins

This shadowbox card is by Cassie.  She used the Witchy Poo set and it really shines!
"This set just screamed 'Shadow Box' card to me. I love these kind of cards, because you can really make a fun scene. The images are embossed for added dimension."
Here is a link on Splitcoast for the Shadow Box card.

Halloween1CT2nwm.JPG
Ink: Versafine Onyx Black
Paper: unknown purple, BG Eerie
Accessories: Scor-pal, Circle Nestabilities, dimensionals, black embossing powder

Tuesday, July 12, 2011

Tuesday Fun!

We have some great cards to share with you today!  The first is by Cherie.


I adore this Shifting Gears set. It has so many different ways you can use it to make each project unique. When flipping through some of my embellishments this afternoon, I came across these super cute Fancy Pants Rub-Ons that worked perfectly with the Shifting Gears Stamp Set.


Zoom out

Zoom out

Cardstock: Bazzill
Rub-Ons: Fancy Pants
Ink: Stampin' Up!
Stamps: Gel-a-tins Shifting Gears & Honey Bear

And this adorable Halloween card is by Cassie.

I thought it would be fun to get away from the traditional orange and black by using kraft in a nighttime setting. I punched a circle in some scrap paper and then airbrushed the moon in. I covered the moon with another circle punched out of a post it so that I could airbrush the rest of the night sky around the moon. After that was accomplished I stamped the haunted house. The main panel for the card was embossed with an embossing plate.
Zoom out


Ink: Memento Tuxedo Black
Paper: CDS Worn Parchment, CDS Cottonball White
Copics: B95, B97, YR31, YR21
Accessories: Square Nestabilities, airbrush, circle punch, yellow ribbon, Halloween button, navy wire, TE Woodgrain Impression Plate

Thursday, July 7, 2011

Witches and Sieves :)

The blog hop is still going on!  Scroll down two posts to find it, or click here.

First up today, this great Halloween card by Cassie!  The stamp is from a new set called Witchy Poo.

"I sponged the moon to give it more dimension and colored the Thickers with copics to have them match the twine. I just love that darling witch on her broom. She's probably some cute sassy thing ;)"

Halloween1CT1nwm.JPG

Ink: Memento Tuxedo Black, SU Crumb Cake, Vintage Photo Distress ink
Paper: unknown orange, CDS Pineapple Twist, CDS Night Eclipse
Copics: E42, E43
Accessories: Circle Nestabilities, TE Cloud Duo Die, White Fabric Thickers, twine, MS Pickett Fence punch, sponges


This altered project is from Sharm!  Check out all that detail!


"It's been a while since I made an altered project, I thought the Gel-a-tins Put A Cap On It stamp set will be perfect for this lil earthenware sieve I got from our local Daiso...yeap, you ladies read it rite *lol*..I'm about to share with you'll an altered sieve! :)"

Supplies List:
Alterable : Earthenware Sieve,
Stamps : Gel-a-tins Put a Cap on it Stamp Set
Punch : Martha Stewart Border Punch
Patterned Paper: Martha Stewart, My Mind's Eye
Embellies : Paper Flowers, Prima Leaves
Inks : Staz-On
Blings : Prima Blings

Saturday, June 25, 2011

Meet Design Team member Cassie!

We missed Cassie's birthday at the beginning of the month, so be sure to leave her some belated birthday wishes in the comments!

I am a stay-at-home homeschooling mom to two great kids, and the wife to a military man. We currently live in Columbus, GA, but I from Nebraska where I was born and raised. I graduated from the University of Nebraska at Lincoln. . .GO HUSKERS! I started stamping when I was 11, when my mother introduced it to me and my sister. We started out making our own Christmas gift tags and embossing them over our electric stove. I loved that and the memories were so great. I picked it all back up when my second child, my daughter, was only a few months old. I needed something that was just for me, so I did it for fun when I had time. I entered the world of blogging only a couple of years ago, and am so thankful that I did because I have met some wonderful people and it has really helped my style to grow! While I did scrap when my kids were little, I just don't do it anymore. I'm all cards now, and I would say that I am primarily a Clean and Simple gal. Although I've been known to dabble in the more intricate as well :)