Showing posts with label Christmas Wreath. Show all posts

Saturday, December 24, 2011

X-Mas '72 layout by Kim!

I don't know about you, but I am terribly behind with the scrapping of my older Christmas pictures. The other day I came cross one, which showed me and my baby brother on his first Christmas - way bank in 1972.
Yup, I think I desperately need to catch up somehow!

What better way, to make use of the stamp set "Christmas Wreath" to incorporate in the overall design of the page.
Image

Instructions:
Using a Versmark inkpad, I stamped the sentiment "Happy Holidays" and the wee "Floral" on the side of my layout. Then I sprinkled some white embossing powder over the area and tapped the excess power back into the pot. Using my heat gun, the sentiment and image quickly set.
I actually like the effect when the embossed are is not perfectly covered with the powder - it gives a more vintage-distressed look, don't you think?

Image

Image

Supplies used:
Papers - My Minds Eye, Simple Stories
Inks - Clearsnap
Other - Embossing Powder, Dimensional Paints
Stickers - Jenni Bowlin

Saturday, December 17, 2011

Happy Holidays - Card by Kim

So, are you all organised for the holidays or could you do with a little more inspiration for quick last minute card? Good, because I have one more for you making use of the new stamp set HAPPY HOLIDAYS
Image

Instructions:
First I inked the edges of some paper scraps and layered them on top of each other. Stamping the "Wreath" onto some white cardstock, I coloured the image with various shades of green and added a little clear glitter glue to some areas, for a frosted look.

Image

The sentiment "Happy Holidays" was stamped onto a strip of masking tape and added to the top of the card.
For the final touch, I used a border punch to avoid too much white space at the top and added a few drops of clear dimensional paint.

Supplies used:
Cardstock - Mad About Cards
Papers - Authentique
Inks - Stampin' Up, Clearsnap
Other - Glitter Glue, Dimensional Pints
Tools - Martha Stewart border punch

Thursday, December 15, 2011

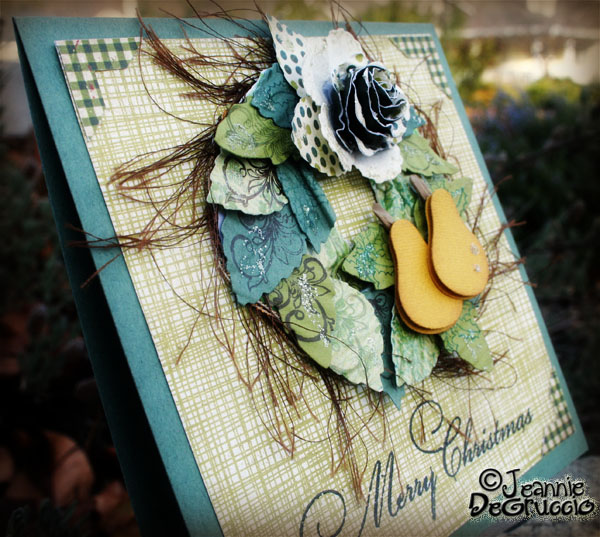
3-D wreath card by Jeannie!

Today I am using the set called Christmas Wreath.

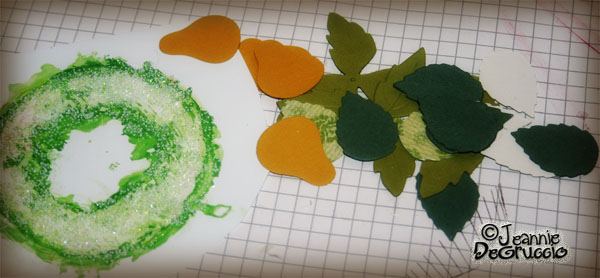
To start out what I did was to very faintly stamp the wreath onto white paper.

I only wanted the shape and did not care about the image showing up too much.

Image

Next, I pretty much made a mess with paint, again I only wanted the shape and was not too concerned with how it looked at this point.

Image

I added some sparkle to the paint in case any or the painted wreath showed through in my final product.

I also die cut a couple of different sized leaves in different papers and die cut little pears also.

Image

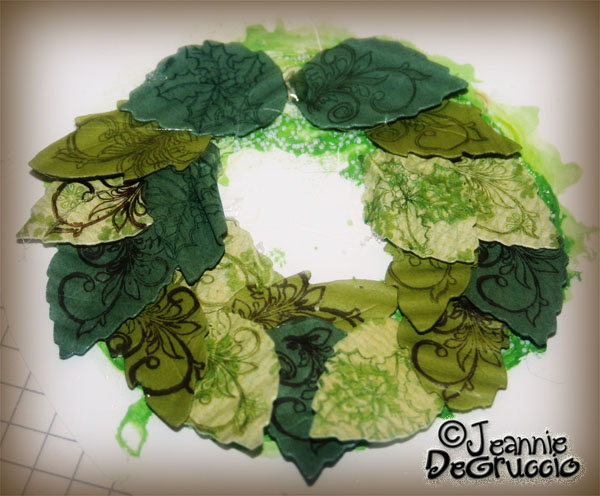
Then I took the 2 smaller stamps from the stamp set and stamped each leaf.

After I stamped them I ran them through a paper crimper a couple of times to distress them.

After that was done, I adhered them to the wreath background, creating a 3-d wreath.

Image

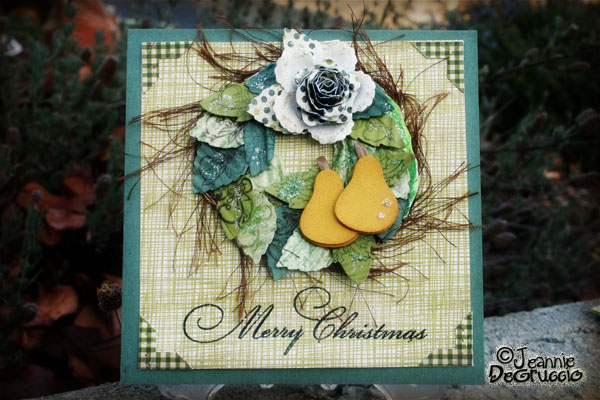
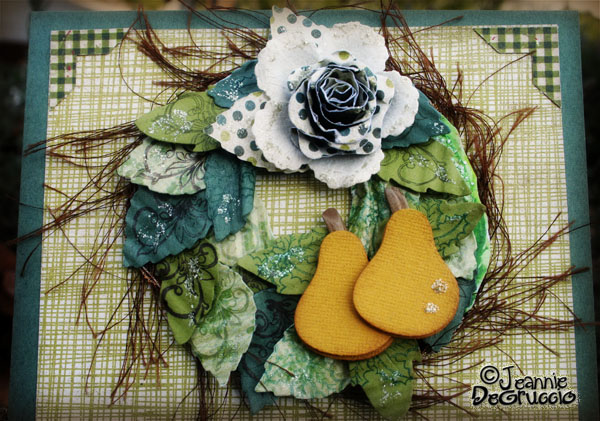
I added some fibers and embellishments and embossed the saying in black on the card front.

Image

Ahhh, I could just stare at this for hours I think the colors are so gorgeous and relaxing!

Image

All of the decorative papers are from Authentique Paper's Free Bird - COMFORT series.

The decorative corners are from Authentique Paper's - Wonder Headlines.

Image

 I hope you have enjoyed seeing how I came up with this design.

I am just loving playing with these stamps and know you will love them too!

This has been Jeannie from The Polka Cabana with today's post. 

Saturday, December 10, 2011

Merry Christmas card by Kim!

Today I would like to showcase another Christmas card with you, which was created within the matter of about 10 minutes. I can sometimes spent hours on getting just one card finished but the gorgeous new stamp set Christmas Wreath makes creating cards a doddle!
Image

Instructions:
I started stamping the tag with the "Merry Christmas" sentiment first and then added the little "Swirl" to the corners of the tag. Previously I stamped the "Holly" twice to a sheet of white bleed proof paper, coloured it in and hand cut the image, adhering it to the tag with the aid of some foam dots.

Image

To add a little more interest to the "Swirl", I adhered a red flat backed pearl to the lower part to compliment the berries from the "Holly" image.

Image

Finally I added the tag to my card base with a double helping of adhesive foam pads, to raise it off the red background and allow me to tuck some punchinella behind the tag.

Supplies used:
Cardstock - Mad About Cards
Papers - Donna Salazar Designs
Tag- WH Smith
Inks - Stampin' Up
Other - Bakers Twine, Punchinella, Button

Saturday, December 3, 2011

Happy Holidays card by Kim!

I don't know about you all, but I am SOOOOO ready for Christmas and the fabulous new stamp set HAPPY HOLIDAYS had me super excited to get started on my Christmas cards!

The detail of the wreath is the best I have even come across and looks awesome just left as it is or coloured in. For today's card I have chosen to get out my ProMarker pens and colour away...

Image

Instructions:
First I stamped the image onto some bleedproof white paper and then added various shades of green all across the wreath, adding a few bits of red for the berries. I hand cut the wreath from the paper and added it to the background with some adhesive foam dots.

Image

I also wanted to feature the totally cute little bow, and after it was stamped and coloured it, I hand cut the bow and added it to the bottom part of the wreath. As a final touch, a piece of bling was added to the bow

Image

Supplies used:
Cardstock - Mad About Cards
Papers - Bo Bunny, Authentique
Punch - Woodware
Inks - Stampin' Up
Pens - ProMarkers

Thursday, December 1, 2011

Have a Beautiful Christmas with Gel A Tins!

I am getting in the mood of making all these fabulous Christmas things and thought I would make a nontraditional color card for you all today.

I am using the same set I made my last Gel a Tins card with, you can find that post here:

http://polkacabana.wordpress.com/category/gel-a-tins/

A friend of mine told me about a wonderful site which I used this sketch to make my card.
Image

Here is what I have made, based on the sketch.

Image

I used paper from the Ooh La La For Her, by My Mind's Eye.
Image

To create lots of texture I used glitter and these micro mini clear glass beads.

Image

My favorite aspect of this is that I stamped the phrase directly onto the twill tape. I love the way it looks.
Image

It looks very elegant, perfect for a Very Important Person you need to send a card to.

Are you thinking about making cards for this Holiday? There is still time. If you don't have enough time to make all of them, pick a handful of people and hand make those people cards.

It is truly an expression of love to put your heart into something and what a way to tell someone close to you, "Merry Christmas."

Have a great Thursday and Happy Crafting.

This has been Jeannie from The Polka Cabana http://polkacabana.wordpress.com with today's post.

Thursday, November 24, 2011

gel-a-tins double duty card!

What is a double duty card? It is a card, yes, but this card is also an ornament.

I got this great idea from a friend who made this wonderful canvas backed card and thought, I have plenty of canvas, what can I come up with?

I started with this canvas star, and I stamped the wreath from my set with embossing ink then embossed it in black.

Image

The extra embossing powder stuck in the canvas and burned a little, but that is not big deal for this type of project.
Image

Here you can see I distressed it a little more and colored the image in slightly.
Image

This is the finished product all embellished.
Image

My idea was to have the ornament on the front of the card, but the ornament would have to be removable.

Here is the front of my card, embossed with white.
Image

I used some glue that dries to a tacky gum type substance. It will hold on forever but when you want to remove the item, you just peel it off.

Image

See how the star sticks to the front?
Image

I love the way this turned out and think I am going to make these for all my kids that need "teacher" presents.

Image

Thank you for stopping by today. I hope you are having a wonderful Thanksgiving today.

This has been Jeannie from The Polka Cabanahttp://polkacabana.wordpress.com/ with today's post.