Showing posts with label Xyron. Show all posts

Saturday, July 6, 2013

Celebrate!

Good morning and happy Saturday, gelly fans!  I'm really happy to be back again to share another card with you this week!

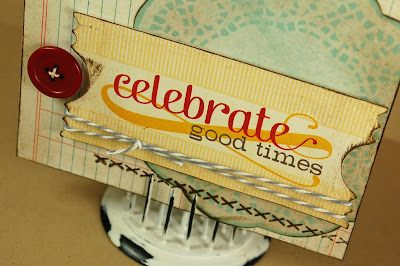
For this one I started with the kit that I bought at a local scrapbook convention.  It came with some papers and embellishments and I chose the Sewing Kit and Sweet to the Core sets to go along with it for a fun look.  The kit is all by My Mind's Eye and I loved the colors and the vintage look and I wanted to add to that with my stamps.  This is what I came up with:


I wanted that main embellishment up top to be the apple, but I added a little stamped button up there too.  I stamped the image on one of the patterned papers, cut it out, ran it through my Xyron 150 with the stamped image upside down and then stuck it to the back side of a clear button to make that embellishment.  The stitching on the bottom is also from the Sewing kit set.  I wanted a vintage fair look and I think the stamps really helped with that!

Thanks for coming by today!  Have a great weekend!

Wednesday, June 26, 2013

You're Invited!

Making your own baby shower invitations and New Baby congratulations cards are a breeze with the gorgeous 'Rock a Bye Baby' clear stamps from gel-a-tins.  I took the bassinet stamp and created a whimsical card that's fun and quick to make.


Your Invited!

 
Supplies
 
gel-a-tins 'Rock a Bye Baby' Clear Stamps
Xyron Mega Runner
Trimcraft Up,Up and Away 12x12 stack
We R Memory Keepers Large Eyelets
May Arts Silver Ribbon
StaZon Black Ink


At the rear of the stamped topper I stacked foam pads to give 'lift', the edges of the topper are glued to the card to form the curve.


Thursday, June 13, 2013

King's Island 1995. [Gelatins Stamps + Xyron]

Hello everyone! We've teamed up with Xyron this month & I've been so excited about the products they sent me. I hadn't used any Xyron products before but I'd had my eye on the Create-a-Sticker machine. 

On my layout today, I used the Xyron Create-a-Sticker. Have you seen the Press A Penny machines? 

I have a pressed quarter from our King's Island trip (back in 1995!) that I wanted to include on this page. So the Create-a-Sticker machine was perfect for adhering this!

I also attempted to run the wood veneer arrow through the machine but it was too thick.


I used the Happiness stamp set from Gelatins Stamps today. It's the dot border from the set, which I stamped multiple times & made a patterned paper. The ink is Prima chalk ink in English Ivy.

Have you tried the Xyron Creat-a-Sticker machine? What kind of items have you used in it?


Wednesday, June 12, 2013

A Father's Day (or any day) Brostache Card

I can't even tell you how much fun I had making this silly card.  I still love the mustache trend (even though I know it has been around for a while now).  It just makes me smile.  Around here we like to give out mustaches as party favors and my sister-in-law even threw my brother a "brostache" themed birthday party a year or two ago.  We're dorks.  I know.  When I saw the Mustache Mania stamp set I knew that I had to have it.


I used the stamps with a light brown distress ink over the patterned paper to make this look for the card base.  I knew that the card was going to be pretty busy, but I still thought that it could use more mustaches!


The ink, ribbon, twine, pen, buttons and stamps were not in the paper kit by MAMBI, but everything else was, including that hilarious mustache on a stick.  I didn't put a real sentiment on this card, but I think that I can choose whether to give this to my brother for Father's Day or for his birthday and it will work either way now. 

Everything is put together with my awesome Xyron adhesives (mostly the Mega Runner on this one).  And when I finished I had a big smile on my face.  I hope you like it too!  Have a great week!

Monday, June 10, 2013

Gel-a-Tins and Xyron

This week gel-a-tins teamed up with Xyron to bring you some amazing projects and inspirations.


I am the luckiest girl in the world because I am fortunate to be on the Design Team for both Xyron and gel-a-tins and long before this team up I have always used Xyron when making my gel-a-tins projects.  I'm sharing two cards here on the gel-a-tins blog and two more over on the Xyron Facebook page.


Products Used
 
gel-a-tins Zebra Background Clear Stamp
gel-a-tins Gelly Gems Roll-up Silver
Xyron Mega Runner
Xyron 5" Creative Station
Momenta Paper


Products Used
 
gel-a-tins 'Little Buddies' clear Stamps
Xyron Mega Runner
Crafters Companion Lace Border die
docrafts 'New Baby' Papers


Thursday, June 6, 2013

Gel-a-tins mashes up with Xyron!


This week, the Gel-a-tinas are working with Xyron!  What a great adhesive to use on your paper crafting projects.  Today, I used the 2" Cheetah with Permanent Adhesive, as well as the Xyron Gluestick.


Tomorrow will be the birthday of one of my friends. I created this fun ensemble using Gel-a-tins: Cosmo Pups and Make a Wish Sets!  Such a cheery set of images and words!


A plain pad of white paper gets the birthday treatment!!  Lots of stickles...and my new favorite color of Rumple Ribbon:  Crazy Coral!  (Can there be a limit to favorite colors??)

The 2" Xyron Cheetah made applying adhesive a snap on such large paper panels.


Basically, a card stock cover with a pocket on the inside!


Note card that just barks "Happy Birthday!"


 And...to top it off...a book mark for her summer reads!
To get my poochies to lie flat, I applied the Xyron Glue Stick to the back of the cut out image.
(Remember to place it on top of a piece of scratch paper.)  Great coverage!!

I enjoyed this mash up...be sure to scroll through the Gel-a-tins blog for more Xyron inspired ideas!

Thanks for stopping by today...
Dawn Mercedes, of Sunnyside Up!

Tuesday, June 4, 2013

Hot Dog! It's a Birthday!

Hello again!  It's Jessica again with another fun card to share with you.  I have loved these sets since I first saw them and I had to use them together on this card.  I love the bright colors and I think it will be the perfect thing to give to a friend for a birthday along with a gift card to the movies.  Check it out...


I stamped the background with the Hot Diggity Dog set using yellow ink on yellow striped paper. I didn't want the patterned paper to just be a strip behind the sentiment, so I decided to punch out some pieces and line them up on the card.  The paper adds a little more color into the card as well.  The ribbon was added after running it through my Xyron 150 and then pleating it as I attached it to the card.  This is a really easy technique and adds a little dimension to the card as well.  The buttons and the background paper were also attached with Xyron machines and my chipboard and stamped sentiment are attached with some foam adhesive that I made with my (you guessed it) Xyron machine.  :)  This was a pretty quick card, and I can't wait to get back in my scrap room and play with these sets some more.  Be Sure to check out the gel-a-tins Facebook page as well as the Xyron Facebook page this week.  You won't want to miss a thing!