Showing posts with label altered projects. Show all posts

Thursday, April 4, 2013

Rainy Day Fun!

Today I am sharing a fun mini-canvas bag that I altered using the Raindrops Are Falling Collection.


I stamped the sentiment and girl with the umbrella images with Archival Ink. 
This is really important on canvas because it does not bleed.  It DOES leave a 
wonderful sharp image! 


The big raindrops are stamped with Quick Quotes Powder Puff Chalking Ink.
They too, do not bleed into the canvas but leave a soft color, but a sharp image. 

April showers keep us indoors so many days here in Maine, so finding new ways
to re-invent fun activities is really important when you have children. Sometimes all it takes
to make an old game appealing is to just change its presentation. In this case the packaging.
This stamped mini-canvas would be fun for a sorting/counting buttons game, to store Jacks,
to keep a few brand new crayons for coloring.  The possibilities are endless!


Other Supplies:
Canvas bag ~ Unknown
Ink ~ Ranger
Chalking Ink ~ Quick Quotes
Pitt Pen ~ Faber Castell 
Glues ~ Helmar

What do you do for rainy day fun? 


Friday, March 29, 2013

Love Knots Funky Fridge Magnet Frame


Hi everyone! How are you doing?

Today I'm returning to one of my all-time Gel-à-Tins favourite sets - Love Knots!

I created a photo frame with this set last year, but today wanted to give it another modern twist and create a magnetic frame with some on-trend colours:


Fun right?! And really simple to create!


I started by die cutting the Polaroid frame and stamping Love Knots on it with watermark ink. I then heat embossed it with gold embossing powder. Such a stunning effect!!


Gold, coral and black is such an on-trend colour combo right now, and I wanted to recreate that so I took a fine paintbrush and selectively coloured some areas of the frame with coral and black inks. So simple and gives such a funky finish!


I finished up by backing my frame with a few layers of coaster board, taking care to trim a gap in the middle layer to accept a photo. I added some adhesive magnetic sheet to the back and voilà - a funky fridge magnet frame, customisable with your own photo!


Supplies Used:

Gel-à-Tins:
Love Knots

Other:
Burano ink (A:Muse), Versafine Onyx Black ink, Versamark ink (Tsukineko)
Vintage Cream cardstock, coaster board (Papertrey Ink)
Metallic Gold Rich Pale Embossing Powder (WOW!)

Fabulous Frames die (Papertrey Ink)
Adhesive Magnetic Sheet


I'll be back again soon to share another project, have a great day everyone and thanks for stopping by!

Saturday, February 23, 2013

Game Day Treats!

Hello!  Today I want to share a quick and easy project that you can make with the gel-a-tins Hoops stamp set. 

I have twins that play basketball, and I like to make up a little treat for the end of the season.  One year I did sugar cookies decorated like basketballs, and this is just the sort of packaging I needed and didn't have at the time :)


The great thing about this packaging is that you could really put any kind of cookie or brownie in there and the bag had that basketball theme.  That would save a whole lot of time!

These bags have a bit of a waxy coating so they're perfect for food, and all I did was fold over the top (you would wait to do this after your cookies were inside), add a strip of paper (this one went through my Xyron 150 and it sticks to the paper perfectly), then twine, a punch and a couple of stamped images.  How cute is that? 

We also have a hockey set that is very cute for those of you whose kids are into hockey.  Stamps can help you put together cute and easy gifts for your favorite team of kiddos!

Have a great weekend!

Tuesday, January 15, 2013

If You Want The Rainbow...

“If you want the rainbow you
gotta put up with the rain.”
~ Dolly Parton

This quote was just perfect for the framed mini canvas inspired by the “Raindrops Are Falling” collection.
I designed my mini canvas around the sweet girl with her umbrella in this collection.

Image

I created the background by stamping the “Crackle Paint” background stamp onto sticky back canvas.

Image

After trimming the canvas, I sprayed mist over the stamped background image.
Once dried (I used my heat gun to speed up the process), I stuck the background canvas onto the photo frame inset.

Image

Layering sky blue and white paint was my next step. Because I wanted the background stamp
to show through the painted layer I used a butter knife to scrape off the excess paint.

Image

The girl with her umbrella was then stamped with Archival Ink onto the canvas.

Image

I used Faber Castel Pitt Pens to color random rain drops on the rain stamp and then stamped the rain drops on my canvas.
I used a Pitt Pen to color my girl’s umbrella and boots red, too. I just love the contrast of the red with the other colors!

Image

To add a little dimension to the stamped rain drops I mixed glitter with Helmar Craft & Hobby PVA Glue and
then painted the mixture onto the rain drops. If you look closely you will see that it adds a tiny bit of glittery sheen to the rain drops.

Image

The quote was my finishing touch.

Image

My daughter loved this so much she asked if she could have it for her room. Of course she can!

Gel-å-Tins (http://gelatinstamps.com) Supplies:
Raindrops Are Falling Collection
Crackle Paint background stamp

Other Supplies:
Claudine Hellmuth Sticky Back Canvas
Ranger Archival Ink
Tattered Angels Mist
Martha Stewart Glitter
Helmar Craft & PVA Glue
Faber Castell Pitt Pens
Misc. frame & tulle

Thank you for visiting today!
~Katie
http://www.scissorsspatulassneakers.com

Tuesday, December 25, 2012

Mini Notebook Stocking Stuffers

Are you an elf helper for Santa Claus? Get on the ball with these super sweet notebooks. They are a good size to slip into purses, the car, the locker at school, or a stocking!

Image

Image

By using Santa's Candy Cane scented Gelly Powder, these notebooks smell sweet to!
To make it extra special, monogram each one. Here I used gold duct tape for the binding and the monogram. Not only does it add holiday glitz, but it helps keep the new cover bound together.

Supplies:
Gel-a-tins: Gingerbread House
Santa's Candy Cane scented Gelly Powder
Colored Inks
Sakura Pen
Gold Duct Tape
Nesties
Ribbon and cord
Red Pearl Pen from Viva Decor

Monday, December 24, 2012

Adorable Ornaments!

Christmas is tomorrow so I wanted to share a couple of ornaments I made for my tree. The first one I just altered a little red bucket I found at Hobby Lobby. I added an Elle's Studio tag and then some embossed snowflakes from the mini retro flakes and sayings stamp set. The embossing powder is scented - Santa's candy cane. It smells as good as it sounds!
 
 
For my second ornament, I altered a CD and used the same stamp set and embossing powder. I also had some help from my Cricut; I cut the snowflakes from the Joys of the Season cartridge.


Thanks for stopping by today and I hope you enjoy your holiday!

Friday, December 7, 2012

Stamp Your Own Ornaments!

Hello, gel-a-tins fans! It's Jessi from Kissin' Krafts and I am excited to share this project with you! (I might be so addicted I will probably be making more soon!) I am stepping away from my normal cards today and sharing with you an ornament I made for Christmas trees.

I used Cheverontastic for this project:

Image

I made the dough (similar to salt dough (but made with baking soda and cornstarch) and rolled it out like I was making cookies. The next stamp is to stamp the dough. (You can do this two different ways. You can stamp the dough and then use cookie cutters or vice versa. I like cutting the dough and then stamping). Make sure to use a straw to make the hole at the top of the ornament. And bake away.

Image

I loved how these turned out. This was the first batch that I made, so it was a learning process. I did have to throw away half the batch due to cracking. But hopefully, I have learned the cause and know now how to fix.

Thank you so much for stopping by today! Have a great gel-a-tins day!

Don't forget to join our Facebook page for the latest news and information!

Supplies:
gel-a-tins - Cheverontastic
Dough
Ribbon

Saturday, November 10, 2012

Mini Gift Box

Need a super cute mini gift box for that special little gift?. The gel-a-tins 'gelly jr 'Winters Pine' makes it that little bit more special by adding a festive topper.

Image

Products Used

gel-a-tins gelly jr 'Winters Pine' stamp
Xyron Mega Runner
docrafts 'Henbury Lane' Gift Box cut-out
We R Memory Keepers Buttons
Crafters Companion 'Spray and Shine'
White Satin Ribbon
Hot Glue Gun
Clear Seed Beads

I used a mini gift box cut out but you can use any gift box. I cut an assembled the box and wrapped it in the satin ribbon.

Image

Using the hot glue attach the buttons to the top. Spray the cut out 'Winters Pine' image with the 'spray and shine'. Sprinkle with some clear seed beads before it dries.

Image

Using the Xyron Mega Runner Place the tag on top of the buttons and place the 'Winters Pine on top.

Image

To buy the gel-a-tins jelly jr 'Winters Pine' and more of these amazing stamps visit http://gelatinstamps.com/ .

Friday, November 9, 2012

Wedding Fun!

Today I have a set of projects to share with you that were made by our very own Drea! 

 
How cute is this?  She used some of our mustache and lip stamps to make these themed invitations, a thank you card, place cards and even a matching napkin ring.  I love the black and red color combo and this stuff would be perfect for a wedding or even a bachelor or bachelorette party. 
 
I hope you've been enjoying these bonus projects this week!  We'll be back again tomorrow with one more fabulous project by Sharon.

Tuesday, November 6, 2012

Mini Wreath by Sharon

(This week we're posting some bonus projects for you!  Today Sharon has an adorable project that she made with one of our gelly jr. stamps).

I wanted to make something special for my friends that I could pop in the mail as a surprise and I decided to make mini wreaths. The gelly jr's 'Winters Pine' was perfect for adding that special touch.

Image

Products Used

gel-a-tins gelly jr's 'Winters Pine'
Xyron Mega Runner
Styrofoam 5" Ring
docrafts Bakers Twine
Dress it Up Snowflake Buttons
White Satin Ribbon
Quick Quotes Green Powder Puff Inking Chalk
Hot Glue Gun

I started by covering the ring with the sating ribbon and then with the bakers twine. Held at the ends by using the hot glue gun.

Image

I stamped the gelly jr's 'Winters Pine' onto white cardstock using the Green Ink. I cut them out and placed around the ring using the Xyron Mega Runner.

Image

To finish I added the tag using the Xyron Mega Runner and secured the buttons in place using the hot glue gun.

Image

To buy the gel-a-tins jelly jr 'Winters Pine' and more of these amazing stamps visit http://gelatinstamps.com/ .

Friday, October 26, 2012

A Pretty Passport Cover!

Hi dear stampers!
Today I want to show you a passport cover!
First I stamped tree and flowers. Cut the flowers on the edge, then chose the substrate and made the basic composition, adding all the layers. In layers I added a cheesecloth.Made a sign.Decorated cover with buttons and half of pearls.

Image

Image

Image

Image


PRODUCTS USED
gel-a-tins stamp doodle flower
gel-a-tins Love Knots stamp set
gel-a-tins stamp Winter's Pine (Christmas star)
MME paper
Averican crafts paper
7 gypsies ink
white acrylic paint
marbls
buttons
cheesecloth

Have a great crafting!
Tanya P.
http://www.diaryofcards.blogspot.com

Friday, October 12, 2012

Fall Kitty Wine Glass Charm

Hi everyone! Welcome back!

Today I'm bringing you a super-cute little project using the mini Fall Kitty Gelly Jr's stamp from Gel-à-Tins! I've just been waiting and waiting for Autumn to be in the air to bring out this little kitty!

I decided I wanted to make something cute and different with this little kitty and stumbled upon this idea:

Image

What do you think? Fun huh?!

I started by stamping the kitty onto orange cardstock and carefully cutting him out, hat and all. I then stamped him again on orange and cut just him out. :-)

Image

See his cute little stripes? That's the Love Knots set at work again! God I will never get tired of using this set!!

Image

I then stamped the hat a couple of times on purple cardstock and trimmed out the hat and the brim. I used dimensional glue gel to adhere it all together so he had some dimension, and used a white pen to add detail to his eyes, tail and paws. I added a tiny bit of shading with a Copic Marker too.

Image

To use him as a glass charm I tied some silk ribbon to the brim and knotted it with a loop at the back, then used another length of ribbon to tie the charm to my glass. Can you imagine a table setup with loads of these little kitties? Too cute!!


Supplies Used:

Gel-à-Tins:
Fall Kitty Gelly Jr's stamp set, Love Knots stamp set

Other:
Smokey Shadow ink (Papertrey Ink), Versafine Onyx Black ink (Tsukineko)
Canyon Clay cardstock, Winter Wisteria cardstock (Papertrey Ink)
Silk Ribbon (Papertrey Ink)
White Pen (Inkssentials), Copic Marker
Pinflair Glue Gel, Mod Podge


I'd love to know what you think of this little project. Thanks for stopping by!!

Saturday, October 6, 2012

Creepy Candle

I made this Creepy Candle wrapper using the gel-a-tins 'Halloween Greetings' stamp set. This fabulous set comes with two sentiments, four super cute mini stamps of a moon, pumpkin, bat and a ghost and three fabulous backgrounds. The backgrounds are amazing for layering with the sentiments.

My first project this month is a wrapped candle

Image


Products Used

gel-a-tins 'Halloween Greetings'
K&Company Jen Yanook Halloween
Xyron Mega Runner
Xyron 150 X
Black and Orange Ribbon
Dress It Up Buttons

How It's Done

Start by wrapping the candle with the cobweb print paper and then a band of the striped paper and hold in place with the Xyron Mega Runner and a lenght of orange ribbon run through the Xyron 150 X.

Image

Stamp the 'Happy Halloween' sentiment onto plain orange paper and layer onto a piece of the cobweb paper using the Xyron mega Runner. Add the dress it up buttons to the front and a box made with the black ribbon to the rear.

Image

Place on the front of the candle using the Xyron Mega Runner

Monday, October 1, 2012

Fall Kitty Tin

Hello stampers, Nina here with a little favor tin! I can't believe we are creating Halloween projects again! Now, meet my little fall kitty:

Image

I used a pretty fun Copic technique with the 0 Colorless Blender: I first saturated the kitty hat with a purple marker and then used the blender to create the polka dots :) Super fun to do to give your kitty a little character :) And here is how the rest of the tin looks like:

Image

I used a 1-3/4" circle punch to punch the kitty out and the circle fits right on the Tim Holtz Mini Rossette (the bigger one in the set), perfect!

Thank you for stopping by and happy crafting!

Tuesday, September 18, 2012

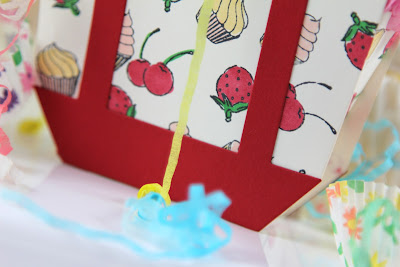
Sweet Cakes Gift Bag

Hi everyone! Are you ready for some more Gel-à-Tins fun?!

I'm here playing with the Sweet Cakes set again! This set is so much fun!!

Today I'm showcasing all the little images from the set. These little images deserve some love too! So I decided to use them to embellish a gift bag I created:

Image

What do you think? Isn't it the cutest?!

I started by die-cutting the bag from cream cardstock and stamping the small images onto the bag bodies.

Image

Here's a little tip when creating a repetitive pattern with small stamps: place all your stamps on one block to make the whole process easier! This also means all your images will always be in the same configuration which is perfect for pattern making!

Image

I then coloured the images with Copic Markers, choosing to use a colour scheme of red, green, pink and cream. This gives it a nice Cath Kidson look I think!

Image

Finally I assembled the little bag, adding some red cardstock handles to tie in with my colour scheme.

Image

All I needed to do then was decide what fun little gift to place in it! This little bag would be perfect for tucking in some handmade chocolates or sweet treats!


Supplies Used:

Gel-à-Tins:
Sweet Cakes stamp set

Other:
Memento Tuxedo Black ink (Tsukineko)
Vintage Cream cardstock, Pure Poppy cardstock (Papertrey Ink)
Copic Markers
Favor It Box 4 die (Papertrey Ink)
Scor-Tape

I'd love to know what you think of this project. Thanks for stopping by - go eat some cupcakes!!