Showing posts with label Ellen. Show all posts

Monday, October 31, 2011

Happy Halloween!

Good morning and Happy Halloween to all you gelly fans out there!  I hope everyone had a great weekend and is all set to get some yummy candy tonight!  We are very ready for a night of fun and friends at my house.
Tomorrow we're going to start introducing you to the new gel-a-tinas, so I hope you'll be sure to check in! 
I have one final project from our current DT to share with you. This one is a layout from Ellen.  She used the Save the Date set to add some accents to this page.  I love the way you can use our sets in so many ways!

"Love these little dots from the Save the Date Stamp Set!!! I used my hole punch and then accented the confetti like pieces
with the small circles and the used the date part of the stamp on the tag. "

Zoom out

Supplies:
Core'dinations Cardstock
CI button
Twinery Twine
Cosmo Cricket alpha stickers

A great big thank you needs to go out  to our first gel-a-tins design team!  I hope you've enjoyed all their great projects! 

Friday, October 28, 2011

Are you ready for the weekend?

Maybe you have some fun and crafting planned and maybe you'll just be trying to keep your kids (or spouse) away from all the Halloween candy.  We're having a Halloween party at my house and I can't wait!  I've been working on cards and decor this month and it's going to be a blast!  Of course, I have been using my gel-a-tins a lot this month, and I'm sure that today's projects will make you want to get crafty too!

Ellen made this cute card with the Home Sweet Home set!

Image

"I love love this Home Sweet Home set for cards, too! Everyone has friends that move so having one of these in your card stash is a must!"

Supplies:
Patterned Paper: Pink Paislee
Carstock: Core'dinations
Buttons: misc

Cassie altered a small gift box with the Chocolate Bliss set.  I love this set and it's so fab on this little box!

ChocolateBlissCT1nwm.JPG

"I found some small old boxes the other day, and I thought 'these need a makeover'! I covered them in patterned paper, and decorated it with some ribbon to make it look like a gift box. "

ChocolateBlissCT1anwm.JPG

Stamps: Chocolate Bliss
Ink: Memento Tuxedo Black, CDS Hot Cocoa
Paper: BG Sweet Threads, buttercream
Accessories: pink ribbon, Scallop Circle & Circle punch, Magenta Viva Pearl Pen, box

Have a great weekend!  We'll be back Monday with even more inspiration for you!

Wednesday, October 19, 2011

Back with more cards for you!

Today we have cards to share with you that were made by DT members Ellen and Cherie.  I don't know about you, but these projects are really making me eager to get my hands on the  Chocolate Bliss and Save the Date stamp sets!

"Grab your Embossing Powder and use it as an accent and layer it over stamped images. I mixed and matched sets here...The Save the Date set and Flowers II."

Image
By Ellen

Supplies:
Patterned Paper: Pink Paislee
Carstock: Core'dinations
Buttons: misc
letters: Jenni Bowlin
Inks: Stampin' Up!

That was Ellen's project made with Save the Date, and now let's see Cherie's Chocolate Bliss card...

"I just love how well chocolates suit the Jillibean Apple Cheddar Soup collection."

IMG_2269.JPG
By Cherie
 Please go check out our Monthly Challenge while you're here!  I love seeing our fans win!

Monday, October 10, 2011

Monday wake-up!

Good morning!  I hope that all you gelly fans out there had a wonderful weekend.  We're coming back at you with some more cards to help get that crafty mojo going!

First off today is Karin.  I love the projects she's made with this combination of stamp sets!  She used the Little Buddies, Off to School Letters and Traffic Signs sets on this one.  Check it out...

IMG_8122a.jpg

Isn't that just so sweet? 

Ellen made the cutest card with the Honey Bear set.  Plus, any card with googly eyes on it makes it the best as far as I'm concerned :)

"I love how versatile Gel-a-tins stamps are! This sentiment is from the Honey Bear set and I use it all the time. I love the crayon look of the type!"

Image

Cardstock: Core'dinations
Sticker: BasicGrey
Patterned Paper: Fancy Pants

Friday, September 30, 2011

What a week!

Busy times for me!  We're coming up on fall break which means that right now it's all about half-days, assemblies and parent-teacher conferences.  Throw in a new DT to choose and you have one busy girl! :)

Our current team has been wonderful and they're still working hard on projects to share with you!  Let's check out one from Ellen to start off this fall Friday!

"I love love to create my own backgrounds with cardstock, stamps and ink!"

Image

Here are a few more with the save the date stamp set
Supplies:
Core'dinations Cardstock
CI button
Twinery Twine
Cosmo Cricket alpha stickers

We have another card by Cassie today for you!  I love the Halloween set and this card is making me think about all the other projects I need to make with it for October!

"I didn't just want to use black, although I struggled not to, haha. I pulled out some navy paper, and gave it a roughed up look by rubbing the ink pad directly onto the paper. For the main panel I used my Copics and my airbrush system to get the same sort of color as the navy paper, and then I embossed the little ghost in white."

GhostCTnwm.JPG

Ink: Craft White, Black Soot distress ink
Paper: SU Not Quite Navy, CDS Cottonball White, MME Gertie
Copics: T3, B39, BG75, & airbrush
Accessories: Circle & Labels 11 Nestabilities, white embossing powder, white Liquid Pearls

I hope you're all inspired to get crafty this weekend!  Don't forget that tomorrow is the day that we announce our new monthly challenge (and the winner for this month)!  See you then!

Wednesday, September 21, 2011

Hello and Happy Wednesday!

We're back to get you through the middle of the week with more inspiration!  Today we have two more cards to share with you.  Let's get to it!

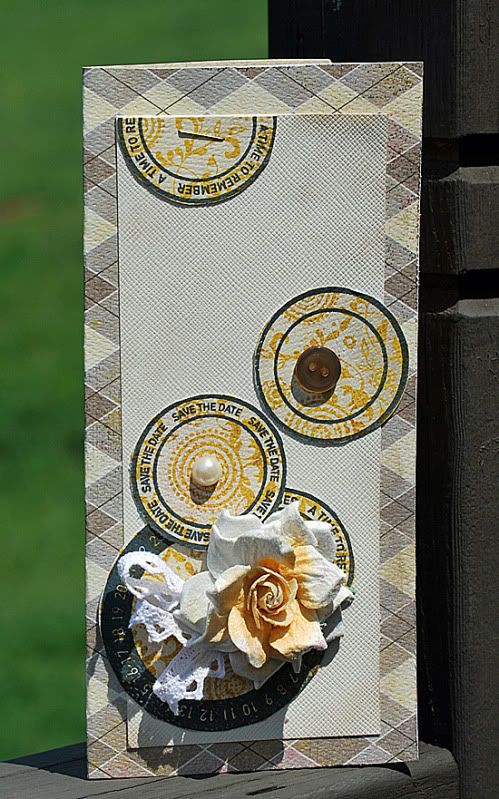
This first card is by Ellen and I love this grey and yellow color combo!

"I love the idea of having wedding cards available since we go to so many and I never seem to have a card. This Save the Date stamp is perfect!  Mix and match the circles to create your own design."

Zoom out

Supplies:
Save the Date Gel-a-tins stamp
Teresa Collins pearl
Creative Imaginations button
Bazzill Cardstock
Authentique Papers
Prima Flower
AC Pigment Ink

Angela has another card today that she made with the Build Your Own Paisley-Floral set.  I love all the different ways she's been showing this off!

Image

"I went with a monochromatic look for this card, heat embossing the paisley onto a die cut using White On! Gelly powder. I then sponged ink over the embossed image. The background paper is stamped using the same colour ink and the dotted outline paisley stamp from the set."

Be sure to check out our monthly challenge and give it a try!  See you again tomorrow with a challenge and a way to help a great cause!

Wednesday, September 7, 2011

Wednesday cards!

Hello again!  Today was have cards by Cassie and Ellen to share with you.  Be sure to read through our other recent posts.  We have the Design Team call still going on and you have a chance to win a stamp set again this month with our monthly challenge (not to mention that you'll want to check out any projects you may have missed).
First up today is Cassie!

"It's hard to believe that October is right around the corner! The bats in this set are so cute, and I really wanted to highlight them. I used scraps of 4 different designer papers, each from a different collection to make my back panel. They were glued down to another lightweight paper so that I could stamp and emboss each bat."

BatsCTnwm.JPG

Ink: Versafine Onyx Black
Paper: SU Sahara Sand, CC Mitten Weather, MME Gertie & Mabel, CC Social Club
Accessories: black embossing powder, dimensionals

Now it's time for Ellen's project, this sweet pink card.

Image

Core'dinations Cardstock
Stampin' up! Ink
misc. Ribbon
PTI die for the window

Save the Date Gel-a-tins stamp
*I also used the Beary Much stamp sent for the sentiment*

Friday, September 2, 2011

Fun Friday projects!

Hello again!  It's finally Friday and we want to send you off for your weekend with some more card inspiration!

I (Jessica) made this first card.  I got this Big and Wild Things set and this was exactly the kind of project I thought it would be perfect for!  The first thing I did was stamp three of the images onto some canvas I got at Michael's.  I used three different greens for a natural, watercolor kind of look.  I trimmed the canvas down and backed it with some green cardstock.  I sewed around the edge with my machine and then inked and attached it to a kraft cardstock card base by Canvas Corp.  The butterflies were punched from craft and I stamped on them with another of the stamps from this set to add some pattern to them.  They got some brown Stickles around the edges to add a little more detail.  The sentiment just got attached to come more card stock and then the card (with foam dots this time). 

I really like the way this turned out!  I am going to have to use this set a lot more, especially on some layouts.

Supplies Used:
Canvas Corp Card
Bazzill cardstock
gel-a-tin stamps: Big and Wild Things
Ink by Ranger and Close to My Heart
Sentiment from Joann's
Stickles by Ranger
Xyron Adhesives

Ellen made this cute card (and I think any boy would be excited to get it)!

"I love the tiny circles in this Save the Date Gel-a-tins stamp! I used it to accent the bling on this card."
Image
Supplies
Core'dinations Cardstock
Stampin' up! Ink
misc burlap
gel-a-tins stamps
want2scrap bling
Teresa Collins tag

Friday, August 26, 2011

Stay tuned...

We have a BIG announcement on the blog on Sunday, so be sure to check back in for that!

Now that I've mentioned that, let's get to the projects!  We have some great stuff from Ellen and Sharm to share with you today.  Take it away, Ellen!

"So I was making this layout and made a mistake along the bottom where the two pieces of paper meet. At first I was worried and set the layout aside and then I thought, "wait!...this faux stitching stamp is perfect!". So I used a scrap piece of paper, stamped it, cut it out and then made it into a banner shaped and layered it over the mistake.

I used the color scheme from Scrapbook & Cards Today's Colour Suite Challenge."


Patterned Papers: LYB
Chipboard: Maya Road
Mist: Shimmerz
Cardstock: Core'dinationsInk: Stampin' UP!
stamps: gel-a-tins

And now for another sweet card from Sharm!


Materials Used:
Cardstock: Ivory Cardstock
Stamp Set: gel-a-tins Birds of a Feather
Patterned Paper: Melissa Frances
Flowers : Prima
Ink : Staz On and Ranger Distress Inks


Tuesday, August 16, 2011

Paw print banners and stitching!

The two projects we're sharing today are so cute!  Adding the smaller paw print stamps in the Cosmo Pups set to the banner on Karin's card is making me want to make a banner card of my own, and I think we already know how much I want that Button Up set with the stitch stamps.  I could use that on anything!  Let's see that card by Karin first...
"I've used another of the sweet dogs from Cosmo Pups- I just LOVE that set!!! I stamped it colored it and cut it out and placed it on a doily I cut out with my silhouette. The little banner is stamped with the little paw print that is also from the Cosmo Pup set."


Papers from October Afternoon - thrift shop

This adorable layout was made by DT member Ellen.  How cute are those stitches from the Button Up set?

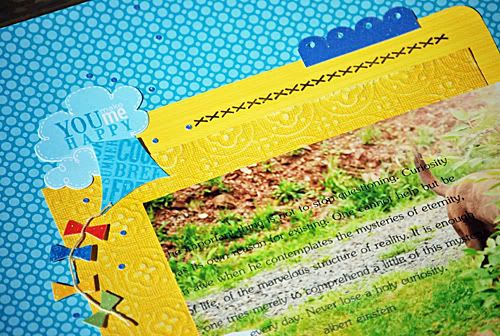
"Faux stitching is a super quick and easy way to add fun accents to any page. For the bottom of the page, I stamped the entire stamp in black ink and then wiped off some of it so the strip wasn't as long. All you need is a wet paper towel or baby wipe."

Image

Image

Supplies:
Gel-a-tins stamps
Stampin' Up! Ink
Patterned Papers: LYB
Alphas: Bella Blvd
Photo Action: Coffee Shop Blog

Monday, August 8, 2011

Buttons and Stitches


If you've been visiting the blog you've seen the projects the design team has made with our Button Up set.  This set combines adorable button and stitch stamps that will add that perfect finishing touch to all of your projects.  The two projects we have to share today show just how cute this set is.
First we have a project by DT member Cherie.  She made this layout and added buttons and stitches to finish it off.

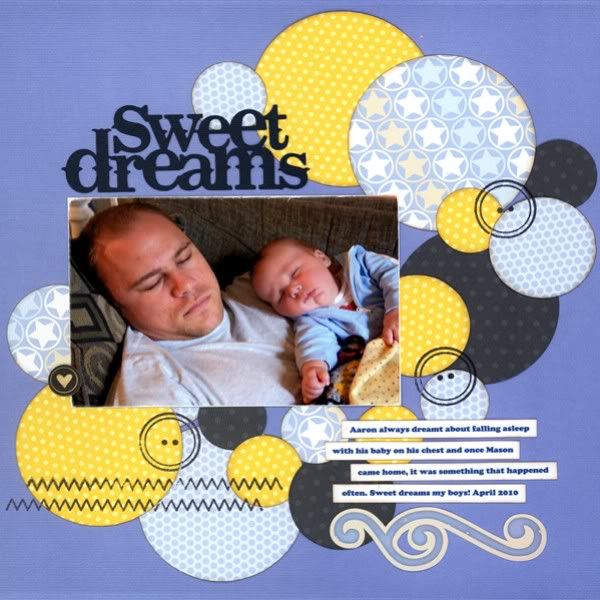
"This layout sort of happened by accident. I saw a layout with circles that inspired me so I started cutting circles. Since I didn't know what sizes I wanted to work with, I cut a whole bunch and when I was done, they were all kind of just lying in the perfect spots so I lifted each gently to glue them down."

Image

Cardstock: Bazzill Basics
Patterned Paper: Pebbles Inc.
Stamps: Gel-a-tins
Sticker: Pebbles Inc.
Chipboard: Basic Grey
Die Cut Title: Silhouette
DT member Ellen made this card that just screams happy!  I love what she did with the stitches!

"Who needs a sewing machine when you can create your own faux stitches with this cute set! It is super easy and this 5x5" card is the perfect size to create your own faux stitched border."

Image

Image


Monday, August 1, 2011

Monday Greetings!

Today we have two more cards for you from DT members Ellen and Karin.  Let's start with the card Karin made using the Cosmo Pups set!
"The set I got to work with this month is the oh sooo cute Cosmo Pups. I just love the sweet dogs and the sentiments are super!
I stamped my background and the clouds are cut with my silhouette.


That is just the cutest card!  How could anyone stay mad when they see that face?

Ellen made this card with the Button Up set.

Image


"These button stamps are perfect for creating your own backgrounds. Stamp some bright colors on a white background. They really pop off the cardstock. Add some twine and you are good to go."

Tuesday, July 26, 2011

Fun for your whole family!

Both of today's projects were made with some of our great new stamp sets.  The Thanksgiving sets are so cute and versatile, you'll find a million ways to use them before and during the holiday.  The Button Up set is just perfect for any time you need that special button you want to add to a page, or for when you want to add the look of stitches without having to get out your needle and thread!

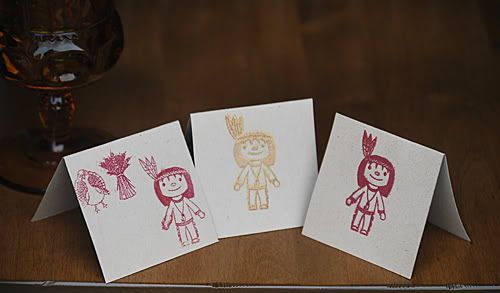
DT member Ellen made these pretty place cards with her kids! 

"When my son, Owen, saw these little Pilgrims and Indians he got so excited! Every year he makes the place settings for Thanksgiving so that is what we did with these stamps.

AND we embossed some of them! He had such a good time embossing. And his vote for favorite scent is watermelon ;) As for me, I cannot get enough of that cute little Turkey!!!
Image


Image

Supplies:
Kraft Bazzill
Ink: Stampin' Up!
Embossing Powders and stamps: Gel-a-tins
Twine: The Twinery
DT member Natalie made these fabulous cards with the Button Up set.  Cutting your stamped images out and using foam dots on the back is such a great way to draw attention to them!

Image

Thursday, July 21, 2011

Thankful Thursday!

Today we have some fabulous projects for you that were made with our Thanksgiving stamps.  Cassie is going inspire you first!
 "As soon as I saw all the adorable people in this set, I knew some napkin rings would be perfect! They will look so lovely on our table for Thanksgiving. Just think of the fun name cards you could make to match. . .hmmm, I guess I'll have to do that ;)"

NapkinRingsCT1nwm.JPG

Ink: Memento Tuxedo Black
Paper: Bazzil Pomegranate, buttercream, Imaginisce - Apple Cider
Accessories: Copics, dimensionals, Labels 11 Nestabilities

Ellen used her stamps to make this summery thank you card. 

"I love love how versatile Gel-a-tins stamps are! Just because this is a Thanksgiving themed set, doesn't mean you can't use these stamps for every day "thank you" cards. You can never have to many of these cards in your stash for quick gifts and notes and this stamp set is perfect for that!"

Image

Stamps: Gel-a-tins
Ink: Stampin' Up!
Mists: Tattered Angels
Paper: BoBunny
Misc: hemp

Saturday, July 16, 2011

It feels like Fall!

I'm sure you've noticed that our newest stamp sets that the team has been working with are Halloween and Thanksgiving themed.  It's never too early to start planning if you're hosting.  And if your kids are helping with the projects, you might like having the extra time! :)  I know I need it!
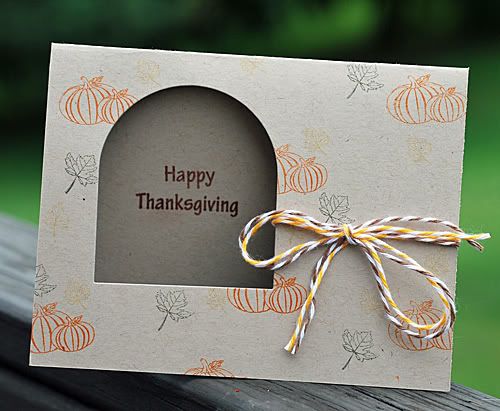
Ellen made this simple, but beautiful Thanksgiving card with one of our new sets.

"I love these mini stamp sets. They are perfect for creating your own backgrounds, especially for cards since the images are scaled down ."

Image

Supplies:
Bazzill Kraft
Ink: Stampin' Up!
Stamps: Gel-a-tins
Die: Papertrey Ink (for window)
Twine: The Twinery

Karin used the Witchy Poo set to make this adorable treat box.  I think my kids will be wanting some of these for sure!

"I used the Silhouette gable box template for this box of treats, and Spellbinders dies to create the little label. The cute cat is from the new Halloween set which I loved working with - so many possibilities!!!."


Papers from BoBunny and Arkivet

Wednesday, July 13, 2011

More Fun Cards!

When was the last time you had a Thanksgiving set that you could use any day of the year?  This new set is so cute that you could use it for your projects any time!  Ellen made our first card today with it.

I know I got a Thanksgiving set but I had these papers on my desk and the stamps were there, too. So I thought they would be cool as thank you cards.
Image

Supplies:
Stamps: Gel-a-tins
Ink: Stampin' Up!
Punch: Creative Memories
Papers: Webster's Pages
Misc: embellishments
Twine: Twinery
Mists: Tattered Angels

 Now this great card by Angela that was made with the Spin Cycle set.
you spin me right round

Monday, June 27, 2011

Meet Design Team member Ellen!


I am so excited to be part of the Gel-a-Tins Design Team. I have been scrapbooking for almost six years now. It started out as a stamping hobby and then just naturally progressed into paper crafting in general. I love to create cards, layouts, mini albums and altered projects and find myself creating almost every day. I stamp on virtually every project, I cannot get enough of it! My days and nights are spent with my two boys, Owen and Henry, and my awesome husband, Brian. We also have two dogs, Max & Chase and you will see all of these guys as subject matter in my projects. They are such an inspiration to me! By day I work in Social Media and Marketing and also teach Business Classes at a local community college. I am so lucky that I found a way to combine my love of creating with paper and a full time job. Other than that, we travel a lot, love to wine taste, watch the Phillies, and hangout out with family and friends.

Wednesday, June 22, 2011

We are Family!

Today's first project is this layout by Ellen.  She used the We Are Family set to stamp her title right on her page.  How cute is that?


I love these cards by Cassie.  She used the Butterflies Are Free set and colored the stamps in with markers to get a very different look on each card.  The white cardstock matted with black really makes those stamps pop!


Ink: Memento Tuxedo Black
Paper: CDS Cottonball White, Night Eclipse, Sweet Pea, Still Waters, Cherry Go Round, Bee Pollen
Copics: B29, B06, B02, R29, R24, R20, YR14, YR21, YR20, G17, G14, G12
Accessories: Square Nestabilities

Monday, June 20, 2011

We Will Rock You!

Today we have a fabulous layout by Ellen and an awesome card from Angela! 
First, the layout by Ellen  She used the We Are Family stamp set to add some accents to her page.  Aren't they cute?


This card by Angela really grabs your attention.  She used Spin Cycle and the colors really pop!


"I think this set is so versatile! In the card above I used a star sticker for the center and the sentiment is a rub-on from Cosmo Cricket." -Angela

Please keep the new fans coming over on our Facebook page!  We have some great stuff in store for you next month, and you won't want to miss it!

Thursday, June 16, 2011

Greetings!

Who doesn't love getting a beautiful hand made card?  The two we're sharing today would make anyone happy to open their mail box!

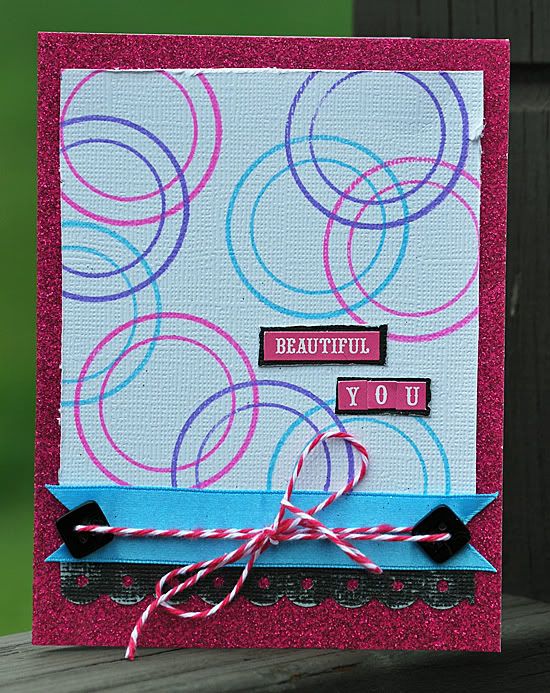
This card by Ellen would be great to congratulate a friend on a new house or to announce your new address.  She used the gel-a-tins We Are Family set to make this, and it's just one of many ways you could use such a versatile stamp set!


Design Team member Natalie made this adorable Happy Birthday card using the Admission is Free set and Crate Paper.  This card is such a cheery way to wish a friend a great day!