Showing posts with label tags. Show all posts

Wednesday, July 3, 2013

Love Knot Tags

Happy Wednesday Gel-A-Tins Fans!  Kate here today, sharing two gift tags I created using the Love Knots background stamp. These tags could easily be used to adorn a gift box, gift bag or wine bottle.  

The background on both of my tags was created by spreading some Walnut Tim Holtz Distress Paint all over a Core'dinations CoreTag.  I swiped the paint off with a baby wipe in random spots to create an uneven, but smooth effect.  On top of this painted background, I stamped the Love Knot stamp using brown Archival Ink. 


 The "Thanks For Everything" sentiment on my first tag was stamped using the Admission is Free collection.  Again, I used brown Archival Ink to stamp the sentiment.


The "To" and "From" sentiment stamps are from Groovy Santa.  Such a fun font and perfect for this tag!

Next time you need a cute tag, pull out your stamps and have some fun! ~ Kate

Gel-A-Tins Supplies:
Love Knots
Admission is Free
Groovy Santa

Other Supplies:
Core'dinations CoreTags
PaperTrey Ink Stamping Cardstock
Tim Holtz Distress Paint
Ranger Archival Ink
No-name Brand Baby Wipes

Wednesday, April 17, 2013

'for you' tag featuring Robin's Nest

We've teamed up with the Robin's Nest this month & I've got a tag to share using their diamond dew drops.

I used purple & red diamond dew drops along the bottom of my tag. The Gelatin's stamp set I used was build your own paisley floral. I chose purple and red inks and made my paisley pattern on the tag.

Tag & dew drops: Robin's Nest
ribbon: May Arts
paisley stamps: Gelatins stamp set build your own paisley floral

For other details, visit my blog Markland & Main.

Friday, January 11, 2013

Joy, Peace and Love

This week I put together a tag using mainly die cut pieces by Amy Tan. I used the mini retro flakes & sayings stamp & walnut stain distress ink.
 
Here is a close up of the stamping:


I cut a piece of the silver gelly gem off & adhered it at the bottom. You can't go wrong with a little bling!

Thanks for stopping by this week & for more details you can check out my blog: http://marklandandmain.blogspot.com/

Wednesday, January 9, 2013

Super Star Tag

Hi everyone! It's great to be with you today! Today I'm sharing a funky tag I made using the Gel-à-Tins Super Star set!

I love stars, especially funky ones like these! I decided they should steal the show and star in plenty of bright colours:

Image

Pretty fun huh?! Let me tell you what I did!

Image

I started by die cutting a tag from cream cardstock. I then stamped the stars in a variety of colours in a random fashion. Sometimes chaos is better than order!

Image

I then stamped the letters to allude to the 'Super Star' statement of this tag, allowing careful positioning so that the next 'character' was that yellow star itself!

Image

Some ribbon and twine were all that was then needed to finish off this tag!

Image


Supplies Used:

Gel-à-Tins:
Super Star

Other:
Military Stars stamp set (Papertrey Ink)
On Broadway Alphabet stamp set (A:Muse)
Pure Poppy, Berry Sorbet, Hibiscus Burst, Harvest Gold, Limeade Ice, Hawaiian Shores inks (Papertrey Ink), Versafine Onyx Black ink (Tsukineko)
Vintage Cream cardstock (Papertrey Ink)
Tag Sale #3 Die (Papertrey Ink)
True Black Swiss Dot Satin Ribbon (Papertrey Ink)
Twine (May Arts)


I'll be back soon to share another project, have a fabulous day and thanks for stopping by!!!

Wednesday, December 19, 2012

Santa Gift Tags

Have you have been naughty or nice this year is year?. If you have been naughty there is still time to get yourself on the nice list by giving a Groovy Santa gift tag with your gifts. gel-a-tins have a super 'Groovy Santa' Clear Stamp set that is perfect for creating your own gift tags, cards, decorative envelopes and cracker buttons.

Image

Products Used

gel-a-tins 'Groovy Santa' clear stamp set
Xyron 5" Creative Station
Dovecraft 'Merry Magic' Stack
Dovecraft 'Merry Magic' Ribbon
We R Memory Keepers Buttons
We R Memory Keepers Eyelets
Flatback gems and pearls
Brown card tags
Clearsnap Red Ink Pad
Staz-On Black in Pad
Black Felt Tip Pen
White Ink Pen

These tags were so quick to make. I cut the backing papers to size and inked the edges and ran through the Xyron 5" Creative Station and applied to the pre-inked tags. The Santa's were stamped on plain card with the red ink and the 'To' and 'From' with the black ink. I used a black flt tip pen to accentuate Santa's features and a white pen on the fur parts.

Image

Image

Image

To buy the amazing gel-a-tins gelly gem roll-ups visit our web page at http://gelatinstamps.com/index.php

Saturday, December 15, 2012

Vintage Tags

Are you tied up in string and have tape stuck to your hair? Take a moment from your gift wrapping and create some tags for those presents.
Think of your wrapping paper style and colors when designing your tags. I decided to go vintage with these Groovy Santa tags. I added a faux paper reinforcement by stamping the shutter from "Gingerbread house" and then punching out a hole and adding an eyelet. A little color and a touch of sparkle is perfect for this kraft tag set. I edged the tags in white pigment ink to soften the color a bit.

Image

Image


Supplies:
Gel-a-tins: Groovy Santa and Gingerbread House
Paper: Kraft
Colored Inks
Brown and white baker's twine
cream eyelets
stickles

Monday, October 29, 2012

Halloween Greetings Tag

Hi everyone! Nice to see you again!

Today I'm bringing you a superquick, supereasy Halloween tag featuring the Gel-à-Tins Halloween Greetings set!

When you have tons of candy to give out the last thing you need is a design that will take ages to put together! Hence today's simple but effective tag:

Image

How about that?! I think you could dress up your ghoulish gifts quite well with this!

Image

I started by die-cutting a tag from some cardstock then stamping the sentiment repeatedly on the tag using orange, purple and green inks.

Image

I then stamped a couple of jack-o-lanterns on orange and purple cardstock using black ink, trimmed them out and adhered with dimensional glue gel. I added a stamped 'stamp' image in black to add a bit of interest to the tag.

Image

All that was left was to add a ribbon/twine treatment and I was done!!


Supplies Used:

Gel-à-Tins:
Halloween Greetings stamp set

Other:
Trick or Treat stamp set Inkadinkado)
Canyon Clay ink, Plum Pudding ink, Simply Chartreuse ink (Papertrey Ink)
Versafine Onyx Black ink, (Tsukineko)
Fine Linen, Plum Pudding and Canyon Clay cardstock (Papertrey Ink)
Orange Zest Saddle Stitch ribbon, Smokey Shadow Satin Luxe ribbon (Papertrey Ink)
Twine (other)
Tag Sale #6 die (Papertrey Ink)
Pinflair Glue Gel (Olba)


I'd love to know what you think of this tag. Thanks for stopping by - and have a Happily Haunted Halloween!!

Sunday, September 16, 2012

Christmas Tag Trio

Hello stampers, Nina here again with another Christmas project! A simple and cute tag trio!

Image

Gelly Jr's are so beautiful when embossed! Try it yourself! I tried 3 ways to tie the ribbon, which one is your favorite?

Image

Supples:

Gelatins Gelly Jr's: Winter's Pine, Peace Birdie and Santa's Candy Cane

Thank you for stopping by. Happy Crafting!

Monday, September 10, 2012

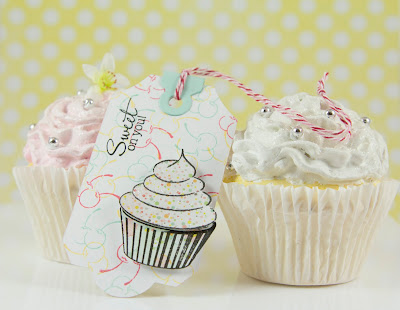
Sweet Cakes Tag

Hi everyone! Great to see you here again!

Today I'm bringing you a sweet tag featuring the Sweet Cakes set from Gel-à-Tins! It's no secret that I have a sweet spot for cupcakes and cupcake stamp sets - and this set is no exception! I just love the mix 'n' match options for the cupcake frosting and the little extra images too!

I wanted to create a quick little gift tag and this one came together pretty quickly:

Image

What do you think? Good enough to eat?!

I started by stamping the cupcake frosting and wrapper onto patterned paper and trimmed them out. I sprayed the frosting with adhesive and added some glitter before adhering the frosting to the case.

Image

I then die cut a tag from white cardstock and stamped it repeatedly with the cherries stamp to create a fun background. I added the hole reinforcer, cut from a different colour cardstock and some twine.

Image

Finally I added a sweet sentiment and adhered my cupcake and I was done!


Supplies Used:

Gel-à-Tins:
Sweet Cakes stamp set

Other:
Fruit Fusion: Cherries stamp set (Papertrey Ink)
Berry Sorbet ink, Aqua Mist ink, Harvest Gold ink (Papertrey Ink), Versafine Onyx Black ink (Tsukineko)
Stamper's Select White cardstock, Aqua Mist cardstock (Papertrey Ink)
Neapolitan Pattern Paper (Dear Lizzy)
Tag Sale #6 die (Papertrey Ink)
Pinflair Glue Gel (Olba), Scor-Tape, Stick & Stay adhesive spray
Glitter (Martha Stewart)
Twine (Divine Twine)

I'd love to know what you think of this project. Thanks for stopping by - and have a sweet day!!

Saturday, July 7, 2012

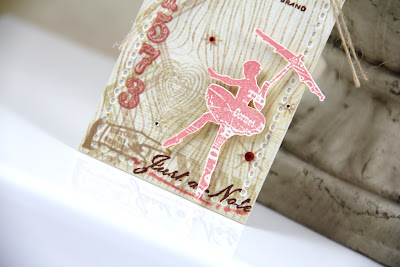
Love Knots tag by Taheerah

Hey everyone! I've missed you guys!

I'm back today with more Love Knots goodness! I just can't get enough of this baby, lol!

The last Love Knots tag I made was before I joined Gel-à-Tins and I think it was kinda vintage/rustic/masculine in style. Today's tag is more feminine in my opinion:

Image

I die-cut the tag from coaster board then stamped that gorgeous woodgrain pattern. I just love it so much!

Image

I added some little details such as the chevron stamped sideways down the tag, stamped numbers and sentiment and the 'Vintage' header. Lots of little details like that really add some character, and there's always more to see every time you look at it!

Image

My love of fussy cutting really shows with the tightrope walker that I stamped and cut out! But it was worth all that effort!!


Supplies Used:

Gel-à-Tins:
Love Knots stamp set

Other:
Postmarks, Button Boutique, Background Basics: Chevron Stripes stamp sets (Papertrey Ink)
Lost And Found Two Rosy Everything stamp set (My Mind's Eye)
Kraft, Dark Chocolate, Berry Sorbet and Pure Poppy inks (Papertrey Ink), Versafine Onyx Black ink (Tsukineko)
Dark Chocolate cardstock, coaster board (Papertrey Ink)
Tag Sale #3 die (Papertrey Ink)
Ribbon, Twine (May Arts)
Button (Papertrey Ink)
Rhinestones (stash)
Pinflair Glue Gel (Olba)

I'd love to know what you think of this tag. Thanks so much for stopping by!!

Thursday, May 31, 2012

Honey Bear baby gift set

Hey everyone! Thanks for joining me here again today!!

When I got my Honey Bear stamp set from Gel-à-Tins I just couldn't get over how cute that little bear was! All I could think was how he'd be perfect for a baby project. So that's what I set about making! It's always fun to try and find different uses for your stamps isn't it?!

I settled on the idea of a baby bib and card gift set. I've wanted to try stamping on fabric for ages and now seemed like the perfect time!

I wanted to keep the gift set gender neutral so I settled on a colour palette of browns and creams:

Image

How cute is that?! Doesn't that little bear work perfectly for a baby project?!

Image

I started by taking a used, washed bib and stamping the bear in brown ink. I found that to stamp well on fabric using quite a bit of pressure and keeping the stamp on the fabric longer than you would on cardstock helped transfer the image well and give good results. You may need to stamp the image twice as well, but that's what's great about the clear stamps from Gel-à-Tins - they make that process so easy!!

Image

After stamping my little bear I coloured him with some Copic markers. I wanted to keep the design simple so all that was needed to finish off was a cute sentiment and some hearts. So adorable!!

Image

I didn't stop there and created a cute little card to accompany the set:

Image

I used that adorable little bear again and kept the design fairly CAS, accenting only with some patterned paper and ribbon in co-ordinating colours.

Image

No gift set is complete without some cute packaging! I set about creating a little clear gift bag, embellished with glitter and adorned with a matching bear tag!

Image

Doesn't he look all cute and perfect?

Image

Here's the set all packaged up, all ready to give to a lucky recipient:

Image


Supplies Used:

Gel-à-Tins:
Honey Bear

Other:
Half Pint Heroines (Waltzingmouse Stamps)
Simply Valentine, Baby Button Bits, Fillable Frames #5 (Papertrey Ink)
Dark Chocolate ink (Papertrey Ink)
Rustic White cardstock, Clear Cardstock (Papertrey Ink)
Dies (Papertrey Ink)
Kraft Twill Ribbon, Silk Ribbon (Papertrey Ink)
Patterned Paper (Simple Stories)
Glitter (Martha Stewart)
Copic Markers
Corner Chomper

I'd love to hear what you think about this cutie little set!! Do you ever find some fun alternative uses for your sets? I'd love to hear about it!! Thanks so much for stopping by!!

Saturday, May 12, 2012

Chevron-Tastic tag by Taheerah

Hi everyone, and welcome to my first Gel-à-Tins post! I'm so excited to be sharing this little project today that I made using the favourite of my new stamp sets - Cheveron-Tastic!

Chevrons are so on trend at the moment, and this new set from Gel-à-Tins totally embraces that! I can see myself using this set over and over - expect lots of projects from me using it!! The chevrons are of different sizes and plenty of them can nuzzle right in with each other on the stamp block so you can stamp a whole pattern in no time!

For my first project I decided to make a funky gift tag:

Image

Pretty cool huh?! I just love how fun and modern it is!

I started with a die-cut tag then stamped one of the chevron patterns using a few different colour inks. I let a couple of the chevrons cross each other for visual interest. I also added a couple on the vertical to change things up a bit! I added a sentiment and a die-cut, glittered frame for a fun finish.

Image

Just check out that ribbon treatment! I picked a ribbon that would co-ordinate perfectly and tied it in a different way than normal, then added some other ribbon in a co-ordinating colour, then finally added some twine so the tag could be attached to a cute little gift bag or a fun package, like this one:

Image

And another close-up of that gorgeous tag:

Image

Can you imagine this tag stamped in a load of different colour combos?! That would make a great little gift in itself!!


Supplies Used:

Gel-à-Tins:
Cheveron-Tastic

Other:
Framed Out #2 (Papertrey Ink)
Autumn Rose, Harvest Gold, Smokey Shadow & Melon Berry inks (Papertrey Ink)
Stamper's Select White cardstock (Papertrey Ink)
Harvest Gold Satin Ribbon (Papertrey Ink)
Chevron Ribbon & Cream Twine (May Arts)
Dew Drops (craft stash)
Pinflair Glue Gel (Olba)
Scor-Tape

I'd love to know what you think of this little tag. Thanks so much for stopping by!!

Friday, April 20, 2012

Pass it on...

Image

Looking to give a little pick-me-up to someone special? These tags may be perfect. Created these tags using Gel-A-Tins Unbeleafable stamp set by simply stamping an image and die cutting a flower. Each die cut image was then backed with colorful scrap pieces of paper to make the flower cut-out pop.

Image

I then used Gel-A-Tins Spin Cycle to give more detail to the quote strip of paper. Fun to mix and match the colors, find that perfect quote and just play with the layers.

Image

Gel-A-Tins Supplies:
Unbeleafable
Spin Cycle

Additional Supplies:
Papertrey Ink - dies, ink, cardstock, buttons
Sizzix - circle die
October Afternoon - paper
Crate Paper - paper
The Girls Paperie - paper
Pebbles - brads
Epiphany Crafts - pennant punch
lace/trim
fabric
thread

Tuesday, December 6, 2011

Holiday Card by Andrea

Image

Can't celebrate the holidays without a little sparkle right? Recently found myself picking up a few new wood items at my local craft store. Came across a few bare snowflake shapes and just knew a little paint and glitter might just make them perfect for my project today. So I pulled out my Gel-A-Tin Twas the Night Before Christmas stamps and went to work...

Image

Created a border along the side of the card using "Christmas", the tree is stamped onto cardstock and lightly colored using Copic markers and the holly leaves beautifully accented the felt and pearl button. Love how each year there is no limit to the amount and variety of color to help brighten up our homes and crafting projects. Just don't forget the sparkle.

Supplies:

Gel-A-Tins Twas the Night Before Christmas
Crate Paper - paper
Bazzill Basics Paper - cardstock
Glue Arts - adhesive
Copic - markers
Prairie Bird Boutique - wrinkle ribbon
lace
wooden snowflake
paint
glitter
felt button
adhesive pearls
twine
mini clothespin
pins

Tuesday, November 15, 2011

Just Can't Wait!

Image

The story goes..."twas the night before Christmas", but I just couldn't wait. It is that time in the crafting world when we begin to make our to-do lists, bring out those holiday colors from our craft rooms and get to work.


Image

Tags are a project for any holiday, but especially Christmas. School events, holiday parties, decorating a tree and topping a gift...so many ways to put your tags to good use. Used Love Knots to create the background of the tag, Twas the Night Before candy cane for the background of the tiny label and Coffee Break circle for the background of the larger label.

Supplies:

Gel-A-Tins Twas the Night Before
Gel-A-Tins Love Knots
Gel-A-Tins Coffee Break
Glue Arts - adhesive
Bazzill Basics Paper - cardstock
My Minds Eye - paper
Papertrey Ink - label die
Quikutz - label die
Frost It Pink - bells
Kaiser Craft - adhesive pearls
embroidery thread
lace
button
twine
ribbon