Showing posts with label Witchy Poo. Show all posts

Wednesday, October 24, 2012

Halloween is Almost Here!

Image

Halloween is fast approaching. I thought I would make one more card to send to a friend. I used the Witchy Poo Collection once again. There are so many images in that set. It is fabulous.

To make this card, I stamped the witch onto yellow cardstock. I used a circle cutter to cut out a circle. It represents the moon. I cut a slightly larger circle in orange, and adhered the two circles together with foam adhesive.

Adhere the circles to the white panel. Stamp the sentiment following the curve of the outer circle. I stamped each letter individually to make sure they were spaced correctly.

Use additional pattern paper to finish off the card. I added two buttons and a small cloud for some interest and to offset the symmetrical design.

So, are you ready for Halloween? Do you have your costume yet?
Thanks for stopping by today.
-Kim F.

Supplies:
Gel-a-tins Witchy Poo Stamp Collection
Black Ink by Ranger
Cardstock by Prism
Pattern Paper by Die Cut With A View
Buttons
Twine by Martha Stewart
Letter Stamps from Michael's

Monday, October 22, 2012

A Spooky Fall Kitty

Hello, Gel-a-tins fans! Can you believe that Halloween is next week?!? So why not another festive Halloween card? Today's card using the single stamp Fall Kitty and the bat stamps from the Witchy Poo Set.

Take a look-

Image

The first step I took in making this card was to stamp the Fall Kitty image onto kraft cardstock. I colored in the image with a variety of markers. Once the ink was dried, I hand-cut the image. I adhered the patterned paper to the card and used a die-cut to cut out the circle on the front. Using the same die-cut, I also cut a circle out of matching orange cardstock and attached to the "inside" of the card. 

Image

It was time to start piecing together the card. I stamped one bat onto the orange circle. The second bat was hand-cut and adhered to the piece of twine. The kitty was glued to the front of the card off to the side of the circle cut-out. I decided to add sticker embellishments to bottom and viola, the card is finished!

Image

Thank you for stopping by Gel-a-tins today! Please share your Gel-a-tins projects on our Facebook page!

Jessi

Wednesday, October 17, 2012

Banners and Sparkle by Nina

Hello stampers! Nina here with a quick and easy halloween card using the fun banners from Witch Poo set.

Image

One of the fun things you can do with a photopolymer stamp is that you can bend a banner or sentiment to create curves:

Image

I heat embossed the banner three times in lavender, leaf and mustard colored embossing powder by American Crafts.

The pretty bling background? It was a beautiful surprise that came in my DT package! Thanks Bonnie, I really enjoyed it!

Happy Huanting! :)

Tuesday, October 16, 2012

Not so Spooky Haunted House

Hello, everyone. I am bringing you another halloween card using the fabulous haunted house image from the Witchy Poo collection.

Image

I first stamped the house onto white cardstock. I cut out some of the windows, and place a piece of ledger paper behind it. The lines in the paper add to the look of the windows. I added a moon, hand-cut cloud, and a stamped bat. The sentiment was stamped onto pattern paper and cut into banner shapes. I adhered most of the elements with foam adhesive squares. Such a must-have when making cards!

I hope you enjoyed this cute, and not so spooky, halloween card!
Thank you for stopping by.
-Kim F.

Supplies:
Witchy Poo Gel-a-tins Stamp Collection (bat, house)
Black Ink by Ranger
Pattern Paper by Die Cuts with a View, Jillibean Soup
Letter Stamps from Michael's Craft Store
Foam Adhesive Squares

Saturday, October 13, 2012

A Chevron-Tastic Haunted House card!

I am loving all the Halloween projects the talented gel-a-tins DT has been showing you! Of course, I have decided to another Halloween card using the Witchy Poo Stamp set and a touch of the Chrevrontastic Set.

Hope you like it!

Image

A close-up of the bats and house from the Witchy Poo Stamp set.

Image

To add a splash of orange to the card, I decided to use the Chrevrontastic set to help highlight the haunted house. And of course, I decided to use a few of my favorite foam dots to add dimension to the card. (The moon and the sign pop off the page.)

Thank you for stopping by today! If you have any gel-a-tins creations, please share them with us and then think about trying out for our current DT search! You could be on the next team!

Have a great day!
Jessi

Thursday, October 11, 2012

Happy Halloween card!

Hey there!  It's Jessica B. here with a fun Halloween card to share.  I don't know about you, but I like having cards for every occasion and Halloween is no exception.  It's nice to give a handmade card to a friend or neighbor along with some fresh cookies.  Here's what I did with the Witchy Poo and Happy Halloween sets...


I love that little banner and I wanted to use it on this card, but I wanted to show it in a different way.  I punched some one-inch circles from a patterned paper and folded just a bit over on the top of each one.  I attached them to some twine and then used foam tape to put the stamped banner pieces over the circles.  The bats were also attached with foam tape and the sentiment was just stamped directly on the card front. 

This was quick and easy to put together and I look forward to giving it away.  That's what cards are for, after all :)

Have a great Thursday and be sure to check out our Facebook page for more info about our current DT call.  I'd love to see some of our fans apply!

Supplies Used:
gel-a-tins Happy Halloween set
gel-a-tins Witchy Poo set
Xyron 510 with permanent refill
Foam adhesive (made with my Xyron)
Pink Paislee papers
Twine by The Twinery

Tuesday, October 9, 2012

Haunted House Card

Hello, everyone! Nina here with a fun Halloween card! I free hand cut the mountain from black cardstock.

Image

Stamps except the sentiment are from Gelatins Witch Poo set. I love the silhouettes in this set! I used a ink dabber and the negative of a punched circle to create the moon:

Image

I then inked the white card base with some blue ink for the sky.

Image

fun and easy! :)

Friday, October 5, 2012

A Spooky Ghost!

Hello, Gel-a-tins fans! Jessi, here! I am super excited for October to be here! Are you enjoying all the Halloween projects the talented design team has been sharing? I know that I am!

Today I have another project for you using the Witchy Poo stamp set.

Image

When I saw these ghost shape cards, I instantly visioned the ghost holding a banner. So I stamped the Witchy Poo banner and cut the banner out. I also stamped the spider webs and attached stickers to spell B-O-O. The final touch was adding the twine bows.

Image

Thank you for stopping by Gel-a-tins today! Please share any of your Gel-a-tins projects with us on our Facebook page.

Tuesday, October 2, 2012

Boo!

Hi dear stampers!
Today I want to show you a Halloween card.
I took scrap paper and stamped on it castle and flags.Then decorated flags with marbles and made a sign BOO.

Image

Image

PRODUCTS USED
gel-a-tins Witchy Poo set
Paper My Little Shoebox
marbles

Have a great crafting!
Tanya P.
www.diaryofcards.blogspot.com

Thursday, September 27, 2012

Over the moon!

Hello, gel-a-tins fans! Jessi here, and today I am showing you another card using the wonderful Halloween stamp set, Witchy Poo! I am loving this stamp! There are countless options with this set!

Here is the card I made using the witch and bats stamps from the set:

Image

Once I saw the flying witch, I knew that I wanted to create her with a full moon behind here. And to add some more details, I added the bats to the card. (Also, I added a foam dot to one of the bats to make it 'pop' of the card.

Image

To finish the card, I added the sentiment.

Thank you for stopping by today! Please don't forget to join our blog and Facebook page to see more Gel-a-tins creations and to showcase your projects as well!

Have a great day!

Monday, September 24, 2012

Happy Halloween!

Hi dear stampers!
Today I want to show you a set of card in the box from gelly stamps :)
I decorated the lid with paper and black paper for pastels. Did a black blob with paint.Stamped flags  and bats and cut them out.Glued all.Then decorated flags with marbles and stamped spiderweb on the background paper, thus completing the entire composition

Image

Image

Image

Than I made a card. With paper and black paper for pastels. Decorated card with black bow and sign "BOO")
Image

Image


PRODUCTS USED
gel-a-tins Witchy Poo set
gel-a-tins box from stamps set
Paper My Little Shoebox
marbles
ribbon
black acrylic paint

Have a great crafting!
Tanya P.
www.diaryofcards.blogspot.com

Friday, September 21, 2012

An Early Halloween Card!

Image

Hello, everyone. Here is another early halloween card. I used the spider web stamp from the Witchy Poo Collection.

Simply stamp the spider web twice at the top of a white piece of cardstock. Stamp the web two more times, cut out, and adhere with foam adhesive squares. This just gives some interest and dimension.

Use a thin, black marker to draw the web coming down and the sentiment. I actually penciled it in first to make sure I was happy with the way it looked. A small, circle punch is perfect to make the spider's body.

Use black patterned paper to complete the card. A simple statement that hopefully will make the recipient smile and not squirm!
-Kim F.

Supplies:
Gel-a-tins Witchy Poo Collection
Black ink by Ranger
Patterned paper by Jillibean and Little Yellow Bicycle
Black Marker
White Cardstock


Small Circle Punch by Recollections

Wednesday, September 19, 2012

Hallo Scream!

I cannot wait for Halloween! Just a little more than one month! Yippee! So meanwhile, let's get in the Halloween mood by making a card with Gel-a-tins "Witchy Poo" Stamp set! This set is so much fun to work with!

Image

I started with the background of the card. The spider web stamp was perfect for just that. To form the background, stamp the image over and over to cover the area.

Image

The next stamp was to use the banner image included in the Witchy Poo Set two times to make detail that goes across the bottom. I fussy-cut the banner out and adhered to the card.

Image

The last step is to add the sentiment onto a banner and add to the card.
This card includes lots of layers and to make them pop, I used foam dots to the layers.


Thank you for stopping by today! Hope you find some time to create! We would love to see what creations you make using Gel-a-tins!

Have a great day!

Jessi

Thursday, September 13, 2012

Celebrate Halloween

The weather here is getting a bit cooler. Autumn is approaching. Before we know it, the first of the holidays will be upon us. The stamp set called, "Witchy Poo" is perfect to celebrate spooky but fun Halloween!
Image

This stamp set includes some witch imagery, as well as bats, bones, and a banner. I decided to use part of the stamp banner and the bats to create this card.

To begin, make a card base from orange cardstock. Stamp the banner and bats in black ink on white cardstock. Cut them out. Use individual flags from the stamped banner and triangles cut from patterned paper to make this focal point embellishment. Add some ribbons, knotted ribbon, and bats for additional texture.

The sentiment can be stamped or handwritten (as I have done here.) Use a thin black marker to create some detail around the border of the card.

Don't be "afraid" to make this banner as elaborate as you wish. It definitely is too cute to spook!
Thank you for checking out the blog today.
-Kim F.

Supplies:
Gel-a-tins Witchy Poo Collection
Adirondack Black Ink by Ranger
Patterned Paper by Jillibean Soup
Cardstock
Rick Rack
Ribbon

Friday, October 14, 2011

Let's get crafty!

Another fun project to share with you today!  I made a shaker card and I can't wait to share it with you.  Hope you like it!


I used both the Witchy Poo and Happy Halloween sets on this one.  The card isn't hard to make at all as long as you've got a piece of foam adhesive.  If you don't, make your own by running craft foam through your Xyron on both sides.  Cheap and easy!


This bat is one of my favorite stamps from the Happy Halloween set.  I stamped them in black first and then went over them with Versamark ink and our Pearly White Gelly Powder.  I did the same thing with the sentiment.  The glitter and texture looks so good on the card.


For the haunted house from the Witchy Poo set I stamped again in Versamark and then embossed it using the Storm Scented Gelly Powder.  The silver color is really pretty and the scent is masculine but not too strong. 
I also embossed with the White On Gelly powder on that chipboard moon. It wasn't the right color and that was a quick and easy fix.  I added the black Martha Stewart glitter to the inside edge and the Art Glitter vintage glass glitter to the outside edges for a final detail. 
Papers are by Echo Park and Making Memories, black ink is by Staz-On and dries clear glue is by Art Glitter.

Well, that's it's for me today!  I hope you've had a great week and are looking forward to a fun and relaxing weekend.  I know I am!

Friday, July 29, 2011

Friday Halloween fun!

Today we have some more great projects to share with you!  I have been having a lot of fun on the net lately, looking at Halloween ideas.  Making treats for three classes worth of kids is something that I have to plan and start early.  Today's projects combine gel-a-tin stamps and easy to find supplies to make treats that you'll love giving away!  First, we have a little something from Karin.
"This little goodie bag I made using a template from Silhouette and cut it out in kraft cardstock. Stamped it with the bats and cob web images from the Halloween set before I glued it together."


Angela made this cute set with a Halloween treat bag and matching card.  Projects like this are perfect for giving to friends and neighbors!

Image

"I love the big pumpkin stamp and I embossed it with black powder and then inked the cardstock with a shimmery orange-red ink. The same ink stamped on a black cardstock was used for the small pumpkins. I embossed the sentiment with White On! Gelly Powder."

Image


Image

"I stamped a little acetate bag with the big pumpkin stamp using Staz-On ink, then I filled it with peanut butter cups."

Image

"I border punched the bag topper with a Kreaxions punch from Just Imagine crafts, then stamped the sentiment and spiders. Love these little spiders!"
Image

"I stamped the bats on grey cardstock and then cut them out and glued them to wire spirals for a fun little detail. What a fun treat to give on Halloween!"

Thursday, July 28, 2011

Lots of treats, but no tricks here!

We have been having so much fun with the two new Halloween sets this month.  I hope you've been enjoying all the inspiration and are ready to get a head start on your own Halloween projects!

This project is by Jessica (that's me :)  I used to teach cake decorating and I love making cupcakes for parties and gifts.  The banner that's part of the Witchy Poo set made me think of the banners you see so much on cakes lately.  I just sized it down and attached it to twine.  I also used that banner (attached to my block on a curve) to stamp around the bottom edge of the cupcake wrappers I cut out.  The spider is from the other Halloween set and the bones are from Witchy Poo.  I think a table full of these would be so fun at a party!


Supplies:
Paper by Basic Grey, ink by Staz-On, twine by The Twinery, 
bamboo skewers from kitchen store, beads from Wal-Mart

Gladys made this adorable card with the Halloween set.  How amazing does that spider stamp look with that stitched web?!


Supplies:
Paper:plum pudding cardstock, webster pages paris, Scenic Route - Metropolis Yasoda Street, Cosmo Cricket - Material girls
Ink:Vesafine Sepia, Onyx black
Stamp:Gelatins Halloween
Others: Green and black floss

Wednesday, July 27, 2011

More ways to say "Thank You!"

Happy Wednesday everyone!  We have more projects to share today so let's get to it!  Sharm has a card for us first.

"I would’ve probably shared before that I’m a vintage freak and that I can never steer away from having a couple of butterflies or flowers on my layouts or cards..and this card, just proves that I love those three elements..

This month, I was lucky to get the gel-a-tins Put a Cap on it stamp set which is D E L I G H T F U L! the stamp set also has simple sentiments that you can use on it’s own, or within the cap stamp. So here’s my project, using the single simple sentiment from that set."

Materials Used:
Cardstock: Bazzill Basics
Stamp : Gel-a-tins Put a Cap On It
Patterned Paper : My Mind’s Eye – Stella & Rose
Die: Sizzix Layered flower (for handmade flower embellie)
Flowers : Craft Supply
Grommet : Moof
Inks : Ranger Distress Inks, Staz On

Jessica made this Halloween tag to share.

"I love the Witchy Poo and Halloween sets and I combined them to make this cute tag.  I think it would be great to give away attached to some baked treats or a bottle of wine for friends."


I stamped the images from both sets on a white cardstock with Versamark ink and used the White Gelly powder to emboss them all.  I sprayed over all the stamped images with orange and silver mists and then wiped the excess off the images.  I cut out two die shapes, one from my stamped paper and one from black cardstock.  I stamped the greeting on the black cardstock just like the other images.  Add some more stamped, embossed images and twine, a little sparkle to the ends and you have a quick tag that your friends will really appreciate!

Supplies Used:
Versamark Ink
White On and Storm gelly powders
Heidi Swapp crystals
Twinery Twine


Monday, July 25, 2011

Gel-a-tins: Here to help you beat that case of the "Mondays"

I hope you're all having a great day out there!  At my house we're counting down the days until school starts (well, I am, anyway).  The kids go back on Wednesday here and I am looking forward to some uninterrupted crafty time!
 
Our first project today is by DT member Cherie made with the Button Up set.  It's an adorable card.  Be sure to leave her some love today in the comments because it's her birthday!!  Happy Birthday Cherie!
 
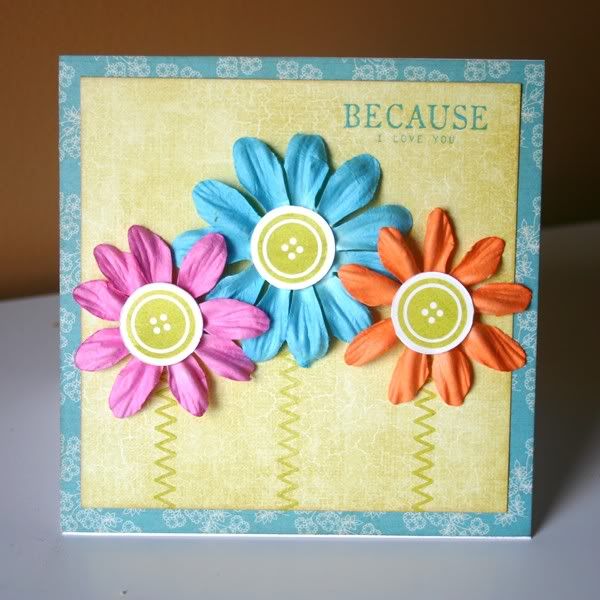
"Here's a card I made with the buttons set. I thought the buttons just screamed flower centers so as soon as I received them I started sketching up this card. The stitching stamps make great stems as well!

Zoom out

Patterned Paper: Pink Paislee & Lily Bee Design
Stamps: Gel-a-tins
Rub-On: Creative Cafe
Flowers: Prima Marketing
Ink: Colorbox
This next card is by Cassie.  How amazing does all the black and white look with those Witchy Poo Halloween stamps?  I think I need to lift this one! 
 
"This new Halloween set has so many great little stamps. A person could have a lot of fun making their own dp with them :) I stamped the banner and then embossed it and cut it out to make a border. The image panel has the spider web and other little images stamped around for the background, and then the cauldron is stamped and embossed in black to make it stand out. "

Halloween1CT3nwm.JPG

Ink: Memento Tuxedo Black, Memento London Fog, Versafine Onyx Black, SU Creamy Caramel
Paper: SU dp, CDS Cottonball White
Accessories: black embossing powder, CDS Designer Label Die, silver brads